



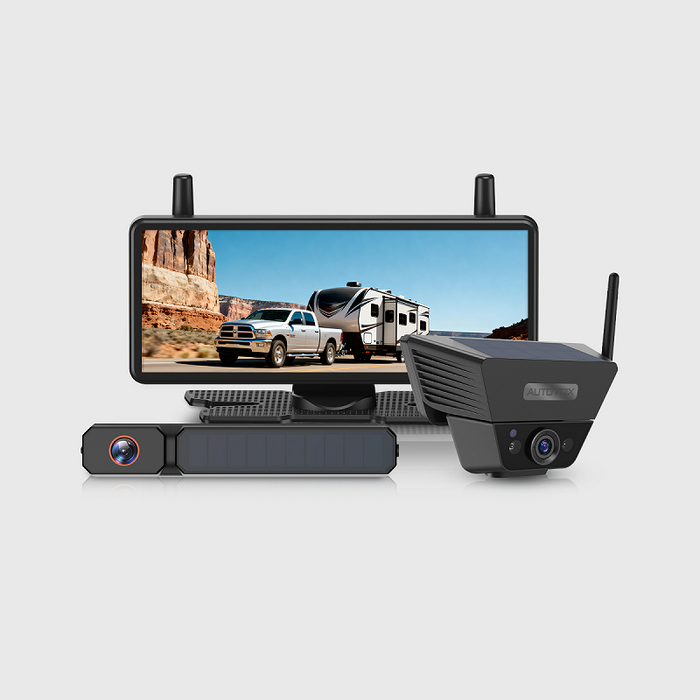


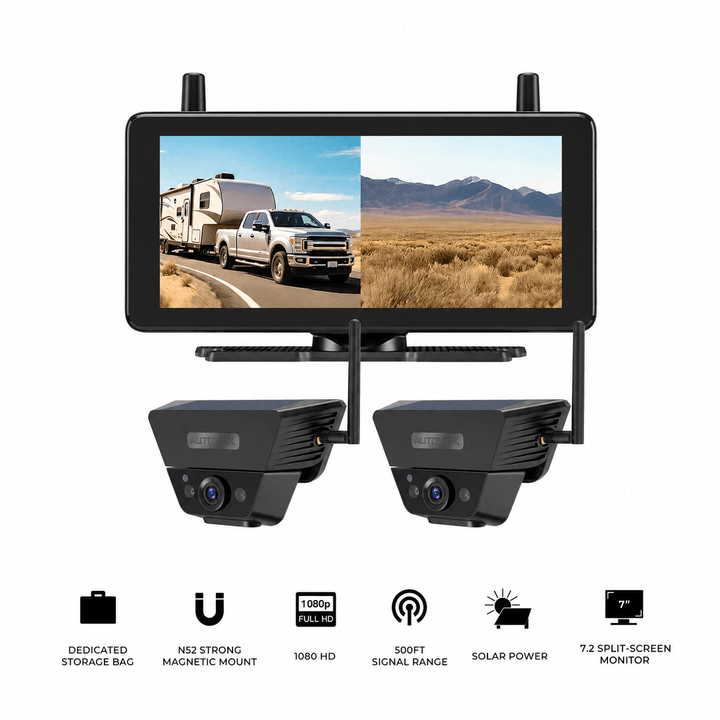


Is installation of AUTO-VOX backup cameras complicated?
australia exclusive · spring sale
Spring Getaways. Clearer Views.
Get ready for road trips and camping adventures with AUTO-VOX reversing cameras.

new launch
the next evolution:
wifi backup camera
No Dash Clutter. No Wiring. Real-Time HD Vision Right on Your Phone.


Awarded "Best Backup Camera" by Germany’s Top Tech Media.
awarded "best backup camera" in germany
Rated #1 by FAZ & Heise. Our best-selling 1080P solar wireless camera, universally fitted in just 3 minutes.

Solar5B AI
Smarter Backup,
Safer Reversing
Smart Reversing Assist automatically detects pedestrians and vehicles—so tight spots stop being a guess.

About AUTO-VOX
Trusted by 500,000+ Drivers Worldwide.
Engineering wireless & solar vehicle safety since 2007. The smarter way to see what’s behind.

Worldwide Shipping
Available in more than 20 countries.
SUPPORT 24/7
24/7 Support, anytime you need it.
100% PAYMENT SECURE
Shopify official payment, 100% secure payment guaranteed.
30-Day Return Policy
Support 30-day no-reason return and exchange.
Quick Finder

With DVR
For Cars & SUVs
For RV
For Trailers
Multi-camera
Rearview Mirror
Top Picks for Every Driver
Shop by Category
Camping & RVing
Explore freely. Park anywhere.

Towing & Trailers
Hook up. Back up with confidence.

Daily Commute
Park easy. Stay safe.

Power & Connection

Solar Series
Sun-Powered Freedom. Zero Wiring Required. Install in just 60 seconds—no drilling, no auto-shop fees. Powered by continuous solar charging and ultra-stable signal transmission, it’s the ultimate hassle-free upgrade for every vehicle.

Wireless Series
Real-Time HD Clarity. Signal That Never Flinches. Powered by AutoLink™ 2.4GHz technology, experience zero-lag 1080P live stream across long vehicles. Plug, play, and drive with unshakeable clarity.

Wired Series
Classic connection, ultimate reliability. Hardwired setup ensures real-time, interference-free video at all times. Built for families who value consistency and durability.

As Seen On
It’s bright and crystal clear so you can see details like license plate numbers.


Testsieger ist die Auto-Vox Solar 3A Plus: stabile Signalübertragung und tolle Bildqualität, bei Tag und Nacht.

Recognized across the Harvest Hosts RV community for life on the road.

T9Pro:すっごく映像が綺麗で肉眼で見ているくらい

Dank kabelloser Anbindung lässt sich die Rückfahrkamera leicht nachrüsten, ohne ein Kabel aufwendig durch den Innenraum zu verlegen.

It’s bright and crystal clear so you can see details like license plate numbers.
Testsieger ist die Auto-Vox Solar 3A Plus: stabile Signalübertragung und tolle Bildqualität, bei Tag und Nacht.
Dank kabelloser Anbindung lässt sich die Rückfahrkamera leicht nachrüsten, ohne ein Kabel aufwendig durch den Innenraum zu verlegen.
T9Pro:すっごく映像が綺麗で肉眼で見ているくらい
Recognized across the Harvest Hosts RV community for life on the road.


19 Years of Engineering Safety into Every Journey.
Since 2007, AUTO-VOX has pioneered wireless vehicle technology. Trusted by over 10,000,000 users across 20+ countries, we don’t just build cameras—we eliminate driving anxiety so you can focus on the road ahead.
Hear From Creators
Youtuber

Youtuber
Youtuber
Youtuber
Youtuber
What Our CustomerS Say
Steven Tucker
⭐️⭐️⭐️⭐️⭐️

“This camera was recommended to me by a friend who has these on his camper. I got the twin pack with 7” Monitor. The clarity and camera range is impressive , especially infra red night mode , allowing some interesting viewing from inside the vehicle at night time. The product quality is fantastic , built to last , definitely “ex squaddie proof” too. ”
Jerry
⭐️⭐️⭐️⭐️⭐️

“I don't usually write reviews, but I must in this case! ! had some trouble at first. These folks walked me through and even sent replacement equipment. Awesome!! Very good quality...clear, easy to instaall.. ”
Adan
⭐️⭐️⭐️⭐️⭐️

“I use it on the back of my pickup, and it makes lining up the tow ball with the caravan hitch much easier. The picture on my phone is clear, and I can usually get everything lined up first time without jumping in and out of the cab. A really handy bit of kit.”
John
⭐️⭐️⭐️⭐️⭐️

“I recently purchased the back-up camera for our new RV. It was easy to install in the location identified by the rv manufacturer. It comes with a nice gasket to seal the location from water. I also used some clear caulk as additional protection. The camera works well and customer support was very fast for a technical question that I had. style of mounting.”
sgallery
⭐️⭐️⭐️⭐️⭐️

“I purchased a back up camera from my Rv last year September 2023 and was so impressed I opted to purchase another one to use as a trail camera on the front of my jeep while offroading for this year while we are in Arizona, important to see what you are about to go over before you actually climb onto it.”
Sandra
⭐️⭐️⭐️⭐️⭐️

“This is perfect for an older car that doesn't have a camera. Great for long vehicles like RVs or trucks. My sister says she's gonna borrow it to try on her school bus. It's easy to install and set up. Has a clear picture. It has a heavy duty case for storage when not in use. It makes a great kitty cam too.”
Product not found
BlogS

By AaliyahGloria
Guides
Jul 30, 2026
A trailer that feels manageable at twenty feet can become a different visibility problem at thirty, thirty-five, or forty feet.
The change is not always obvious while driving straight on an open highway. It becomes clearer during the moments when the tow vehicle and trailer need to move through different paths.
A lane change requires the driver to judge whether a vehicle has fully cleared the trailer’s side. A campground loop may bring the inside trailer wheels toward a curb while the outside rear corner swings toward a tree. A fuel-station exit may look wide enough from the tow vehicle, but the trailer still has to track through the turn and clear the pump island.
Then there is backing.
One rear camera may show the road behind the trailer or the space near the bumper, depending on its angle. It may not show both equally well. It may also leave the left and right side areas outside the frame when the trailer is entering an angled campsite.
That does not make a rear camera unhelpful. It means the visibility problem has grown with the trailer.
A multi-camera trailer backup camera system can provide selected rear, lower-rear, left-side, and right-side views. These additional perspectives may help reduce blind spot uncertainty, but they cannot completely remove blind spots, guarantee accident prevention, or replace towing mirrors, direct observation, a walk-around, and a visible spotter.
This guide explains when one rear camera may feel limited, what different camera angles contribute, where multi-camera coverage matters most, and how to check whether a system fits the actual trailer before installation.
Quick Navigation
- Quick Long-Trailer Answer
- How Trailer Length Changes Visibility
- Map the Difficult-to-See Areas
- Understand One Rear Camera's Limits
- What Multiple Camera Views Add
- Where Multi-Camera Coverage Matters
- Use Rear and Side Views During Turns
- Build a Backing Routine
- Check Installation Compatibility
- Use CampSync D1
- Consider CampSync D1 Lite
- Compare WF4
- Consider a Portable Dual-Camera Kit
- Use the Long-Trailer Checklist
- Frequently Asked Questions
Important: Camera systems can provide selected additional views, but they cannot show the complete environment around a long trailer. Continue using properly adjusted towing mirrors, direct observation, a walk-around, a visible spotter, safe lane-change habits, and driver judgment. Confirm installation, power, and vehicle compatibility before use.
Quick Answer: When Is One Rear Camera Not Enough?
One rear camera may be enough when the main need is a straightforward view behind the trailer.
A longer trailer may benefit from additional camera views when the driver must monitor several different areas during the same trip, including the road behind, the bumper or hitch area, and the left and right sides.
Consider a multi-camera setup when:
- the trailer is long enough that the side areas are difficult to judge
- the rear overhang moves close to obstacles during turns
- the trailer is frequently used in multi-lane traffic
- the driver regularly backs into angled campsites
- fuel-station turns and campground loops require repeated corrections
- a bike rack, spare tyre, ladder, or cargo carrier affects the rear view
- one rear angle cannot provide useful road and close-bumper views at the same time
| Driving Situation | What One Rear Camera May Show | What May Remain Difficult to Judge |
|---|---|---|
| Straight backing | Rear path and stopping distance | Left and right rear corners |
| Highway driving | Traffic behind the trailer | Vehicles beside the trailer |
| Angled campsite backing | Part of the reversing route | Inside rear corner and outside swing |
| Tight turn | Part of the rear environment | Trailer wheel tracking and side clearance |
| Hitch or bumper check | Close lower-rear area | Farther traffic behind the trailer |
| Lane change | Following vehicles | Whether a vehicle has cleared the trailer side |
| Fuel-station exit | Rear area near the trailer | Side cameras, wheel path, and rear-corner swing |
The useful question is not how many cameras the trailer can carry. It is which areas remain difficult to judge and whether another view would provide relevant information before the driver moves.
Step 1: Understand How Trailer Length Changes Visibility
A longer trailer adds distance, body area, turning movement, and installation challenges.
The Rear Camera Is Farther From the Driver
As the trailer gets longer, the distance between the rear camera and the display increases.
The signal may also need to travel through or around:
- metal body structures
- appliances
- storage compartments
- water tanks
- cargo
- bicycles and racks
- electrical equipment
- other wireless devices
Wireless video does not depend on cellular service, but the camera-to-monitor connection can still be affected by distance, obstructions, antenna placement, interference, and power stability.
Test the system on the actual tow vehicle and trailer rather than relying only on a maximum-range number.
More Trailer Length Creates More Side Area
The driver may need to understand several zones:
- the area behind the tow vehicle
- the front half of the trailer side
- the rear half of the trailer side
- the passenger-side rear area
- the driver-side lane-change area
- the rear corner
- the bumper, hitch, or accessory area
A single rear lens is not naturally positioned to answer every question about those areas.
Trailer Wheels Follow an Inside Path
During a turn, the trailer wheels track inside the path of the tow vehicle.
The tow vehicle may clear a curb, sign, pump island, or campground post while the trailer moves closer to it. At the same time, the outside rear corner can swing toward another obstacle.
This creates two different problems in one maneuver: inside wheel tracking and outside rear swing.
Rear Accessories Change the View
Recheck visibility after installing:
- a spare tyre
- a bike rack
- a cargo carrier
- a ladder
- a storage box
- boat or equipment mounts
An accessory may block part of the image, change the final stopping point, or become the first part of the trailer to approach an obstacle.
Step 2: Map the Difficult-to-See Areas Before Choosing a System
Start with the trailer, mirrors, and real driving position—not the product list.
A simple visibility test can show where an additional camera angle would be useful.
Use a Safe Open Area
- Connect the tow vehicle and trailer correctly.
- Adjust the towing mirrors.
- Park in a legal, open, low-traffic area.
- Ask a helper to place lightweight cones around the trailer.
- Mark where cones disappear from the mirrors.
- Repeat the test on both sides and both rear corners.
- Compare those areas with the existing rear-camera view.
- Repeat after travel equipment is loaded.
Keep the helper away from the vehicle path and use cones rather than real obstacles.
Identify Four Core Viewing Questions
| Viewing Area | Question the Driver Needs Answered |
|---|---|
| Far rear | Is traffic approaching or following closely behind the trailer? |
| Close rear | How much space remains near the bumper, hitch, or parking boundary? |
| Left side | Has a vehicle cleared the trailer, and what is the driver-side clearance? |
| Right side | Is there a vehicle, curb, post, or obstacle in the passenger-side area? |
Every added camera should answer a specific question.
Installing several lenses that show nearly the same area can add screen complexity without adding useful information.
Driver's tip: Do not start with “How many cameras can I add?” Start with “Which decision is still uncertain with my mirrors and current rear view?”
Step 3: Know What One Rear Camera Can and Cannot Show
A well-positioned rear camera remains useful for many towing situations.
One Rear Camera May Help With
- straight-line backing
- rear stopping distance
- checking the bumper or hitch area
- monitoring traffic behind the trailer
- checking the area before leaving a campsite
- watching a bike rack or cargo carrier
One Rear Angle May Not Handle Every Rear Task
A lens aimed lower may provide a useful close view of the bumper, hitch, or parking boundary. That same angle may provide less information about traffic farther behind.
A lens aimed farther down the road may be useful while driving. It may provide less detail in the area immediately below the rear of the trailer.
One Rear Camera May Not Show the Side Areas
The left and right lane-change zones, trailer-wheel path, and rear-corner movement may remain outside the frame.
That becomes especially important during:
- multi-lane highway travel
- merging
- narrow campground turns
- angled backing
- fuel-station exits
- roadside parking
Wide-Angle Views Have Trade-Offs
A wider lens can show more of the surrounding area, but it can also change how distance appears on the screen.
Practise with the camera before the trip. Use cones to learn what five, ten, or twenty feet look like in the selected view.

A Rear Camera Still Cannot Evaluate the Complete Environment
It may not show:
- overhead branches
- soft ground
- the trailer wheels
- an obstacle beside the front half of the trailer
- a person outside the camera frame
- the opposite rear corner during an angled maneuver
Continue using towing mirrors and direct checks.
Step 4: What a Multi-Camera System Actually Adds
The main value of a multi-camera system is not simply a larger specification list.
It is the ability to assign different viewing jobs to different lenses and select the relevant views for the current maneuver.
| Camera Perspective | Primary Use |
|---|---|
| Main rear view | Road behind the trailer, following traffic, and normal rear monitoring |
| Lower rear view | Bumper, hitch, parking boundary, and close obstacles |
| Left-side view | Driver-side lane area, side clearance, and turn monitoring |
| Right-side view | Passenger-side area, curbs, posts, and blind-side backing context |
Split-Screen Viewing Supports Comparison
Split-screen viewing may let the driver compare selected areas without repeatedly changing camera channels.
For example:
- far rear plus lower rear while towing
- rear plus right side during an angled campsite approach
- rear plus left side during a lane-change check
- rear and both sides during a slow campground maneuver
Showing more images also makes each individual image smaller. The driver should not assume that every available channel needs to remain on screen at all times.
Choose the Relevant Views for the Task
Before the trailer moves, decide which two or three views answer the current questions.
During highway travel, a farther rear view and the relevant side view may matter most. During final campsite backing, the lower rear and rear-corner context may be more useful.
Camera views should reduce uncertainty, not create a new reason for the driver to spend too much time looking away from the road.
Step 5: Where Multi-Camera Coverage Matters Most
Lane Changes With a Long Trailer
Before changing lanes, the driver needs to understand:
- whether the target lane is occupied
- whether a nearby vehicle has fully cleared the trailer
- whether traffic is approaching quickly from behind
- whether the trailer remains stable in its current lane
A side camera can add information about the area beside the trailer. It does not replace the towing mirror, turn signal, direct observation, or the need to wait for a clear gap.
Do not complete a lane change by watching the screen alone.
Campground Loops
Campground roads may be narrow and lined with:
- trees
- utility posts
- parked tow vehicles
- picnic tables
- children and pets
- signs
- neighbouring slide-outs
The driver may need to monitor inside trailer-wheel tracking and outside rear-corner swing at the same time.
Backing Into an Angled Site
An angled site can place the passenger-side rear corner outside the driver’s mirror view.
Different views may help with:
- the main reversing path
- rear stopping distance
- the driver-side site boundary
- the passenger-side rear corner
- the hitch or bumper area
- the location of the spotter
The spotter should remain visible. If the driver loses sight of the spotter, the trailer stops.
Tight Fuel Stations
Before entering, check:
- canopy height
- pump-lane width
- tow-vehicle turning space
- trailer-wheel path
- rear swing
- the exit route
- traffic behind and beside the trailer
A station with a slightly higher price may be a better choice when it offers a wide approach and forward exit.
Merging Onto a Highway
A side camera can supplement the mirror view, particularly when traffic approaches beside the rear half of the trailer.
Accelerate appropriately, signal early, maintain lane position, and wait for a clear opening. The screen remains an additional reference rather than the sole basis for the merge.
Step 6: Use Rear and Side Views During Turns
Before the Turn
- reduce speed
- confirm the road width
- check pedestrians and traffic
- identify the exit lane
- allow room for trailer-wheel tracking
- check where the rear corner may swing
During the Turn
Use the towing mirrors to monitor the trailer body and wheel path. Use the relevant side view as an additional check. Use the rear view to understand rear-corner movement and traffic behind.
Avoid switching repeatedly between every available camera channel. Select the views that matter before entering the turn.
After the Tow Vehicle Clears
Do not assume the complete trailer has cleared the obstacle because the tow vehicle has passed it.
Continue monitoring until the trailer wheels and rear corner have completed the turn.
If the available clearance is uncertain, stop in a safe position and inspect directly.
Step 7: Build a Repeatable Backing Routine
Split-screen viewing works best when it supports a clear backing plan.
- Stop before entering the campsite.
- Walk the site when it is safe.
- Identify the left and right rear-corner hazards.
- Check overhead clearance and ground condition.
- Decide where the trailer wheels and rear bumper should finish.
- Choose one primary spotter.
- Select the most relevant camera views.
- Move slowly enough to stop immediately.
- Stop when the spotter disappears.
- Stop when a camera image freezes or disconnects.
- Pull forward and reset when the angle becomes poor.

Give Every View a Job
| View | Backing Job |
|---|---|
| Far rear | Monitor the wider road or campsite area behind the trailer |
| Lower rear | Judge the bumper, hitch, or final stopping boundary |
| Left side | Check the driver-side site boundary and trailer clearance |
| Right side | Monitor the passenger-side rear corner and nearby obstacles |
Driver's tip: Split-screen viewing supports the backing plan. It does not replace walking the site or keeping the spotter visible.
Step 8: Check Trailer Compatibility Before Installation
A camera system should be selected only after confirming how it will mount and receive power on the actual trailer.
Check for a Pre-Wired Rear-Camera Mount
Confirm:
- whether the trailer has an existing pre-wired camera bracket
- whether the bracket style matches the selected system
- which vehicle circuit supplies power
- whether the power is controlled by the running lights or reverse lights
- whether an adapter is required
- whether the voltage remains stable
Do not assume a visible bracket is powered. Test the outlet according to the trailer manufacturer’s instructions.
Check the Side-Marker Positions
For marker-light side cameras, confirm:
- the marker-light size and position
- the available 12V power
- left and right mounting height
- whether a slide-out, door, awning, or trim piece blocks the angle
- whether the marker-light function remains correct
- whether drilling or wiring changes are required
Installation requirements may differ between travel trailers, fifth wheels, motorhomes, and tow vehicles.
Check Monitor Placement
The display should:
- remain visible without blocking the road
- allow the driver to glance rather than stare
- keep power cables away from controls
- remain stable on rough roads
- show the selected split-screen layout clearly from the driving position
Test the Signal on the Complete Rig
Test with:
- the trailer connected to the tow vehicle
- the camera in its final position
- the monitor in the normal driving position
- the engine running
- running lights and relevant circuits switched on
- normal cabin electronics operating
- single, dual, and multi-view layouts
- realistic daylight and low-light conditions
- several minutes of continuous operation
If the image freezes or disappears, stop the vehicle. A clear frozen frame is not a live view.
Check PWM and Power Compatibility
Some tow vehicles and RV circuits may use pulse-width-modulated power that does not provide a stable supply for every camera setup.
Check the tow vehicle, trailer circuit, and product instructions before ordering or installation. A voltage reading or connector shape alone may not confirm stable compatibility.
Step 9: Use CampSync D1 for Rear and Side Perspectives
For a longer trailer that needs both near-and-far rear information plus left and right side views, the CampSync D1 multi-camera RV system uses three cameras with four lenses.
The setup includes:
- one dual-lens rear camera
- one left-side camera
- one right-side camera
- a 7.2-inch display with multi-view layouts
Assign the Four Lenses Specific Roles
| CampSync D1 Perspective | Practical Use |
|---|---|
| Farther rear lens | Road behind the trailer and approaching traffic |
| Lower rear lens | Bumper, hitch, cargo carrier, and close rear area |
| Left-side camera | Driver-side lane area and turning clearance |
| Right-side camera | Passenger-side lane area, curb, and campsite obstacles |
Where This Configuration May Be Useful
- long travel trailers
- fifth wheels
- larger motorhomes
- regular multi-lane driving
- angled campsite backing
- narrow campground loops
- fuel-station turns
- drivers who need separate close and farther rear views
The additional views can help reduce blind spot uncertainty. They cannot completely eliminate blind spots or show every overhead, ground-level, and out-of-frame hazard.

Power, Signal, and Recording Limits
Wireless refers to video-signal transmission. The cameras and monitor still require appropriate DC power.
Actual signal performance depends on trailer length, vehicle construction, antenna position, power stability, interference, and installation.
CampSync D1 supports DVR loop recording with compatible local storage. An SD card is sold separately. Footage may help review available context but does not guarantee accident prevention, legal acceptance, fault determination, or an insurance outcome.
Step 10: When CampSync D1 Lite May Be Enough
Not every longer trailer needs side cameras.
The CampSync D1 Lite dual-lens rear camera may suit a driver whose main issue is choosing between a farther rear view and a closer bumper or hitch view.
It uses one rear camera body with two lenses:
- an upper or farther rear perspective
- a lower or closer rear perspective
D1 Lite May Fit When
- the towing mirrors already provide useful side coverage
- the driver mainly needs two different rear angles
- side-marker camera installation is not suitable
- the trailer is used mostly for straight backing and towing
- the bumper, hitch, bike rack, or cargo area needs a close view
A dual-lens rear unit does not add the dedicated left and right side views included with CampSync D1.
Wireless video still requires camera and monitor power. Actual signal performance should be tested on the complete rig.
When DVR recording is used, an SD card is sold separately. Recording may support review but does not guarantee a legal or insurance result.
Step 11: When WF4 May Be a Better Fit
The multi-camera WF4 3-channel RV camera system uses one rear camera and two side cameras.
It may suit a trailer where one rear angle is sufficient and the main upgrade need is left and right side context.
| System | Rear Structure | Side Structure |
|---|---|---|
| CampSync D1 | One dual-lens rear camera with farther and closer perspectives | Left and right side cameras |
| WF4 Multi-Camera | One rear camera | Left and right side cameras |
WF4 May Fit When
- one rear perspective answers the primary rear-view need
- left and right side views are the main missing information
- the trailer supports the required rear and marker-light installation
- the driver wants single, dual, or triple view options
Confirm rear pre-wire, side-marker positions, DC 12V power, monitor placement, and PWM compatibility where relevant.
Wireless refers to video transmission rather than power-free operation.
Where DVR loop recording is used, an SD card is sold separately. Footage may help review available context but does not guarantee a claim, legal, or responsibility outcome.
Step 12: When a Portable Dual-Camera Kit Makes More Sense
A permanently installed rear-and-side system is not the right direction for every trailer.
The Solar5B dual-camera kit may be more practical for:
- a rented or borrowed trailer
- seasonal towing
- a temporary setup
- drivers who move cameras between vehicles
- a trailer without suitable side-marker camera positions
- one main rear view and one movable second angle
Use the Second Camera for a Different Area
Possible positions include:
- the passenger-side rear corner
- the hitch
- the campsite boundary
- a temporary lower-rear angle
- a cargo or bike-rack view
A portable magnetic second camera does not automatically provide the same role as a permanently mounted side-marker camera during long-distance driving.
Check Mounting and Charging
Confirm that the mounting surface is suitable, clean, and positioned away from direct branch contact. Recheck the camera after rough-road travel.
Solar charging provides supplemental charging only. Monitor the battery and recharge manually when required.
Check the current product package and recording requirements before travel. Camera footage cannot guarantee that every event will be captured or determine a legal or insurance outcome.
Long-Trailer Visibility and Towing Checklist
| Category | What to Check |
|---|---|
| Tow vehicle | Mirrors, brakes, lights, hitch, controller, and power compatibility |
| Trailer | Tyres, cold pressure, load, lug nuts, doors, and exterior equipment |
| Dimensions | Height, width, trailer length, and combined vehicle length |
| Rear camera | Lens, angle, mount, power, signal, and blocked views |
| Side cameras | Marker-light positions, power, left/right angles, and obstructions |
| Monitor | Placement, power, stability, and split-screen readability |
| Signal | Engine running, electronics on, complete trailer length, and continuous test |
| Cargo | Bike rack, spare tyre, ladder, or carrier affecting the view |
| DVR | Compatible storage, correct time, recording status, and file protection |
| Practice | Lane changes, wide turns, angled backing, and pull-forward resets |
| Spotter | Simple signals, visible position, and immediate stop rule |
| Route | RV-suitable roads, fuel access, weather, and daylight arrival |
| Campsite | Entrance, loop width, site angle, side obstacles, and exit path |
Which AUTO-VOX Setup Fits a Longer Trailer?
| Product | More Suitable For | Main Viewing Structure |
|---|---|---|
| CampSync D1 | Longer rigs needing close/far rear and left/right side views | Dual-lens rear + left side + right side |
| CampSync D1 Lite | Drivers mainly needing two different rear perspectives | Farther rear + closer rear |
| WF4 Multi-Camera | Drivers needing one rear and two side views | Rear + left side + right side |
| Solar5B Dual-Camera Kit | Temporary or movable dual-view needs | Main rear + movable second view |
Camera Options for Longer Trailers
Prices, configurations, and availability may change. Confirm the current product page, trailer compatibility, power circuit, mounting method, and selected package before purchase.
Common Long-Trailer Camera Mistakes
Adding More Cameras Without Mapping the Difficult Areas
Additional lenses are useful only when they answer different driving questions.
Pointing Both Rear Lenses at the Same Area
A dual-lens setup is more useful when one view covers farther rear traffic and the other covers the bumper or hitch area.
Using Side Cameras as Mirror Replacements
Side cameras add selected visual context. Continue using properly adjusted towing mirrors and direct observation.
Watching Every Split-Screen View at Once
Select the views relevant to the current task. Do not let multiple images distract from the road.
Ignoring Trailer-Wheel Tracking
A side view may not show the exact wheel position. Practise turns and continue using the mirrors.
Choosing a Camera Before Checking the Pre-Wire
Confirm the bracket, connector, power circuit, and required adapter before purchase.
Assuming Every Marker Light Can Power a Side Camera
Check DC voltage, circuit control, PWM compatibility, and the product instructions.
Testing the System Only While Parked
Test the complete rig with the engine and normal electronics operating.
Continuing When the Image Freezes
A frozen frame is not a live view. Stop the vehicle and inspect the area directly.
Assuming Wireless Means No Power or Wiring
Wireless refers to video-signal transmission. The cameras and monitor still need power.
Assuming Recording Guarantees Evidence
Footage may provide context but cannot guarantee accident prevention, legal acceptance, fault determination, or an insurance result.
Claiming Multi-Camera Coverage Removes Every Blind Spot
A more accurate description is that selected camera angles may help reduce blind spot uncertainty.
Frequently Asked Questions
Is one rear camera enough for a travel trailer?
It may be enough when the main need is a straightforward rear view. A longer trailer may benefit from additional rear or side views when several areas remain difficult to judge.
When should I add side cameras to a trailer?
Consider side cameras when towing mirrors do not provide enough information around the rear half of the trailer during lane changes, turns, or angled backing.
Why are long trailers harder to see around?
They create more side area, greater camera-to-monitor distance, wider turning movements, and additional rear-corner and wheel-tracking considerations.
What areas can a rear camera miss?
A rear camera may miss the left and right side areas, trailer wheels, overhead hazards, opposite rear corner, and objects outside its field of view.
What is the difference between a far rear and close rear view?
A farther rear view is aimed toward the road and following traffic. A close rear view is aimed nearer the bumper, hitch, cargo carrier, or parking boundary.
Where should side cameras be mounted on a trailer?
The position depends on the trailer and camera design. Marker-light camera systems commonly use left and right side-marker areas, but power, angle, clearance, and installation compatibility must be confirmed.
Do side cameras replace towing mirrors?
No. They add selected side views but do not replace properly adjusted towing mirrors or direct observation.
Can a split-screen monitor show all cameras at once?
It depends on the system. CampSync D1 can show three camera channels while its rear channel contains two lens perspectives. WF4 supports single, dual, or triple views.
Should I watch all camera views while driving?
No. Select the relevant views and use brief glances. The road, mirrors, and surrounding traffic remain the primary focus.
What is a dual-lens rear camera?
It is one rear camera body containing two lenses aimed at different areas, such as farther traffic and the close bumper or hitch zone.
What is the difference between CampSync D1 and CampSync D1 Lite?
CampSync D1 Lite uses one dual-lens rear camera. CampSync D1 adds left and right side cameras to that dual-lens rear setup.
What is the difference between CampSync D1 and WF4?
CampSync D1 has a dual-lens rear camera plus two side cameras. WF4 uses one rear camera plus two side cameras.
Does CampSync D1 fit a pre-wired trailer?
It supports compatible pre-wired installations, but the bracket, connector, power circuit, and trailer-specific fit should be confirmed before purchase.
Do wireless trailer cameras still need power?
Yes. Wireless describes video transmission. The camera and monitor still require the correct DC power or supported battery source.
Can marker lights power side cameras?
They may provide power in a compatible installation, but the voltage, circuit, connector, PWM behavior, and marker-light function must be checked.
Why does a wireless image freeze on a long trailer?
Possible causes include distance, metal obstructions, antenna placement, interference, unstable power, or installation issues. Stop the vehicle whenever the image is not clearly live.
Do I need an SD card for DVR recording?
Compatible local storage is required where DVR recording is used. For CampSync D1, CampSync D1 Lite, and WF4, an SD card is sold separately.
Can a camera system completely remove trailer blind spots?
No. Cameras provide selected views and may help reduce blind spot uncertainty, but some areas remain outside the lenses.
How should I test a camera system before a long trip?
Test on the complete connected rig with the engine, running lights, and normal electronics operating. Check every view, power source, mounting position, and signal over several minutes.
Which views help when backing into an angled campsite?
A lower rear view can help with stopping distance, while left and right side views can provide additional rear-corner and site-boundary context. A spotter and direct site inspection remain important.
Final Thoughts: Upgrade Visibility When the Trailer Gets Bigger
A longer trailer does not automatically require the largest camera system.
It does require the driver to understand which areas remain difficult to judge and whether additional rear or side views would make those decisions less uncertain.
Begin with the existing mirrors and rear camera. Map the close rear, far rear, left-side, and right-side areas. Identify which situations create the most uncertainty: lane changes, campground loops, angled backing, fuel stations, or hitch monitoring.
Then check the trailer itself.
Confirm the pre-wired bracket, marker-light positions, DC power, PWM compatibility, monitor location, signal path, and installation requirements. Test the system on the complete rig rather than only on a workbench or driveway.
During travel, select the views that fit the current task. Keep using the towing mirrors, signal early, maintain lane position, and stop when a view becomes unclear. During backing, walk the site, keep the spotter visible, and pull forward when the angle needs to be reset.
- Identify what the current rear camera already shows.
- Map the areas that remain difficult to judge.
- Separate far rear, close rear, left side, and right side needs.
- Choose camera angles for real driving scenarios.
- Confirm trailer power and mounting compatibility.
- Test the system on the complete rig.
- Practise single and split-screen use.
- Continue using mirrors, direct checks, and a spotter.
As the rig gets longer, the visibility plan should grow with it—one useful angle at a time.

By AaliyahGloria
Guides
Aug 28, 2026
A Class A motorhome can feel surprisingly manageable once it is rolling down a wide interstate.
The difficult moments often arrive much more slowly.
A narrow campground entrance. A fuel island with concrete posts on both sides. A right turn between trees. A crowded parking lot. The final few feet while backing into a site.
From the driver's seat, the front of the coach may be easy to judge. The rear of the vehicle can be thirty feet or more behind you, with a tall body, a rear section extending behind the axle, and very little direct sightline to anything close to the bumper.
Add a small car behind the motorhome and the visual picture changes again.
This is why rear cameras have become such a useful feature on Class A motorhomes. Many newer models already include a factory rear camera, and some also offer left- and right-side camera views.
That leads to a more useful question than simply asking whether a Class A needs a backup camera:
Does the camera system already on your motorhome show the areas you actually need to see?
For one owner, the factory rear camera may be enough. Another driver may regularly tow a car, maneuver through tight campgrounds, or have limited visibility around both rear corners. In that case, additional rear or side views can make the camera system more useful.
The goal is to identify the missing view first, then choose the simplest setup that fills that gap.
Quick Navigation
- Quick Answer
- Check the Factory System First
- Why Rear Visibility Matters
- Why One Rear Camera May Be Limited
- Tail Swing and Side-Rear Views
- What Three Cameras Add
- Multi-View Options for Class A RVs
- Why Class A Owners Tow Cars
- Three Common Towing Methods
- Flat-Towing Backing Restriction
- Camera Views With a Toad
- Portable Second-Camera Option
- Should You Upgrade?
- Camera & Towing Checklist
- Frequently Asked Questions
Towing reminder: Camera views do not change the operating limits of a tow bar, tow dolly, trailer, motorhome chassis, hitch, or towed vehicle. Standard flat-tow systems commonly prohibit backing while connected. Follow the instructions for the exact motorhome, hitch, tow equipment, supplemental braking system, and towed vehicle before towing or maneuvering.
Quick Answer: Does a Class A Motorhome Need a Backup Camera?
A rear camera is highly useful on a Class A because the driver has limited direct visibility immediately behind such a large vehicle.
Many modern Class A motorhomes already include one from the factory.
The next question is whether that factory system provides enough coverage for the way you travel.
| Your Current Setup | What to Consider |
|---|---|
| Good factory rear camera + useful left/right cameras | Use and evaluate the existing system before buying additional equipment |
| Good rear camera but no useful side views | Consider whether left/right side context would help with turns and campground maneuvering |
| Rear camera view is narrow or poorly positioned | Identify which rear area is missing before choosing another camera |
| Factory system works but you tow a car | Consider whether the tow connection, toad, or another selected rear area needs a supplemental view |
| No usable rear camera | An aftermarket rear or multi-camera setup becomes more relevant |
| Flat-towed vehicle behind the coach | Use cameras for visual context while continuing to follow flat-tow operating restrictions |
More cameras are useful only when each one answers a real visibility problem.
A practical Class A setup may consist of a single good rear view, a rear-plus-side system, or an existing factory system supplemented by one portable camera.
Start With the Factory Camera System
Before installing anything, sit in the driver's seat and understand what the motorhome already has.
Camera packages vary by manufacturer, model year, floorplan and option package.
Some recent Class A motorhomes include a rear camera as standard equipment while offering side-view cameras as an option. Other coaches may already have rear, left and right views integrated into the dash display.
Check the Exact Coach, Not the Model Name Alone
Verify:
- model year
- floorplan
- factory option package
- rear camera presence
- left-side camera presence
- right-side camera presence
- turn-signal camera activation
- display size
- single, split or multi-view capability
If you are buying a used Class A, also check whether the camera system is still original.
A previous owner may have replaced the monitor, changed the camera position or added aftermarket equipment.
Test the System in the Situations That Matter
A camera that looks fine while the RV is parked on a dealer lot may feel very different during an actual campground maneuver.
Test:
- the area immediately behind the coach
- the farther rear area
- both rear corners
- side views during slow turns where available
- night or low-light image quality
- the display while wearing your normal driving glasses or sunglasses
Use the existing system long enough to identify a real limitation before deciding what to add.
What to remember: “Class A motorhome” does not describe one universal camera package. Verify the exact factory equipment before planning an aftermarket upgrade.
Why Rear Visibility Matters More on a Class A
A Class A motorhome places the driver far ahead of the rear bumper.
Large mirrors help enormously with side awareness, but they cannot create a direct line of sight through the entire coach.
The Rear of the Coach Is Far Away
The farther the driver's seat is from the back of the RV, the harder it becomes to judge close rear objects through normal direct observation.
At a campsite, that may include:
- a utility pedestal
- a picnic table
- a tree
- a short post
- another vehicle
- camping gear
- the back edge of the parking pad
A rear camera can keep a selected area behind the coach visible while the motorhome moves slowly.

The Body Is Tall
The height of a Class A creates another visibility challenge.
A driver looking through mirrors may see a large vehicle behind the RV while missing something much closer to the bumper and lower to the ground.
The actual view depends on camera height, angle, lens and installation.
The Rear Axle May Be Well Ahead of the Rear Bumper
Depending on the chassis, wheelbase and coach design, a meaningful section of the motorhome may extend behind the rear axle.
That matters when turning because the rear body follows a different path from the front of the coach.
This is one reason campground turns and fuel stops deserve as much attention as backing itself.
Why One Rear Camera May Still Leave Important Areas Hard to See
A rear camera usually does its strongest work directly behind the coach.
That leaves several other viewing questions.
| Area | Why It May Still Be Difficult to See |
|---|---|
| Main rear area | A centered rear camera generally covers this area most directly |
| Left rear corner | An object close beside the coach may sit outside the main rear-camera frame |
| Right rear corner | The passenger-side rear area can be difficult to judge from the driver's position |
| Very close rear area | A camera aimed farther behind the RV may provide less detail immediately below or near the rear body |
| Tow connection | A view optimized for farther rear traffic may not be ideal for the hitch or tow-bar area |
| Towed vehicle | A close rear view may show the connection clearly while providing less context around the full toad |
This does not mean a single rear camera is inadequate for every Class A.
It means camera placement involves a tradeoff.
A lens aimed downward provides different information from one aimed farther toward the road.
A wide rear view provides different information from dedicated left- and right-side cameras.
The right number of cameras depends on which of those views matters to your driving and towing setup.
Tail Swing Makes Side-Rear Awareness Important
A large motorhome does not rotate around its front bumper.
During a turn, the body behind the rear axle can move toward the opposite side of the turn.
This movement is commonly discussed as rear overhang or tail swing.
Think About a Right Turn
As the front of the motorhome turns to the right, the rear body behind the axle can move toward objects on the left side.
Depending on the coach geometry, that can matter around:
- fuel pumps
- bollards
- parked vehicles
- campground posts
- trees
- gate structures
- tight parking-lot entrances
The opposite pattern can occur during a left turn.
A Rear Camera and Side Camera Answer Different Questions
A centered rear view tells you what is happening behind the coach.
A side camera can add a selected view alongside the vehicle or near a rear corner.
Mirrors remain an essential part of the process.
The additional camera view gives the driver another reference while planning and completing a slow maneuver.
It does not provide complete coverage of every surrounding area.
What to remember: Class A visibility is about more than the space directly behind the bumper. Rear overhang and side-rear movement make the left and right sides worth evaluating too.
What a Three-Camera RV System Adds
A three-camera layout typically assigns one camera to the rear and one to each side.
The value comes from giving each camera a specific job.
Main Rear Camera
The rear camera can provide visual context for:
- backing
- campsite positioning
- the area behind the motorhome
- a toad or trailer where the installation supports that view
Left-Side Camera
A left-side view can supplement the mirror during:
- campground turns
- selected lane-change situations
- fuel-station approaches
- slow maneuvers near the driver-side rear area
Right-Side Camera
A passenger-side view can be especially useful because that side is farther from the driver.
It may add context for:
- right-side campground boundaries
- slow turns
- selected lane-change situations
- objects near the passenger-side rear quarter
Three cameras do not create a guaranteed 360-degree view or eliminate blind spots.
They provide three selected perspectives that can be used with mirrors, direct sight, walk-arounds and a spotter where appropriate.
Multi-View Camera Options for a Larger Class A
For a Class A owner who has identified missing rear and side views, a multi-camera system can consolidate several perspectives on one display.
CampSync D1: Two Rear Perspectives Plus Both Sides
The CampSync D1 uses three physical cameras and four lenses.
The layout consists of:
- one dual-lens rear camera
- one left-side camera
- one right-side camera
The dual-lens rear camera can provide two different rear perspectives while the side cameras add selected left- and right-side views.
For a long Class A, that arrangement can be useful when the driver wants both:
- a closer rear reference
- a farther rear reference
- left-side context
- right-side context
The exact usefulness depends on mounting position, coach geometry and how the cameras are aimed.

WF4: Rear + Left + Right
The WF4 multi-camera setup uses:
- one rear camera
- one left-side camera
- one right-side camera
Its 7.2-inch monitor supports single, dual and triple viewing modes.
This gives the driver a straightforward rear-plus-two-sides arrangement when one main rear perspective is enough.
Wireless Still Requires Power
With these RV systems, “wireless” refers to transmission of the video signal.
The cameras and display still require their supported electrical connections.
Installation on a long Class A should also account for coach length, mounting position, electrical access and expected wireless transmission conditions.
Do not assume that every camera position on every long motorhome will produce identical signal performance.
Why Class A Owners Often Tow a Smaller Vehicle
The same features that make a Class A comfortable at a campground can make it inconvenient for short local trips.
Once the motorhome is parked, the owner may have:
- leveled the coach
- extended slide-outs
- connected shore power
- connected water
- set up outdoor equipment
Breaking down the campsite for a grocery run can become a surprisingly large task.
A smaller vehicle solves that problem.
It can handle:
- grocery trips
- restaurant visits
- trailhead parking
- city driving
- attraction parking lots
- day trips away from the campground
For many travelers, the Class A handles the long-distance journey while the smaller vehicle handles local transportation after arrival.
That smaller vehicle is often called a toad or dinghy vehicle.
Three Common Ways to Bring a Car Behind a Motorhome
The camera needs can change depending on how the vehicle is transported.
1. Flat Towing / Four-Down / Dinghy Towing
With flat towing, all four wheels of the towed vehicle remain on the road.
A typical setup can involve equipment such as:
- a compatible motorhome receiver
- a tow bar with an appropriate rating
- a vehicle-specific baseplate
- safety cables
- lighting or wiring equipment
- a supplemental braking system as required by the applicable setup and rules
The towed vehicle itself must be approved for the intended flat-towing procedure.
Check its owner's manual and manufacturer guidance before choosing this method.
2. Tow Dolly
A tow dolly typically supports one end of the car while another pair of wheels remains on the road.
This creates its own questions involving:
- vehicle compatibility
- dolly capacity
- loading procedure
- tie-down procedure
- braking and lighting
- campground storage
Follow the dolly, motorhome and vehicle manufacturers' instructions for the specific combination.
3. Car Trailer
A full car trailer carries the complete vehicle off the road surface.
This adds another large piece of equipment behind the Class A.
Planning needs to include:
- trailer weight
- vehicle weight
- motorhome towing rating
- receiver and hitch ratings
- trailer brakes and lighting
- overall combination length
- parking and campground storage
Whichever towing method you choose, use the ratings and procedures for the actual motorhome, chassis, hitch, towing equipment and vehicle.

Important: A Camera Does Not Change Flat-Towing Backing Restrictions
This distinction matters because adding a clearer rear camera can create more confidence in the view behind the coach.
The tow equipment still has the same mechanical limits.
For example, Blue Ox instructs users not to back up with its tow bar connected to the towed vehicle.
Reverse movement can cause the towed vehicle to track incorrectly, bind or jackknife and can place loads on the tow bar, baseplate and vehicle structure that the system was not designed to handle.
A clearer image of the toad does not make that maneuver acceptable.
Plan the Exit Before Entering a Tight Area
When flat towing, think ahead at:
- fuel stations
- restaurants
- parking lots
- campground registration areas
- dead-end roads
- tight campsite loops
Look for a route that allows the motorhome and toad to continue forward.
If backing becomes necessary, follow the tow-bar, motorhome and towed-vehicle instructions for disconnecting and repositioning the equipment.
Flat-tow rule: Never use a camera view as justification for reversing a connected flat-tow setup when the equipment manufacturer prohibits it. The towing system's operating instructions control the maneuver.
Towing a Car Changes the Visual Picture Behind the RV
Without a toad, the rear camera can focus entirely on the area behind the motorhome.
With a toad attached, several reference areas may become important at the same time.
The Connection Area
You may want visual context around the area immediately behind the motorhome where towing equipment is located.
A camera can help you see the general relationship of the equipment from the driver's position.
The physical pre-trip inspection still needs to verify items such as:
- tow-bar attachment
- pins and retaining devices
- safety cables
- electrical connection
- supplemental braking equipment
- lighting
A camera image cannot confirm that those components are installed, rated or secured correctly.
The Towed Vehicle
A farther rear perspective can help keep the toad within the driver's visual context while traveling.
The useful field of view depends on camera height, angle and the distance between the motorhome and towed vehicle.
Both Sides of the Coach
The addition of a towed vehicle increases the overall combination length.
Left- and right-side views can add context when the driver is:
- approaching a campground turn
- moving through a fuel station
- evaluating selected lane-change situations
- passing roadside objects at low speed
The cameras supplement the mirrors and normal driving observations.
What to remember: Towing can create three different viewing needs: the connection area, the towed vehicle farther behind, and the left/right sides of the motorhome.
When a Portable Second Camera Can Be Useful
A complete multi-camera replacement is not always necessary.
Some Class A owners already have a factory rear camera that works well.
The missing view may be one temporary or highly specific area.
The Solar5B Dual-Camera Kit provides a dedicated monitor with two portable magnetic cameras.
Depending on suitable mounting surfaces and the vehicle layout, one camera can provide the main selected view while the second can be moved toward another area such as:
- a rear corner
- a hitch or tow connection area
- a selected side-rear area
- a temporary campsite positioning reference
A standard Solar5B offers the simpler one-camera version for owners who need only one portable rear perspective.
Portable and Fixed Systems Solve Different Problems
A fixed rear-plus-side system makes sense when the same views are useful on most travel days.
A portable camera can make more sense when the missing view changes with the task.
For example, an owner may use the factory rear camera for normal driving and place a portable camera near another suitable area during a campsite maneuver.
The camera remains a visual reference.
It does not verify towing-system installation, exact clearances or safe load limits.
Should You Upgrade the Factory Camera System?
The decision becomes much easier once you evaluate the existing system in real driving and parking situations.
Keep the Factory System When It Already Does the Job
An upgrade may add little value if you already have:
- a clear rear view
- useful left/right side views
- a display you can read comfortably
- camera positions that work with your towing setup
Use those features first.
Consider More Side Context When Rear Coverage Is Already Good
If the rear view is useful but the motorhome has no side-camera views, evaluate whether the difficult areas occur during:
- turns
- campground roads
- fuel-stop maneuvering
- selected lane-change situations
A rear-plus-left-plus-right system may address that pattern more directly than adding another rear-only camera.
Consider a Supplemental Camera When the Missing View Is Specific
If the factory system works most of the time and towing introduces one additional viewing need, a portable second camera may be enough.
Review Installation Limits Before Buying
Check:
- camera mounting locations
- available power
- existing side-marker configuration
- monitor location
- coach length
- wireless transmission path
- weather exposure
- compatibility with existing equipment
Also decide whether you prefer:
- one permanent multi-view monitor
- the existing factory display plus a supplemental display
- a portable system used only when needed
Class A Camera and Towing Checklist
| Check | What to Confirm |
|---|---|
| Motorhome | Exact year, manufacturer, model, floorplan, length and applicable chassis information |
| Factory rear camera | Whether it is installed, functional and positioned usefully |
| Factory side cameras | Whether left/right cameras are installed and how they activate |
| Display | Screen size and single, split or multi-view capability |
| Close rear view | Whether the area immediately behind the coach is visible enough for your needs |
| Farther rear view | Whether the system provides useful context farther behind the motorhome |
| Side areas | Which left/right areas remain difficult to observe |
| Towing method | No toad, flat tow, tow dolly or full trailer |
| Motorhome towing limits | Chassis, receiver and manufacturer ratings |
| Towed vehicle | Approved towing procedure from its manufacturer |
| Tow equipment | Correct ratings, setup and operating procedures |
| Camera location | Which physical area each camera is intended to show |
| Power | Compatible and properly installed electrical supply |
| Physical inspection | Hitch, tow equipment, safety devices and surroundings checked directly |
| Manuals | Motorhome, chassis, hitch, tow equipment and towed-vehicle instructions available |
AUTO-VOX Camera Options for Class A Motorhomes
| Product | Camera Layout | Best Fit in This Article |
|---|---|---|
| CampSync D1 | 3 cameras / 4 lenses | Closer/farther rear context plus selected left and right views |
| WF4 | 1 rear + 2 side cameras | Straightforward rear, left and right multi-view setup |
| Solar5B Dual-Camera Kit | 2 movable cameras | Flexible main view plus a selected supplemental angle |
| Solar5B | 1 portable camera | Simple portable rear-view option |
Camera Options for Class A Rear and Side Visibility
Prices, configurations and availability may change. Confirm the current product page, selected configuration, motorhome compatibility, camera mounting locations, electrical requirements and expected transmission conditions before purchase.
Common Class A Camera and Towing Mistakes
Assuming Every Class A Has the Same Factory Camera Package
Rear and side-camera equipment can vary by manufacturer, model year, floorplan and option package. Check the exact coach.
Looking Only Directly Behind the Motorhome
Evaluate the rear corners and side-rear areas too, especially when the coach has significant body length behind the rear axle.
Assuming Three Cameras Create Complete Surround Coverage
A three-camera system provides selected rear, left and right perspectives. Areas outside those fields of view still require mirrors, direct checks and normal observation.
Forgetting That a Toad Changes the Combination Length
The motorhome may feel familiar by itself, while the connected toad adds another vehicle and towing system behind it.
Using the Camera Instead of Inspecting the Tow Equipment
Physically verify the tow bar or trailer connection, pins, safety equipment, lighting and supplemental braking components according to their instructions.
Assuming Better Rear Visibility Makes Flat-Tow Backing Acceptable
Camera visibility does not change a tow-bar manufacturer's prohibition on reversing while connected.
Buying an Aftermarket System Before Testing the Factory Cameras
Identify the actual missing view first. The existing rear and side cameras may already cover the areas you need.
Frequently Asked Questions
Do Class A motorhomes come with backup cameras?
Many newer Class A motorhomes include a factory rear camera, and some also include or offer side-view cameras. Equipment varies by manufacturer, model year, floorplan and option package, so check the specification sheet and actual coach before assuming a particular camera configuration.
Is one rear camera enough for a Class A RV?
It can be enough when the rear view is clear and the mirrors provide adequate side context for the driver's normal use. Additional left and right cameras may be useful on larger coaches, in tight campground maneuvering, or when important side-rear areas remain difficult to observe.
What is the advantage of a three-camera RV system?
A typical three-camera system provides a main rear view plus selected left- and right-side views. CampSync D1 uses three physical cameras and four lenses because its rear camera contains two lenses, adding two different rear perspectives alongside the two side-camera views.
Can I back up a Class A while flat towing a car?
Standard tow-bar flat-towing setups commonly prohibit backing while the towed vehicle remains connected. Blue Ox, for example, specifically instructs users not to back up with its tow bar connected. Follow the instructions for your exact tow bar, motorhome and towed vehicle and disconnect according to those procedures when backing is required.
What is the difference between flat towing, a tow dolly, and a car trailer?
Flat towing keeps all four wheels of the towed vehicle on the road. A tow dolly supports one end of the vehicle while another pair of wheels remains on the road. A full car trailer carries the complete vehicle. Each method has its own compatibility, weight, braking, connection and operating requirements.
Can an aftermarket RV camera replace a spotter or towing inspection?
No. Cameras add selected visual information. Continue using mirrors, direct observation, walk-arounds and a spotter where appropriate. Tow-bar connections, hitch components, safety cables, lighting, supplemental braking equipment and other towing hardware still require direct inspection according to their manuals.
Final Thoughts: Start With the Views You Already Have
A Class A motorhome benefits greatly from rear visibility, but the upgrade decision should begin with the equipment already installed.
Start with four questions:
- What rear and side cameras does this exact motorhome already have?
- Which area is still difficult to see during actual travel or campsite maneuvering?
- Will the motorhome travel by itself, flat tow a car, use a tow dolly, or pull a trailer?
- Does the missing view justify a portable supplemental camera or a fixed rear-plus-side system?
If the factory rear and side cameras already give you the views you need, there may be little reason to replace them.
If the main rear view is useful but one towing or campsite angle remains difficult to see, a portable dual-camera setup can fill a specific gap.
If the coach regularly needs rear, left and right context, a multi-camera system such as CampSync D1 or WF4 may better match the way the Class A is driven.
Towing adds another layer to every decision. Camera placement should account for the motorhome, towing connection and towed vehicle, while the physical towing setup continues to follow the ratings and procedures in the relevant manuals.
Most importantly, a better camera image does not change what the tow equipment can safely do.
Before upgrading a Class A motorhome camera system, verify the factory rear and side-camera configuration and confirm how the motorhome will tow and park. Then decide whether a flexible dual-camera setup or a rear-plus-side multi-camera system fills the actual view that is missing.

By AaliyahGloria
Guides
Aug 28, 2026
An RV renovation can look perfect while the vehicle is parked.
The pillows are arranged, the plants are in place, the new wall treatment looks better in person than it did in the sample, and the slide-out trim finally feels more like something you would choose for a house.
Then travel day arrives.
The plant needs somewhere to go before the first turn. A decorative frame rattles against the wall. A rug folds into a walkway. A new piece of trim sits closer to the slide than expected. The beautiful storage basket becomes another object that has to be moved before the RV can leave.
That is when an RV renovation gets its real test.
A travel-friendly upgrade needs to work in two modes. It should make the RV more comfortable when parked, and it should remain practical when the slides come in, the cabinets are latched and the vehicle starts moving again.
That does not mean your RV has to feel plain or temporary. It means each renovation decision deserves four questions:
How much weight does it add? How will it stay secure? Does it preserve clearance? Can the systems behind it still be inspected and serviced?
The eight upgrades below use those questions to balance style, comfort and actual travel-day use.
Quick Navigation
- The Travel-Day Renovation Test
- 1. Lightweight Soft Furnishings
- 2. Give Décor a Travel Position
- 3. Use Lightweight Wall Art
- 4. Test Peel-and-Stick Materials
- 5. Keep the Headboard Inspectable
- 6. Respect Slide-Out Clearance
- 7. Create No-Decor Zones
- 8. Add Flexible Visibility
- Travel-Day Renovation Checklist
- Common Renovation Mistakes
- Frequently Asked Questions
Before modifying the RV: Preserve access to emergency exits, safety labels, electrical panels, ventilation, plumbing, wiring, slide-out mechanisms and other service points. Follow the RV and component manufacturers' instructions when a renovation affects a structural, electrical, plumbing, gas, mechanical or safety-related area.
Before You Renovate: Use the Travel-Day Test
It is easy to judge an upgrade from a campground photo.
A more useful test imagines the RV ten minutes before departure.
| Test | Question to Ask |
|---|---|
| Weight | How much weight does this add, and where is that weight located? |
| Securement | Will it stay secured during acceleration, braking, turns and normal road vibration? |
| Travel position | If it cannot stay where it is, where does it go before departure? |
| Clearance | Can slides, cabinets, doors, windows and furniture still move normally? |
| Visibility | Does the driver still have a clear view through required windows and mirrors? |
| Emergency access | Can every emergency exit and safety device still be reached immediately? |
| Serviceability | Can wiring, seals, panels, equipment and fasteners still be inspected? |
| Reset time | Can the RV move from camp mode to travel mode without a long packing routine? |
There is one more question for any renovation that adds permanent material:
What does this do to the RV's available cargo capacity?
One small piece of décor is unlikely to transform the weight of a large RV. A complete renovation can.
Flooring, lumber, furniture, countertops, tile, batteries, appliances and storage additions accumulate quickly.
Use the ratings and cargo information for your specific RV, pay attention to axle loading, and use actual scale weights when you need to understand the loaded rig rather than estimating from individual items.
Upgrade 1: Use Lightweight Soft Furnishings for a Big Visual Change
Textiles are one of the easiest ways to make an RV feel intentional without rebuilding anything.
A different rug, a few pillow covers and a throw can change the room more than a complicated wall project.
They also work well in a moving vehicle when you choose them with travel day in mind.
Prioritize Things That Are Easy to Wash and Store
Useful choices include:
- removable pillow covers
- lightweight throws
- washable rugs
- compact bedding
- fabrics that fold into existing cabinets or storage bins
The goal is to add color and texture without creating a second cargo-management system.
Think About the Travel Position Before Buying
If six decorative pillows have to be moved before every drive, decide where they will go.
If a rug needs to be rolled up because it interferes with a slide or moving furniture, make sure the rolled rug has a secure storage location.
When the storage answer is “we'll put it somewhere,” that usually becomes a travel-day annoyance later.
Watch Cumulative Weight
Soft furnishings are generally lighter than furniture or construction materials, which is one reason they are a practical place to begin.
Still, RV renovations tend to happen in layers.
A heavy rug, weighted blanket, additional mattress topper and several storage baskets all become part of the loaded vehicle.
Choose the visual change you want with as little unnecessary weight as practical.
Travel-day test: If the item is loose when the RV moves, it needs a secure travel position before it becomes part of the renovation.
Upgrade 2: Give Plants and Tabletop Décor a Travel-Day Position
Plants can make a compact RV interior feel warmer almost immediately.
Small lamps, bowls, books and decorative objects can do the same.
The parked-RV question is where they look good.
The moving-RV question is where they go next.
Think in Two Modes
Camp mode: the object is displayed where you want to use or see it.
Travel mode: the object is secured, removed or relocated before the vehicle moves.
A small plant might live on a shelf at camp and travel in a secured container.
A decorative bowl might stay on the table while parked and move into a cabinet before departure.
A lamp may need a lower, more secure travel position.
Use Retention Methods Within Their Limits
Depending on the object and surface, people commonly use:
- removable hook-and-loop strips
- museum-style putty or wax
- non-slip liners
- small containment trays
- dedicated travel bins
These can reduce everyday shifting, but they should not be treated as a guarantee that an object will remain secure during every braking event, rough road or sudden maneuver.
Anything heavy, fragile or capable of becoming a projectile deserves a more conservative travel position.

Avoid Creating Twenty Tiny Departure Tasks
One plant takes seconds to move.
Twelve decorative objects scattered across shelves, counters and tables can turn departure into a scavenger hunt.
A simple renovation works better when most items either:
- stay safely secured in place, or
- move to one obvious travel-storage location.
The fewer decisions required on departure morning, the easier the RV is to use.
Upgrade 3: Mount Photos and Wall Art With Travel in Mind
Wall décor solves one advantage that tabletop décor does not: it can add personality without occupying a counter.
The challenge is that an RV wall moves, vibrates and may contain wiring, plumbing or lightweight construction that is very different from a residential wall.
Choose Lightweight Pieces
For a moving RV, consider:
- small lightweight frames
- acrylic glazing instead of heavy glass where appropriate
- fabric wall art
- thin prints
- lightweight signs
- low-profile decorative pieces
A heavy mirror or thick glass frame requires much more confidence in both the wall structure and the mounting method.
Use the Least Invasive Mounting Method That Works
Removable strips and other low-impact mounting methods can be useful for lightweight décor when they are compatible with the wall surface.
Test first.
RV interior panels can react differently to:
- adhesive
- heat
- humidity
- surface cleaners
- long-term pressure
Do not assume that an adhesive labeled removable on a residential wall will leave every RV finish unchanged.
Know What Is Behind the Wall Before Drilling
A screw or nail introduces a different set of questions.
Before drilling, understand the wall construction and verify that you are not entering an area containing:
- electrical wiring
- plumbing
- structural components
- slide-related hardware
- other concealed equipment
When that information is uncertain, use a mounting solution that does not require guessing what is behind the panel.
Travel-day test: Wall décor should remain secure through normal road movement without turning the RV wall into a hidden wiring or structural experiment.
Upgrade 4: Test Peel-and-Stick Materials Before Covering a Whole Wall
Peel-and-stick wallpaper, backsplash panels and decorative films are attractive RV renovation tools because they can transform a surface without major demolition.
An RV also exposes adhesive to conditions that a climate-controlled house may never experience.
Summer heat, winter storage, humidity and repeated vibration all matter.
Start With a Small Hidden Test Area
Before covering an entire wall, test the exact material on the exact RV surface.
Check:
- initial adhesion
- edge lifting
- bubbling
- reaction to heat
- cleanability
- how the original surface looks after removal
- whether adhesive residue remains
Give the test enough time to experience realistic temperature changes if possible.
Kitchen Areas Need Extra Thought
A backsplash near a cooking area has to deal with more than vibration.
Consider:
- heat exposure
- grease
- cleaning products
- moisture
- clearance from appliances
Follow appliance and RV manufacturer requirements around heat-producing equipment.

Keep Access Panels Accessible
A continuous decorative surface can make an access panel look less attractive, but permanently covering that panel may turn a future five-minute inspection into a removal project.
If the original RV provides removable access, preserve it.
Use seams, removable sections or another design that allows technicians and owners to reach the equipment behind the finish.
Upgrade 5: Keep the Headboard Lightweight and Inspectable
The wall behind an RV bed is often a good renovation target.
It is visually important, relatively small and can make a bedroom feel much less generic.
It is also an area where a decorative panel can accidentally hide something you may need later.
Check What the Wall Already Does
Before adding a headboard, inspect the area for:
- windows
- emergency-exit windows
- electrical outlets
- USB ports
- reading lights
- ventilation
- wall seams
- signs of condensation
- access to wiring or equipment
An emergency-exit window must remain accessible and usable.
Do not allow decorative fabric, panels or furniture to interfere with opening it.
Use Lightweight Construction
If you want a more architectural look, lightweight materials can often create the visual effect without adding thick hardwood or a heavy upholstered structure.
Potential approaches include:
- fabric panels
- tapestry
- thin decorative board
- lightweight slats
- removable wallpaper or wall covering
Whatever you use, make sure the mounting method is appropriate for the wall.
Plan for Future Inspection
Suppose a moisture stain appears behind the bed next year.
Can you still inspect the wall seam?
If a reading light fails, can you reach its wiring?
If a window seal needs attention, can the trim be removed without dismantling half the bedroom?
A good headboard decorates the wall while leaving future maintenance possible.
Travel-day test: Keep decorative headboards light, securely mounted and removable enough that windows, seams and service areas remain inspectable.
Upgrade 6: Treat Slide-Out Trim as Part of a Moving System
Replacing dated slide-out fascia can make a major visual difference because the original trim often occupies a large part of the room.
It is also one of the renovation areas where appearance needs to follow mechanical clearance.
The decorative trim may be stationary relative to part of the interior, but the slide-out itself is a moving system.
Observe the Complete Slide Cycle First
Before removing or adding material, watch the slide operate through its normal extension and retraction cycle.
Note the relationship between the trim and:
- moving slide structure
- seals
- flooring
- furniture
- wiring where visible
- tracks or other accessible mechanism components
- service and inspection points
Use the manufacturer's documentation for the installed slide mechanism when clearance requirements are involved.
Do Not Let Decorative Material Enter the Travel Path
New wood, fabric, fasteners or adhesive should not interfere with:
- slide movement
- seal compression
- rollers or tracks where applicable
- moving wiring
- inspection access
Even a small decorative change can become a mechanical problem when it occupies space the slide needs during movement.
Think About Fasteners
A longer screw can reach farther into the structure than the original fastener.
A heavier piece of trim may require a different mounting method.
Do not choose fastener length or placement by appearance alone.
Confirm what is behind the attachment point and whether the modification is compatible with the slide structure.

Keep It Easy to Inspect
The finished renovation should still allow you to look at:
- seals
- visible fasteners
- edges
- signs of water intrusion
- changes in slide alignment
If the new fascia makes inspection harder, revise the design while the renovation is still easy to change.
Upgrade 7: Create No-Decor Zones Around Driving and Safety Areas
Some areas of the RV benefit from a simple renovation rule:
Do not decorate across the function.
A hanging organizer may be attractive and useful until it covers a window. A plant may look good beside the driver's seat until it moves into the driver's sightline. A decorative panel may make an electrical compartment disappear visually and also make the reset switch harder to reach.
Mark the No-Decor Zones Before Renovating
| Area | What Must Remain Available |
|---|---|
| Driver position | Windshield, side windows, mirrors, controls and normal driving visibility |
| Emergency exits | Opening mechanism, clear approach and full usable exit path |
| Safety equipment | Fire extinguisher and other installed emergency equipment |
| Safety labels | Warning, operating and capacity information that needs to remain readable |
| Electrical area | Breakers, fuses, disconnects and service access |
| Ventilation | Air returns, vents and required airflow paths |
| Utility panels | Plumbing, electrical and appliance inspection points |
| Slide-outs | Movement, seal and service clearance |
Check the Driver's Seat After Every Front-Cabin Change
Sit in the normal driving position after installing:
- curtains
- window coverings
- phone mounts
- organizers
- plants
- decorative signs
Look through the windshield, both side windows and mirrors.
Then check again with the item in the position it might take after vibration or a turn.
A hanging object that stays outside the sightline while parked may swing into it while moving.
Keep Emergency Exits Obvious
An emergency window should not disappear behind:
- a fixed headboard
- decorative shelving
- storage boxes
- heavy curtains that restrict operation
- wall panels
Everyone who travels in the RV should know where the exits are and how they operate.
Travel-day test: If a renovation makes a driving view, emergency exit, warning label, control or inspection point harder to use, redesign that area before considering the project finished.
Upgrade 8: Add Flexible Visibility Without Rebuilding the RV
Some useful RV upgrades do not require replacing furniture or opening walls.
A flexible camera can add a selected rear or exterior view without turning the project into a major body modification.
The useful distinction is how you prefer to view that image.
Solar4 Wifi: Use the Phone or Tablet You Already Carry
Solar4 Wifi provides a live camera view on a compatible phone or tablet rather than requiring a separate dashboard monitor.
The camera connects locally to the device over WiFi, so the live view does not depend on cellular service or an external internet connection.
That can suit an RV renovation where the goal is to keep the dashboard relatively simple.
Depending on camera placement, it can provide a selected view such as:
- the rear of the RV
- a selected side-rear area
- a hitch or cargo area
- another nearby exterior reference point
The viewing device needs to remain within the camera's local WiFi connection range.
Solar-assisted charging supports the camera battery and remains supplemental charging.
Solar5B: Use a Dedicated Display
Some drivers prefer to keep the phone available for navigation, calls or another task.
The Solar5B pairs a portable magnetic camera with its own display, creating a dedicated rear-view setup.
This can be useful for:
- backing into campsites
- checking a selected rear approach
- temporary or seasonal installations
- RVs where a portable setup makes more sense than a large installation project
The Solar5B Dual-Camera Kit can add a second movable camera angle when two selected views are more useful than one.
Keep the Role of the Camera Clear
A flexible camera is an additional visual tool.
It does not replace:
- mirrors
- direct observation
- walk-arounds
- a spotter where appropriate
- child supervision
- pet supervision
- physical inspection of the campsite
Solar4 Wifi should not be treated as a security or unattended child- or pet-monitoring system.
Camera images also provide visual references rather than exact physical clearance measurements.
Renovation angle: Visibility upgrades can be useful precisely because they may add a selected view without requiring a major interior rebuild. Choose between a phone-based local view and a dedicated display according to how the RV is actually used.
The Travel-Day RV Renovation Checklist
After finishing an upgrade, run this check before the next trip.
| Check | What to Confirm |
|---|---|
| Added weight | You understand what the renovation added and how it affects the loaded RV |
| Loose objects | Every plant, decoration and portable item has a secure travel position |
| Wall-mounted items | Frames, panels and décor remain securely attached |
| Cabinets and doors | All doors, drawers and latches operate normally |
| Slides | The complete extension and retraction paths remain clear |
| Windows | Normal windows and emergency exits still open as intended |
| Driver visibility | Windshield, side windows and mirrors remain unobstructed |
| Safety equipment | Emergency equipment and warning labels remain accessible |
| Service access | Electrical, plumbing, mechanical and appliance access points remain usable |
| Travel reset | The RV can move from camp mode to travel mode without a complicated packing process |
AUTO-VOX Options for Flexible RV Viewing
| Product | Viewing Style | Practical Fit |
|---|---|---|
| Solar4 Wifi | Phone / tablet local WiFi view | For users who prefer a live selected view without adding a separate dashboard display |
| Solar5B | Dedicated monitor | Portable rear-view setup for parking and campsite approaches |
| Solar5B Dual-Camera Kit | Dedicated monitor + two cameras | Main rear plus a movable second selected perspective |
| Solar5B AI | Dedicated monitor with Smart Reversing Assist | Additional low-speed reversing cues within the parking-guideline area |
Flexible Camera Options for RV Travel Days
Prices and configurations may change. Confirm the current product page, selected configuration, RV compatibility, mounting position and power requirements before purchase.
Common RV Renovation Mistakes That Show Up on Travel Day
Designing Only for Camp Mode
An RV spends time parked, but it also accelerates, brakes, turns and travels over imperfect roads.
Every loose item needs a travel position and every permanent installation needs to tolerate normal vehicle movement.
Adding Heavy Materials Without Reviewing Weight
Residential materials may be attractive because they feel substantial.
That same weight travels with the RV permanently.
Track large renovation additions and evaluate the loaded RV against its applicable ratings.
Giving Décor No Storage Position
If every departure requires finding a new place for plants, pillows and counter décor, the renovation creates work instead of simplifying the space.
Using Permanent Adhesive Before Testing the Surface
Test peel-and-stick products and mounting adhesives before covering visible areas.
Heat and long-term contact can change both adhesion and removal behavior.
Covering Inspection Panels
A smooth uninterrupted wall can look better in photos.
Electrical, plumbing and mechanical access remains more valuable when something needs inspection on the road.
Changing Slide-Out Trim Without Checking the Full Movement
Inspect extension, retraction, seals and service clearance before finalizing decorative slide modifications.
Blocking Visibility or Emergency Access
Keep the driver's sightlines, mirrors, windows, emergency exits, warning labels and safety equipment outside the decoration plan.
Frequently Asked Questions
How much weight can I add during an RV renovation?
There is no single safe renovation-weight allowance for every RV. Review the specific vehicle's GVWR, axle ratings and cargo information, account for passengers, water, fuel, gear and installed equipment, and use actual scale weights when needed to understand how the loaded RV is distributed. Large renovation projects deserve more weight planning than a few lightweight decorative changes.
Is peel-and-stick wallpaper safe for RV walls?
Compatibility depends on the wall finish, adhesive, temperature exposure, humidity and cleaning products. Test the exact product on a small inconspicuous section first, then check adhesion and removal before covering a larger area.
Can I hang regular glass picture frames in an RV?
They can add unnecessary weight and breakage risk in a moving vehicle. Lightweight frames and acrylic or other less fragile glazing are often easier to manage. Whatever material you choose, use a mounting method appropriate for the wall and normal RV vibration.
Can I replace the trim around an RV slide-out?
Decorative slide-out trim can be changed on many RVs, but the renovation must preserve movement clearance, seals and access to the installed mechanism. Observe the complete slide cycle and follow the RV or slide-system manufacturer's requirements before adding material or fasteners.
Can Solar4 Wifi work without internet?
Yes. Solar4 Wifi connects locally between the camera and a compatible phone or tablet, so the live view does not require cellular data or an external internet connection. The viewing device still needs to remain within the camera's local WiFi connection range.
Should I use an RV camera to watch children or pets inside the RV?
A backup camera should not be treated as a substitute for appropriate child or pet supervision. Solar4 Wifi is designed to provide a selected camera view and should not be relied on as an unattended caregiving or security system.
Final Thoughts: Renovate for the Road, Not Just the Campsite
An RV can feel personal without turning every travel day into a packing project.
The upgrades that usually work best share a few characteristics.
They add reasonable weight. Loose items have a travel position. Mounted items stay secure. Slides and doors keep their clearance. The driver keeps a clear view. Emergency exits remain accessible. Service panels can still be opened.
That gives you a simple renovation sequence:
- Choose lightweight materials where practical.
- Give every loose object a secure travel position.
- Mount wall décor for a moving environment.
- Test adhesives before making a large commitment.
- Keep decorative panels removable enough for inspection.
- Treat slide-out areas as moving mechanical spaces.
- Protect visibility, exits, labels and service access.
- Use flexible viewing upgrades when they fit the way you travel.
The best test comes after the renovation looks finished.
Bring the slides in. Close the cabinets. Put every loose object into travel mode. Sit in the driver's seat. Walk to each emergency exit. Open the service panels you may need later. Then imagine the first hard turn, uneven campground road and backing maneuver of the next trip.
If the RV still works naturally in that state, the renovation is doing more than looking good.
Before you finish any RV renovation, ask one final question: Will this upgrade still be secure, practical, visible, and easy to inspect when the RV is actually moving, turning, backing, and parking?
FAQ
Not at all! Our products, including the Solar5, Solar4B, Solar3A Plus feature hassle-free designs like magnetic installation and wireless setups. These make it easy to install on RVs, trailers, and other large vehicles without professional assistance.
Are AUTO-VOX backup cameras compatible with all vehicle types?
Yes, Auto-Vox offers a wide range of products tailored to different vehicle types, including cars, trucks, RVs, trailers, and vans. For example, the Solar3C is specifically designed for large vehicles, while other models cater to standard cars and smaller vehicles.
How does AUTO-VOX ensure the product's durability in extreme weather?
AUTO-VOX products are built with high-quality, weather-resistant materials. They are designed to withstand extreme heat, cold, rain, and snow, ensuring reliable performance in all conditions.
What are the benefits of shopping with AUTO-VOX?
We offer free shipping across the US, 24/7 customer support, 100% secure payment, and a 30-day return policy to ensure a risk-free shopping experience.
How does AUTO-VOX support sustainable driving?
AUTO-VOX integrates sustainability into its product design. For example, the Solar3A Plus features advanced solar-assisted charging and power-saving technology, reducing battery consumption by 50% while maintaining excellent performance and reliability.
Why are EU/UK prices different from US prices?
EU and UK prices reflect local taxes, import duties, and shipping costs, which may cause differences from US pricing.
More questions? See our full FAQ