


A trailer that feels manageable at twenty feet can become a different visibility problem at thirty, thirty-five, or forty feet.
The change is not always obvious while driving straight on an open highway. It becomes clearer during the moments when the tow vehicle and trailer need to move through different paths.
A lane change requires the driver to judge whether a vehicle has fully cleared the trailer’s side. A campground loop may bring the inside trailer wheels toward a curb while the outside rear corner swings toward a tree. A fuel-station exit may look wide enough from the tow vehicle, but the trailer still has to track through the turn and clear the pump island.
Then there is backing.
One rear camera may show the road behind the trailer or the space near the bumper, depending on its angle. It may not show both equally well. It may also leave the left and right side areas outside the frame when the trailer is entering an angled campsite.
That does not make a rear camera unhelpful. It means the visibility problem has grown with the trailer.
A multi-camera trailer backup camera system can provide selected rear, lower-rear, left-side, and right-side views. These additional perspectives may help reduce blind spot uncertainty, but they cannot completely remove blind spots, guarantee accident prevention, or replace towing mirrors, direct observation, a walk-around, and a visible spotter.
This guide explains when one rear camera may feel limited, what different camera angles contribute, where multi-camera coverage matters most, and how to check whether a system fits the actual trailer before installation.
Quick Navigation
- Quick Long-Trailer Answer
- How Trailer Length Changes Visibility
- Map the Difficult-to-See Areas
- Understand One Rear Camera's Limits
- What Multiple Camera Views Add
- Where Multi-Camera Coverage Matters
- Use Rear and Side Views During Turns
- Build a Backing Routine
- Check Installation Compatibility
- Use CampSync D1
- Consider CampSync D1 Lite
- Compare WF4
- Consider a Portable Dual-Camera Kit
- Use the Long-Trailer Checklist
- Frequently Asked Questions
Important: Camera systems can provide selected additional views, but they cannot show the complete environment around a long trailer. Continue using properly adjusted towing mirrors, direct observation, a walk-around, a visible spotter, safe lane-change habits, and driver judgment. Confirm installation, power, and vehicle compatibility before use.
Quick Answer: When Is One Rear Camera Not Enough?
One rear camera may be enough when the main need is a straightforward view behind the trailer.
A longer trailer may benefit from additional camera views when the driver must monitor several different areas during the same trip, including the road behind, the bumper or hitch area, and the left and right sides.
Consider a multi-camera setup when:
- the trailer is long enough that the side areas are difficult to judge
- the rear overhang moves close to obstacles during turns
- the trailer is frequently used in multi-lane traffic
- the driver regularly backs into angled campsites
- fuel-station turns and campground loops require repeated corrections
- a bike rack, spare tyre, ladder, or cargo carrier affects the rear view
- one rear angle cannot provide useful road and close-bumper views at the same time
| Driving Situation | What One Rear Camera May Show | What May Remain Difficult to Judge |
|---|---|---|
| Straight backing | Rear path and stopping distance | Left and right rear corners |
| Highway driving | Traffic behind the trailer | Vehicles beside the trailer |
| Angled campsite backing | Part of the reversing route | Inside rear corner and outside swing |
| Tight turn | Part of the rear environment | Trailer wheel tracking and side clearance |
| Hitch or bumper check | Close lower-rear area | Farther traffic behind the trailer |
| Lane change | Following vehicles | Whether a vehicle has cleared the trailer side |
| Fuel-station exit | Rear area near the trailer | Side cameras, wheel path, and rear-corner swing |
The useful question is not how many cameras the trailer can carry. It is which areas remain difficult to judge and whether another view would provide relevant information before the driver moves.
Step 1: Understand How Trailer Length Changes Visibility
A longer trailer adds distance, body area, turning movement, and installation challenges.
The Rear Camera Is Farther From the Driver
As the trailer gets longer, the distance between the rear camera and the display increases.
The signal may also need to travel through or around:
- metal body structures
- appliances
- storage compartments
- water tanks
- cargo
- bicycles and racks
- electrical equipment
- other wireless devices
Wireless video does not depend on cellular service, but the camera-to-monitor connection can still be affected by distance, obstructions, antenna placement, interference, and power stability.
Test the system on the actual tow vehicle and trailer rather than relying only on a maximum-range number.
More Trailer Length Creates More Side Area
The driver may need to understand several zones:
- the area behind the tow vehicle
- the front half of the trailer side
- the rear half of the trailer side
- the passenger-side rear area
- the driver-side lane-change area
- the rear corner
- the bumper, hitch, or accessory area
A single rear lens is not naturally positioned to answer every question about those areas.
Trailer Wheels Follow an Inside Path
During a turn, the trailer wheels track inside the path of the tow vehicle.
The tow vehicle may clear a curb, sign, pump island, or campground post while the trailer moves closer to it. At the same time, the outside rear corner can swing toward another obstacle.
This creates two different problems in one maneuver: inside wheel tracking and outside rear swing.
Rear Accessories Change the View
Recheck visibility after installing:
- a spare tyre
- a bike rack
- a cargo carrier
- a ladder
- a storage box
- boat or equipment mounts
An accessory may block part of the image, change the final stopping point, or become the first part of the trailer to approach an obstacle.
Step 2: Map the Difficult-to-See Areas Before Choosing a System
Start with the trailer, mirrors, and real driving position—not the product list.
A simple visibility test can show where an additional camera angle would be useful.
Use a Safe Open Area
- Connect the tow vehicle and trailer correctly.
- Adjust the towing mirrors.
- Park in a legal, open, low-traffic area.
- Ask a helper to place lightweight cones around the trailer.
- Mark where cones disappear from the mirrors.
- Repeat the test on both sides and both rear corners.
- Compare those areas with the existing rear-camera view.
- Repeat after travel equipment is loaded.
Keep the helper away from the vehicle path and use cones rather than real obstacles.
Identify Four Core Viewing Questions
| Viewing Area | Question the Driver Needs Answered |
|---|---|
| Far rear | Is traffic approaching or following closely behind the trailer? |
| Close rear | How much space remains near the bumper, hitch, or parking boundary? |
| Left side | Has a vehicle cleared the trailer, and what is the driver-side clearance? |
| Right side | Is there a vehicle, curb, post, or obstacle in the passenger-side area? |
Every added camera should answer a specific question.
Installing several lenses that show nearly the same area can add screen complexity without adding useful information.
Driver's tip: Do not start with “How many cameras can I add?” Start with “Which decision is still uncertain with my mirrors and current rear view?”
Step 3: Know What One Rear Camera Can and Cannot Show
A well-positioned rear camera remains useful for many towing situations.
One Rear Camera May Help With
- straight-line backing
- rear stopping distance
- checking the bumper or hitch area
- monitoring traffic behind the trailer
- checking the area before leaving a campsite
- watching a bike rack or cargo carrier
One Rear Angle May Not Handle Every Rear Task
A lens aimed lower may provide a useful close view of the bumper, hitch, or parking boundary. That same angle may provide less information about traffic farther behind.
A lens aimed farther down the road may be useful while driving. It may provide less detail in the area immediately below the rear of the trailer.
One Rear Camera May Not Show the Side Areas
The left and right lane-change zones, trailer-wheel path, and rear-corner movement may remain outside the frame.
That becomes especially important during:
- multi-lane highway travel
- merging
- narrow campground turns
- angled backing
- fuel-station exits
- roadside parking
Wide-Angle Views Have Trade-Offs
A wider lens can show more of the surrounding area, but it can also change how distance appears on the screen.
Practise with the camera before the trip. Use cones to learn what five, ten, or twenty feet look like in the selected view.

A Rear Camera Still Cannot Evaluate the Complete Environment
It may not show:
- overhead branches
- soft ground
- the trailer wheels
- an obstacle beside the front half of the trailer
- a person outside the camera frame
- the opposite rear corner during an angled maneuver
Continue using towing mirrors and direct checks.
Step 4: What a Multi-Camera System Actually Adds
The main value of a multi-camera system is not simply a larger specification list.
It is the ability to assign different viewing jobs to different lenses and select the relevant views for the current maneuver.
| Camera Perspective | Primary Use |
|---|---|
| Main rear view | Road behind the trailer, following traffic, and normal rear monitoring |
| Lower rear view | Bumper, hitch, parking boundary, and close obstacles |
| Left-side view | Driver-side lane area, side clearance, and turn monitoring |
| Right-side view | Passenger-side area, curbs, posts, and blind-side backing context |
Split-Screen Viewing Supports Comparison
Split-screen viewing may let the driver compare selected areas without repeatedly changing camera channels.
For example:
- far rear plus lower rear while towing
- rear plus right side during an angled campsite approach
- rear plus left side during a lane-change check
- rear and both sides during a slow campground maneuver
Showing more images also makes each individual image smaller. The driver should not assume that every available channel needs to remain on screen at all times.
Choose the Relevant Views for the Task
Before the trailer moves, decide which two or three views answer the current questions.
During highway travel, a farther rear view and the relevant side view may matter most. During final campsite backing, the lower rear and rear-corner context may be more useful.
Camera views should reduce uncertainty, not create a new reason for the driver to spend too much time looking away from the road.
Step 5: Where Multi-Camera Coverage Matters Most
Lane Changes With a Long Trailer
Before changing lanes, the driver needs to understand:
- whether the target lane is occupied
- whether a nearby vehicle has fully cleared the trailer
- whether traffic is approaching quickly from behind
- whether the trailer remains stable in its current lane
A side camera can add information about the area beside the trailer. It does not replace the towing mirror, turn signal, direct observation, or the need to wait for a clear gap.
Do not complete a lane change by watching the screen alone.
Campground Loops
Campground roads may be narrow and lined with:
- trees
- utility posts
- parked tow vehicles
- picnic tables
- children and pets
- signs
- neighbouring slide-outs
The driver may need to monitor inside trailer-wheel tracking and outside rear-corner swing at the same time.
Backing Into an Angled Site
An angled site can place the passenger-side rear corner outside the driver’s mirror view.
Different views may help with:
- the main reversing path
- rear stopping distance
- the driver-side site boundary
- the passenger-side rear corner
- the hitch or bumper area
- the location of the spotter
The spotter should remain visible. If the driver loses sight of the spotter, the trailer stops.
Tight Fuel Stations
Before entering, check:
- canopy height
- pump-lane width
- tow-vehicle turning space
- trailer-wheel path
- rear swing
- the exit route
- traffic behind and beside the trailer
A station with a slightly higher price may be a better choice when it offers a wide approach and forward exit.
Merging Onto a Highway
A side camera can supplement the mirror view, particularly when traffic approaches beside the rear half of the trailer.
Accelerate appropriately, signal early, maintain lane position, and wait for a clear opening. The screen remains an additional reference rather than the sole basis for the merge.
Step 6: Use Rear and Side Views During Turns
Before the Turn
- reduce speed
- confirm the road width
- check pedestrians and traffic
- identify the exit lane
- allow room for trailer-wheel tracking
- check where the rear corner may swing
During the Turn
Use the towing mirrors to monitor the trailer body and wheel path. Use the relevant side view as an additional check. Use the rear view to understand rear-corner movement and traffic behind.
Avoid switching repeatedly between every available camera channel. Select the views that matter before entering the turn.
After the Tow Vehicle Clears
Do not assume the complete trailer has cleared the obstacle because the tow vehicle has passed it.
Continue monitoring until the trailer wheels and rear corner have completed the turn.
If the available clearance is uncertain, stop in a safe position and inspect directly.
Step 7: Build a Repeatable Backing Routine
Split-screen viewing works best when it supports a clear backing plan.
- Stop before entering the campsite.
- Walk the site when it is safe.
- Identify the left and right rear-corner hazards.
- Check overhead clearance and ground condition.
- Decide where the trailer wheels and rear bumper should finish.
- Choose one primary spotter.
- Select the most relevant camera views.
- Move slowly enough to stop immediately.
- Stop when the spotter disappears.
- Stop when a camera image freezes or disconnects.
- Pull forward and reset when the angle becomes poor.

Give Every View a Job
| View | Backing Job |
|---|---|
| Far rear | Monitor the wider road or campsite area behind the trailer |
| Lower rear | Judge the bumper, hitch, or final stopping boundary |
| Left side | Check the driver-side site boundary and trailer clearance |
| Right side | Monitor the passenger-side rear corner and nearby obstacles |
Driver's tip: Split-screen viewing supports the backing plan. It does not replace walking the site or keeping the spotter visible.
Step 8: Check Trailer Compatibility Before Installation
A camera system should be selected only after confirming how it will mount and receive power on the actual trailer.
Check for a Pre-Wired Rear-Camera Mount
Confirm:
- whether the trailer has an existing pre-wired camera bracket
- whether the bracket style matches the selected system
- which vehicle circuit supplies power
- whether the power is controlled by the running lights or reverse lights
- whether an adapter is required
- whether the voltage remains stable
Do not assume a visible bracket is powered. Test the outlet according to the trailer manufacturer’s instructions.
Check the Side-Marker Positions
For marker-light side cameras, confirm:
- the marker-light size and position
- the available 12V power
- left and right mounting height
- whether a slide-out, door, awning, or trim piece blocks the angle
- whether the marker-light function remains correct
- whether drilling or wiring changes are required
Installation requirements may differ between travel trailers, fifth wheels, motorhomes, and tow vehicles.
Check Monitor Placement
The display should:
- remain visible without blocking the road
- allow the driver to glance rather than stare
- keep power cables away from controls
- remain stable on rough roads
- show the selected split-screen layout clearly from the driving position
Test the Signal on the Complete Rig
Test with:
- the trailer connected to the tow vehicle
- the camera in its final position
- the monitor in the normal driving position
- the engine running
- running lights and relevant circuits switched on
- normal cabin electronics operating
- single, dual, and multi-view layouts
- realistic daylight and low-light conditions
- several minutes of continuous operation
If the image freezes or disappears, stop the vehicle. A clear frozen frame is not a live view.
Check PWM and Power Compatibility
Some tow vehicles and RV circuits may use pulse-width-modulated power that does not provide a stable supply for every camera setup.
Check the tow vehicle, trailer circuit, and product instructions before ordering or installation. A voltage reading or connector shape alone may not confirm stable compatibility.
Step 9: Use CampSync D1 for Rear and Side Perspectives
For a longer trailer that needs both near-and-far rear information plus left and right side views, the CampSync D1 multi-camera RV system uses three cameras with four lenses.
The setup includes:
- one dual-lens rear camera
- one left-side camera
- one right-side camera
- a 7.2-inch display with multi-view layouts
Assign the Four Lenses Specific Roles
| CampSync D1 Perspective | Practical Use |
|---|---|
| Farther rear lens | Road behind the trailer and approaching traffic |
| Lower rear lens | Bumper, hitch, cargo carrier, and close rear area |
| Left-side camera | Driver-side lane area and turning clearance |
| Right-side camera | Passenger-side lane area, curb, and campsite obstacles |
Where This Configuration May Be Useful
- long travel trailers
- fifth wheels
- larger motorhomes
- regular multi-lane driving
- angled campsite backing
- narrow campground loops
- fuel-station turns
- drivers who need separate close and farther rear views
The additional views can help reduce blind spot uncertainty. They cannot completely eliminate blind spots or show every overhead, ground-level, and out-of-frame hazard.

Power, Signal, and Recording Limits
Wireless refers to video-signal transmission. The cameras and monitor still require appropriate DC power.
Actual signal performance depends on trailer length, vehicle construction, antenna position, power stability, interference, and installation.
CampSync D1 supports DVR loop recording with compatible local storage. An SD card is sold separately. Footage may help review available context but does not guarantee accident prevention, legal acceptance, fault determination, or an insurance outcome.
Step 10: When CampSync D1 Lite May Be Enough
Not every longer trailer needs side cameras.
The CampSync D1 Lite dual-lens rear camera may suit a driver whose main issue is choosing between a farther rear view and a closer bumper or hitch view.
It uses one rear camera body with two lenses:
- an upper or farther rear perspective
- a lower or closer rear perspective
D1 Lite May Fit When
- the towing mirrors already provide useful side coverage
- the driver mainly needs two different rear angles
- side-marker camera installation is not suitable
- the trailer is used mostly for straight backing and towing
- the bumper, hitch, bike rack, or cargo area needs a close view
A dual-lens rear unit does not add the dedicated left and right side views included with CampSync D1.
Wireless video still requires camera and monitor power. Actual signal performance should be tested on the complete rig.
When DVR recording is used, an SD card is sold separately. Recording may support review but does not guarantee a legal or insurance result.
Step 11: When WF4 May Be a Better Fit
The multi-camera WF4 3-channel RV camera system uses one rear camera and two side cameras.
It may suit a trailer where one rear angle is sufficient and the main upgrade need is left and right side context.
| System | Rear Structure | Side Structure |
|---|---|---|
| CampSync D1 | One dual-lens rear camera with farther and closer perspectives | Left and right side cameras |
| WF4 Multi-Camera | One rear camera | Left and right side cameras |
WF4 May Fit When
- one rear perspective answers the primary rear-view need
- left and right side views are the main missing information
- the trailer supports the required rear and marker-light installation
- the driver wants single, dual, or triple view options
Confirm rear pre-wire, side-marker positions, DC 12V power, monitor placement, and PWM compatibility where relevant.
Wireless refers to video transmission rather than power-free operation.
Where DVR loop recording is used, an SD card is sold separately. Footage may help review available context but does not guarantee a claim, legal, or responsibility outcome.
Step 12: When a Portable Dual-Camera Kit Makes More Sense
A permanently installed rear-and-side system is not the right direction for every trailer.
The Solar5B dual-camera kit may be more practical for:
- a rented or borrowed trailer
- seasonal towing
- a temporary setup
- drivers who move cameras between vehicles
- a trailer without suitable side-marker camera positions
- one main rear view and one movable second angle
Use the Second Camera for a Different Area
Possible positions include:
- the passenger-side rear corner
- the hitch
- the campsite boundary
- a temporary lower-rear angle
- a cargo or bike-rack view
A portable magnetic second camera does not automatically provide the same role as a permanently mounted side-marker camera during long-distance driving.
Check Mounting and Charging
Confirm that the mounting surface is suitable, clean, and positioned away from direct branch contact. Recheck the camera after rough-road travel.
Solar charging provides supplemental charging only. Monitor the battery and recharge manually when required.
Check the current product package and recording requirements before travel. Camera footage cannot guarantee that every event will be captured or determine a legal or insurance outcome.
Long-Trailer Visibility and Towing Checklist
| Category | What to Check |
|---|---|
| Tow vehicle | Mirrors, brakes, lights, hitch, controller, and power compatibility |
| Trailer | Tyres, cold pressure, load, lug nuts, doors, and exterior equipment |
| Dimensions | Height, width, trailer length, and combined vehicle length |
| Rear camera | Lens, angle, mount, power, signal, and blocked views |
| Side cameras | Marker-light positions, power, left/right angles, and obstructions |
| Monitor | Placement, power, stability, and split-screen readability |
| Signal | Engine running, electronics on, complete trailer length, and continuous test |
| Cargo | Bike rack, spare tyre, ladder, or carrier affecting the view |
| DVR | Compatible storage, correct time, recording status, and file protection |
| Practice | Lane changes, wide turns, angled backing, and pull-forward resets |
| Spotter | Simple signals, visible position, and immediate stop rule |
| Route | RV-suitable roads, fuel access, weather, and daylight arrival |
| Campsite | Entrance, loop width, site angle, side obstacles, and exit path |
Which AUTO-VOX Setup Fits a Longer Trailer?
| Product | More Suitable For | Main Viewing Structure |
|---|---|---|
| CampSync D1 | Longer rigs needing close/far rear and left/right side views | Dual-lens rear + left side + right side |
| CampSync D1 Lite | Drivers mainly needing two different rear perspectives | Farther rear + closer rear |
| WF4 Multi-Camera | Drivers needing one rear and two side views | Rear + left side + right side |
| Solar5B Dual-Camera Kit | Temporary or movable dual-view needs | Main rear + movable second view |
Camera Options for Longer Trailers


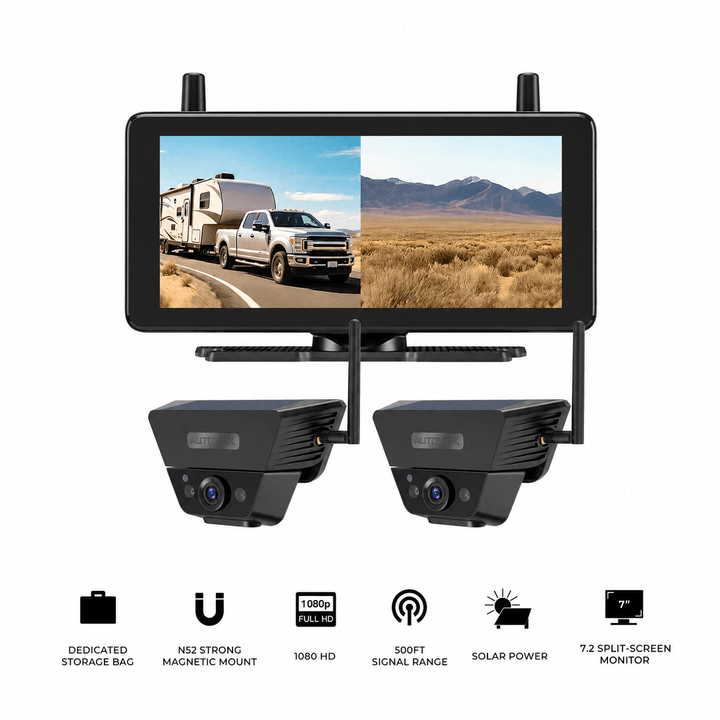
Prices, configurations, and availability may change. Confirm the current product page, trailer compatibility, power circuit, mounting method, and selected package before purchase.
Common Long-Trailer Camera Mistakes
Adding More Cameras Without Mapping the Difficult Areas
Additional lenses are useful only when they answer different driving questions.
Pointing Both Rear Lenses at the Same Area
A dual-lens setup is more useful when one view covers farther rear traffic and the other covers the bumper or hitch area.
Using Side Cameras as Mirror Replacements
Side cameras add selected visual context. Continue using properly adjusted towing mirrors and direct observation.
Watching Every Split-Screen View at Once
Select the views relevant to the current task. Do not let multiple images distract from the road.
Ignoring Trailer-Wheel Tracking
A side view may not show the exact wheel position. Practise turns and continue using the mirrors.
Choosing a Camera Before Checking the Pre-Wire
Confirm the bracket, connector, power circuit, and required adapter before purchase.
Assuming Every Marker Light Can Power a Side Camera
Check DC voltage, circuit control, PWM compatibility, and the product instructions.
Testing the System Only While Parked
Test the complete rig with the engine and normal electronics operating.
Continuing When the Image Freezes
A frozen frame is not a live view. Stop the vehicle and inspect the area directly.
Assuming Wireless Means No Power or Wiring
Wireless refers to video-signal transmission. The cameras and monitor still need power.
Assuming Recording Guarantees Evidence
Footage may provide context but cannot guarantee accident prevention, legal acceptance, fault determination, or an insurance result.
Claiming Multi-Camera Coverage Removes Every Blind Spot
A more accurate description is that selected camera angles may help reduce blind spot uncertainty.
Frequently Asked Questions
Is one rear camera enough for a travel trailer?
It may be enough when the main need is a straightforward rear view. A longer trailer may benefit from additional rear or side views when several areas remain difficult to judge.
When should I add side cameras to a trailer?
Consider side cameras when towing mirrors do not provide enough information around the rear half of the trailer during lane changes, turns, or angled backing.
Why are long trailers harder to see around?
They create more side area, greater camera-to-monitor distance, wider turning movements, and additional rear-corner and wheel-tracking considerations.
What areas can a rear camera miss?
A rear camera may miss the left and right side areas, trailer wheels, overhead hazards, opposite rear corner, and objects outside its field of view.
What is the difference between a far rear and close rear view?
A farther rear view is aimed toward the road and following traffic. A close rear view is aimed nearer the bumper, hitch, cargo carrier, or parking boundary.
Where should side cameras be mounted on a trailer?
The position depends on the trailer and camera design. Marker-light camera systems commonly use left and right side-marker areas, but power, angle, clearance, and installation compatibility must be confirmed.
Do side cameras replace towing mirrors?
No. They add selected side views but do not replace properly adjusted towing mirrors or direct observation.
Can a split-screen monitor show all cameras at once?
It depends on the system. CampSync D1 can show three camera channels while its rear channel contains two lens perspectives. WF4 supports single, dual, or triple views.
Should I watch all camera views while driving?
No. Select the relevant views and use brief glances. The road, mirrors, and surrounding traffic remain the primary focus.
What is a dual-lens rear camera?
It is one rear camera body containing two lenses aimed at different areas, such as farther traffic and the close bumper or hitch zone.
What is the difference between CampSync D1 and CampSync D1 Lite?
CampSync D1 Lite uses one dual-lens rear camera. CampSync D1 adds left and right side cameras to that dual-lens rear setup.
What is the difference between CampSync D1 and WF4?
CampSync D1 has a dual-lens rear camera plus two side cameras. WF4 uses one rear camera plus two side cameras.
Does CampSync D1 fit a pre-wired trailer?
It supports compatible pre-wired installations, but the bracket, connector, power circuit, and trailer-specific fit should be confirmed before purchase.
Do wireless trailer cameras still need power?
Yes. Wireless describes video transmission. The camera and monitor still require the correct DC power or supported battery source.
Can marker lights power side cameras?
They may provide power in a compatible installation, but the voltage, circuit, connector, PWM behavior, and marker-light function must be checked.
Why does a wireless image freeze on a long trailer?
Possible causes include distance, metal obstructions, antenna placement, interference, unstable power, or installation issues. Stop the vehicle whenever the image is not clearly live.
Do I need an SD card for DVR recording?
Compatible local storage is required where DVR recording is used. For CampSync D1, CampSync D1 Lite, and WF4, an SD card is sold separately.
Can a camera system completely remove trailer blind spots?
No. Cameras provide selected views and may help reduce blind spot uncertainty, but some areas remain outside the lenses.
How should I test a camera system before a long trip?
Test on the complete connected rig with the engine, running lights, and normal electronics operating. Check every view, power source, mounting position, and signal over several minutes.
Which views help when backing into an angled campsite?
A lower rear view can help with stopping distance, while left and right side views can provide additional rear-corner and site-boundary context. A spotter and direct site inspection remain important.
Final Thoughts: Upgrade Visibility When the Trailer Gets Bigger
A longer trailer does not automatically require the largest camera system.
It does require the driver to understand which areas remain difficult to judge and whether additional rear or side views would make those decisions less uncertain.
Begin with the existing mirrors and rear camera. Map the close rear, far rear, left-side, and right-side areas. Identify which situations create the most uncertainty: lane changes, campground loops, angled backing, fuel stations, or hitch monitoring.
Then check the trailer itself.
Confirm the pre-wired bracket, marker-light positions, DC power, PWM compatibility, monitor location, signal path, and installation requirements. Test the system on the complete rig rather than only on a workbench or driveway.
During travel, select the views that fit the current task. Keep using the towing mirrors, signal early, maintain lane position, and stop when a view becomes unclear. During backing, walk the site, keep the spotter visible, and pull forward when the angle needs to be reset.
- Identify what the current rear camera already shows.
- Map the areas that remain difficult to judge.
- Separate far rear, close rear, left side, and right side needs.
- Choose camera angles for real driving scenarios.
- Confirm trailer power and mounting compatibility.
- Test the system on the complete rig.
- Practise single and split-screen use.
- Continue using mirrors, direct checks, and a spotter.
As the rig gets longer, the visibility plan should grow with it—one useful angle at a time.


