


Extreme heat changes the order of an RV arrival.
On a comfortable travel day, it is easy to pull into a campsite and keep working until everything is finished: back in, level the rig, connect power and water, arrange the outdoor mat, unload the chairs, organize the bikes and make the campsite look settled.
On a brutally hot afternoon, that same routine can keep someone outside longer than they realize.
The dangerous thought is often simple: Just one more thing, then I'll go inside.
Five minutes becomes fifteen. The sun reflects off the gravel. There is very little air movement between the RVs. You are concentrating on hoses, leveling blocks and electrical connections instead of noticing how long you have been in the heat.
A better extreme-heat arrival has a different priority.
Get the RV into a workable position. Establish reliable cooling. Get people and pets out of the heat. Finish non-urgent campsite chores later.
That approach starts before the RV reaches the campground. You need to know what the weather is doing along the route, whether the campground can support the cooling equipment, whether the air conditioner is ready for sustained use and where you will go if the power or AC stops working.
This guide keeps the process to ten steps—from route planning through the final campsite check—so you have a sequence that is easy to save and use on the road.
Quick Navigation
- The 10-Step Heat Checklist
- 1. Check Heat, Smoke, and the Route
- 2. Confirm the Campground Cooling Plan
- 3. Test AC and Power Before Leaving
- 4. Choose a Better Arrival Time
- 5. Inspect the Site and Park
- 6. Get People and Pets Cool First
- 7. Reduce Heat Entering the RV
- 8. Recognize Heat Illness
- 9. Build a Cooling Plan B
- 10. Finish the Exterior Check
- Full 10-Step Checklist
- RV Viewing Options
- Common Mistakes
- Frequently Asked Questions
Extreme-heat priority: This checklist is general trip-planning information and does not replace medical advice or official emergency guidance. Follow local weather alerts and public-health instructions. If someone develops confusion, altered behavior, slurred speech, loss of consciousness, seizures, or other signs of possible heat stroke, treat it as a medical emergency and seek emergency medical help immediately.
Quick Answer: What Should You Do When RVing in Extreme Heat?
The most useful extreme-heat strategy is to decide the sequence before you reach the campground.
| Step | Extreme-Heat RV Check |
|---|---|
| 1 | Check official heat alerts, wildfire smoke, construction, closures and alternate routes |
| 2 | Confirm campground electrical service, shade, water and nearby cooled indoor options |
| 3 | Test the AC, filters, generator where equipped, batteries and electrical system before departure |
| 4 | Schedule arrival outside the most difficult heat window when practical and safe |
| 5 | Inspect the site and park with shade, utilities, slides and campsite access in mind |
| 6 | Secure the RV, establish reliable cooling and get people and pets into the cooled space |
| 7 | Reduce unnecessary heat gain through windows, cooking and repeated door opening |
| 8 | Watch for heat exhaustion and signs of possible heat stroke |
| 9 | Have a relocation plan for shore-power loss, AC failure or an RV that will not stay cool |
| 10 | Recheck the electrical connection, exterior equipment and campsite surroundings |
Cooling, reliable power and a workable backup destination remain the priorities throughout the process.
Step 1: Check Heat Alerts, Smoke, Road Conditions, and Your Backup Route
The temperature at the campground is only one part of an extreme-heat travel day.
Your route may cross hotter terrain before you arrive. Construction can create long periods of slow traffic. Wildfire smoke may affect the route or destination. A closure can add another hour of driving when everyone is already tired.
Before departure, check:
- official local heat alerts
- hourly temperatures along the route
- overnight temperatures at the destination
- wildfire and smoke information
- road closures
- construction zones
- fuel availability on long or remote sections
- alternate roads
- alternate campgrounds
Pay Attention to the Overnight Temperature
A campground that reaches a very high afternoon temperature but cools substantially after sunset presents a different challenge from one that stays hot throughout the night.
Warm overnight conditions reduce the amount of natural cooling available to the RV and increase the importance of dependable air conditioning and power.
Use Heat Alerts as a Planning Signal
Official heat watches and warnings are useful decision points.
A watch means dangerous heat may develop and gives you time to prepare. A warning means dangerous heat is expected or occurring and calls for action based on the local guidance.
That action may include:
- changing the driving schedule
- shortening the travel day
- moving to a campground with more reliable electrical service
- choosing a location with an indoor cooled facility nearby
- delaying the trip
There is no requirement to reach the original campground simply because it is on the reservation.
What to remember: Treat extreme heat as a route-planning condition. Keep an alternate route, campground and cooled indoor destination available before the travel day begins.
Step 2: Confirm the Campground Can Support Your Cooling Plan
A shaded campsite is useful in summer.
Reliable cooling requires more than shade.
Before arrival, confirm what the campground can actually provide.
Electrical Service
Ask which electrical service is available at your site and whether it matches the RV configuration.
Depending on the rig, that may mean verifying 30-amp or 50-amp service and understanding which air-conditioning loads your RV can operate on the available connection.
Also ask whether the campground is experiencing:
- known pedestal problems
- temporary electrical restrictions
- scheduled outages
- generator restrictions that could affect a backup plan
Do not assume that every campsite in the same park offers the same electrical service.

Shade and Site Orientation
Ask whether shaded sites are available.
A mature tree canopy or a site protected from strong afternoon sun can reduce solar heat hitting the RV, provided the site itself is suitable and overhead branches do not create another problem.
When choosing among available sites, consider where the strongest afternoon sun will hit the RV.
Water and Facilities
Confirm access to:
- potable water
- showers
- restrooms
- campground office or lounge
- other climate-controlled facilities where available
Know the Nearest Cooled Indoor Location
If the RV loses cooling, you should already know where you can go.
Depending on the area, possibilities may include:
- a designated cooling center
- a public library
- a community center
- a shopping center
- a hotel
- another campground
- another suitable air-conditioned location
If you travel with pets, include them in this plan and identify a suitable pet-friendly option in advance.
Step 3: Test the AC, Filters, Generator, and Battery System Before the Trip
The driveway is a much better place to discover an air-conditioning problem than a campground at the end of a 100°F-plus travel day.
Test the cooling system before departure.
Run the Air Conditioner
Confirm that:
- the system starts normally
- cool air is moving through the expected vents
- the thermostat behaves normally
- the unit does not make a new or unusual sound
- airflow appears normal for your system
Follow the RV and air-conditioner manufacturers' service schedule.
Check the Filters
Dirty filters can restrict airflow.
Inspect, clean or replace them according to the manufacturer's instructions.
While you are there, look at accessible vents and returns for anything that could restrict normal airflow.
Test the Generator Where Equipped
If a generator is part of the heat backup plan, test it before the trip and follow its manufacturer maintenance schedule.
Confirm:
- normal operation
- fuel availability
- the electrical loads it is designed to support
- campground rules affecting generator use
A generator should only be operated according to its safety and ventilation instructions.
Understand the Battery and Inverter Limits
Know which equipment the RV battery and inverter can actually power.
An inverter that comfortably supports lights, electronics and a refrigerator may have very different requirements when air conditioning enters the picture.
Use the ratings and instructions for the installed system.
Look at the Shore-Power Equipment
Before leaving, inspect the accessible:
- shore-power cord
- plug
- adapters where properly used
- electrical management or surge equipment
Look for visible damage, deformation, discoloration or other signs that deserve professional attention before the trip.
What to remember: Test the cooling plan under controlled conditions before travel. Know what the AC needs and what the backup power equipment can realistically support.
Step 4: Avoid the Hottest Part of the Day for Arrival and Outdoor Setup When Practical
Arrival time can reduce the amount of heat exposure built into a campground setup.
If the route, campground check-in rules and normal driving safety allow it, aim for a time when the most demanding outdoor work does not land in the hottest part of the afternoon.
That might mean:
- leaving earlier
- taking a longer midday break in an air-conditioned location
- arriving later in the afternoon
- splitting a long travel day into two shorter days
The right schedule depends on the route and the driver.
A cooler arrival does not justify driving while exhausted or pushing deep into the night when fatigue is becoming a problem.

Separate Essential Setup From Optional Setup
Before you arrive, decide which jobs actually need to happen immediately.
Essential tasks may include:
- getting the RV into its final position
- securing the vehicle
- connecting the appropriate electrical service
- starting effective cooling
Tasks that can often wait include:
- setting out chairs
- unrolling outdoor mats
- organizing bikes
- decorating the campsite
- setting up the complete outdoor kitchen
- rearranging storage compartments
That distinction becomes valuable when the temperature is pushing everyone toward their limit.
Step 5: Inspect the Site and Park With Shade and Setup in Mind
Heat can create pressure to finish the parking maneuver quickly so everyone can go inside.
Keep the normal parking checks.
Before backing, look at:
- ground condition
- trees and overhead branches
- available shade
- shore-power pedestal
- water connection
- slide-out clearance
- awning area
- pedestrian paths
- the route to a cooled facility or vehicle
Choose the Final Position Before Doing the Outdoor Work
Moving the RV after leveling and connecting utilities adds more time outside.
Take the extra minute to confirm the position first.
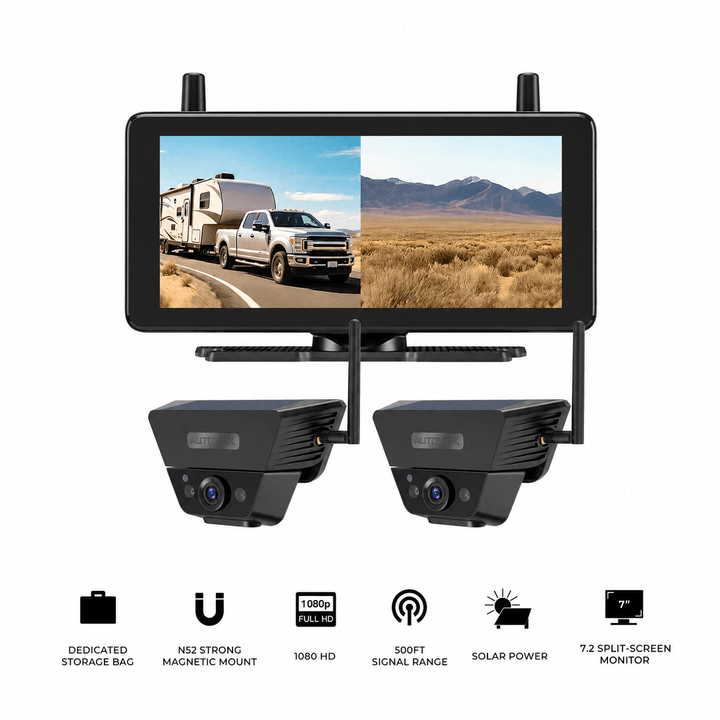
If a rear view is useful during the maneuver, the Solar5B can provide a dedicated rear-camera view on its monitor.
The Solar5B Dual-Camera Kit adds a second movable camera angle.
Depending on the campsite and mounting location, one camera can focus on the main rear path while the second covers a selected area such as:
- the passenger-side rear corner
- the utility pedestal
- the edge of the campsite
- a shaded-side reference point
The camera helps keep a selected area visible during the maneuver.
It does not measure temperature, determine exact physical clearance or tell you whether a campsite is cool enough.
If the view becomes uncertain, stop, get out when safe and check directly.
What to remember: Extreme heat is a reason to simplify the campsite setup, not a reason to rush the parking maneuver.
Step 6: Get the RV Powered and Get People and Pets Cool First
Once the RV reaches its final position, change priorities immediately.
Follow the manufacturer's parking and securing procedure, establish the appropriate electrical connection and start effective cooling.
Then get people and pets into the cooled environment.
A Practical Arrival Order
- Put the RV in its final parking position.
- Secure the RV according to its normal procedure.
- Connect to the appropriate shore-power service.
- Confirm the electrical connection is operating normally.
- Start the air-conditioning system.
- Move people and pets into the cooled space.
- Take a break and rehydrate.
- Return to non-urgent outdoor setup later when conditions are more manageable.
That may feel unfinished at first.
The outdoor mat can wait. The chairs can stay folded. The bikes can remain secured. The water hose can be handled after everyone has cooled down if the immediate situation allows.
Keep an Eye on the RV Interior
The air conditioner needs time to pull heat from:
- interior air
- walls
- cabinets
- furniture
- flooring
- stored gear
A sun-heated RV may take time to become comfortable even when the system is working normally.
If the interior continues becoming dangerously hot or effective cooling cannot be established, use the backup plan rather than waiting indefinitely inside the RV.
Step 7: Reduce Heat Entering the RV
Once the AC is running, help it by reducing avoidable heat gain.
Cover Sun-Exposed Windows
Use the shades, curtains or reflective window coverings appropriate for the RV.
The windshield and other large glass areas can admit a substantial amount of solar heat.
Close coverings on the sides receiving strong direct sunlight.

Limit Unnecessary Door Opening
Repeated trips between the campsite and RV allow hot outside air to replace cooled interior air.
Bring frequently needed items inside in a few organized trips rather than making a separate trip for every object.
Reduce Indoor Cooking Heat
Ovens and stovetops add heat to a space that the AC is already trying to cool.
On the hottest days, consider meals that require less indoor cooking or use appropriate campground cooking facilities when outdoor conditions and fire rules allow.
Use Ventilation According to Conditions
When outside air remains hotter than the interior, opening windows and roof vents can bring additional heat inside.
Later in the evening, if outdoor air becomes cooler and conditions are suitable, ventilation may become more useful.
Follow the operating guidance for the RV's ventilation equipment.
Use the Awning Only When Conditions Allow
An awning can shade part of the RV and campsite.
Use it according to the manufacturer's instructions and only when wind and weather conditions are appropriate.
Shade is helpful. Reliable air conditioning and power remain the core cooling strategy in extreme heat.
What to remember: Once the RV is cooling, reduce the amount of new heat entering through direct sun, cooking and repeated door opening.
Step 8: Recognize Heat Exhaustion and Heat Stroke
Extreme heat can affect people before they realize how much strain has built up.
That is especially relevant during campsite arrival because the work often involves sun exposure, lifting, walking around the rig and concentrating on several tasks at once.
Possible Signs of Heat Exhaustion
Symptoms can include:
- headache
- nausea
- dizziness
- weakness
- irritability
- thirst
- heavy sweating
- elevated body temperature
If heat-exhaustion symptoms appear, stop the outdoor activity, move to a cooler environment and begin cooling. Seek medical evaluation or assistance as appropriate, particularly when symptoms are significant, persistent or worsening.
Possible Heat Stroke Is an Emergency
Warning signs can include:
- confusion
- altered mental status or unusual behavior
- slurred speech
- loss of consciousness
- seizures
- very high body temperature
If someone shows signs of possible heat stroke, seek emergency medical help immediately.
Do not wait for the campsite setup to be completed.
Keep the person with assistance and follow emergency-dispatch instructions while help is on the way.
Medical reminder: Heat-related illness can become serious quickly. When symptoms suggest possible heat stroke or a person's condition is rapidly worsening, use emergency medical services rather than relying on an RV cooling routine alone.
Step 9: Build a Backup Plan for Power Loss or AC Failure
An extreme-heat plan is incomplete until it answers one question:
Where will everyone go if this RV stops staying cool?
Build that answer before the trip.

If Shore Power Fails
Know whether the RV has another appropriate power source and what that source can actually run.
If a generator is part of the plan, follow its operating instructions and campground rules.
If the electrical system cannot support the required cooling, move to the next option.
If the Air Conditioner Fails
Possible backup locations may include:
- another air-conditioned vehicle
- a campground office or lounge
- a designated cooling center
- a library or community facility
- a shopping center
- a hotel
- another campground with confirmed electrical service
The correct choice depends on the location, operating hours, travel distance and who is traveling with you.
If the Entire Campground Loses Power
A large outage during extreme heat can affect many RVs at once.
Nearby hotels and alternate campgrounds may fill quickly.
Keep:
- an alternate campground in your phone
- a nearby indoor cooling location saved in your maps
- enough fuel to relocate
- important medications easy to access
- pet needs included in the relocation plan
Do Not Rely on an Unattended RV Staying Cool
If people or pets depend on the RV air conditioner, consider what happens if shore power trips or the AC stops while nobody is inside.
A running air conditioner at the moment you leave does not guarantee that the RV will remain cooled throughout an unattended period.
Plan around that possibility before leaving anyone dependent on the RV's cooling environment.
What to remember: Plan B should be a real destination, not simply “we'll figure something out if the AC stops.” Save the location and route before the trip.
Step 10: Use a Local Exterior View and Finish the Heat-Safety Walk-Around
Once everyone is cooling down and the essential setup is complete, finish one exterior check without turning it into another long work session.
Look at:
- shore-power connection
- electrical cord routing
- water connection
- leveling equipment
- tires
- awning position
- bikes and cargo
- camera mounts
- items exposed to direct afternoon sun
- the route between the RV and the campsite road
Use Solar4 Wifi for One Selected Nearby View
After parking, Solar4 Wifi can provide a live view of one selected exterior area on a compatible phone or tablet through its local WiFi connection.
Depending on the campsite, that selected view might include:
- the rear campsite area
- the utility side of the RV
- an exterior gear area
- another nearby area you want to glance at from inside
The phone or tablet needs to remain within the camera's local WiFi connection range.
Solar4 Wifi provides visual information only.
It does not measure temperature, detect an overheated electrical connection, verify that the AC is working or determine whether the campsite is safe in extreme heat.
Remember What Solar Assistance Means
Solar-assisted camera charging can help support the camera battery under suitable conditions.
It remains supplemental charging.
The camera's solar panel is unrelated to the electrical power required to cool the RV.
Reliable RV air conditioning, dependable power and a relocation plan remain separate requirements.
The Complete 10-Step Extreme-Heat RV Checklist
| Step | Before / During Arrival | Key Question |
|---|---|---|
| 1 | Check official heat alerts, smoke and roads | Is today's route still the right route? |
| 2 | Confirm campground power, shade and cooling options | Can this campground support the cooling plan? |
| 3 | Test AC, filters, generator and batteries | Does the equipment work before departure? |
| 4 | Choose a practical arrival window | Can the heaviest setup avoid the hardest heat period? |
| 5 | Inspect and park the RV | Are the site position, shade and utilities workable? |
| 6 | Establish cooling first | Are people and pets in a cooled environment? |
| 7 | Reduce indoor heat gain | Can direct sun and unnecessary heat sources be reduced? |
| 8 | Watch for heat illness | Is anyone showing symptoms that require cooling or medical help? |
| 9 | Activate Plan B if needed | Where will everyone go if power or AC fails? |
| 10 | Complete the exterior recheck | Are power, equipment and campsite surroundings still in order? |
AUTO-VOX Viewing Options for Hot-Weather Campsite Arrival
| Product | Viewing Need | Role During a Hot-Weather Arrival |
|---|---|---|
| Solar5B | Portable main rear view | Selected rear context during campground parking |
| Solar5B Dual-Camera Kit | Main rear + second movable angle | Rear plus another selected campsite perspective |
| Solar4 Wifi | Local phone / tablet view | Nearby exterior view after the RV is parked |
| Solar5B AI | Portable rear-view configuration | Additional option for low-speed RV parking needs |
Camera Options for Campsite Arrival and Exterior Views



Prices and configurations may change. Confirm the current product page, selected package, RV compatibility, mounting method and power requirements before purchase.
Common Extreme-Heat RV Camping Mistakes
Checking Only the Destination's Afternoon High
Look at the complete route, official alerts, overnight temperature, construction, smoke and alternate routes too.
Assuming the Campground Electrical Service Will Handle Your Setup
Confirm the service at the actual site and understand the electrical requirements of the cooling equipment before arrival.
Discovering AC Problems at the End of the Travel Day
Run and inspect the air-conditioning system before the trip and follow its normal maintenance schedule.
Finishing Every Campsite Chore Before Going Inside
In extreme heat, establish reliable cooling and get people and pets out of the heat before completing optional outdoor setup.
Relying on Fans as the Entire Extreme-Heat Plan
Fans can help with air movement and comfort in suitable conditions. A dependable extreme-heat plan should include effective cooling and access to an air-conditioned location if the RV becomes too hot.
Waiting for the AC to Fail Before Looking for Plan B
Save an alternate cooled location, route and campground before the trip.
Treating Solar-Powered Accessories as Backup RV Cooling Power
Solar-assisted charging on a portable camera supports that camera under suitable conditions. It does not power the RV air conditioner or replace dependable shore power, generator capacity or another appropriate cooling solution.
Frequently Asked Questions
How hot is too hot for RV camping?
There is no single temperature that answers this for every RV or traveler. Consider official heat alerts, humidity, overnight temperatures, individual health risks, the RV's actual cooling performance, electrical reliability and whether you have access to another cooled location. Delaying or changing the trip can be reasonable when reliable cooling cannot be maintained.
Can an RV air conditioner keep up in extreme heat?
Performance depends on the RV, air-conditioning system, maintenance condition, available electrical service, insulation, direct sun, outside temperature and other factors. Test the system before travel and have another cooled location available if the RV cannot maintain an appropriate interior environment.
Should I use a fan instead of the RV air conditioner to save power?
A fan can improve air movement in suitable conditions, but it should not be the only cooling plan during dangerous extreme heat. Use effective cooling and move to an air-conditioned location when the RV cannot remain adequately cooled.
What are common signs of heat exhaustion?
Possible symptoms include headache, nausea, dizziness, weakness, irritability, thirst, heavy sweating and elevated body temperature. Stop heat exposure, move to a cooler environment and seek medical evaluation or assistance as appropriate, especially if symptoms are significant or worsening.
When does heat illness become an emergency?
Possible heat-stroke signs include confusion, altered mental status, slurred speech, loss of consciousness, seizures and very high body temperature. Suspected heat stroke is a medical emergency and requires immediate emergency medical help.
Can Solar4 Wifi tell me whether campsite equipment is overheating?
No. Solar4 Wifi provides a live visual view of one selected nearby exterior area while the phone or tablet remains within the camera's local WiFi connection range. It does not measure temperature or determine whether an electrical connection, appliance or other piece of equipment is overheating.
Final Thoughts: Have Plan B Ready Before You Need It
Extreme heat makes an RV arrival easier to manage when the priorities are decided before the wheels stop moving.
Keep the sequence simple:
- Check the heat, smoke and route.
- Confirm the campground can support the cooling plan.
- Test the AC and power equipment before departure.
- Choose a more manageable arrival window when practical.
- Inspect the campsite and park carefully.
- Establish cooling and get people and pets out of the heat.
- Reduce unnecessary heat entering the RV.
- Recognize the signs of heat-related illness.
- Move to Plan B when power or cooling becomes unreliable.
- Finish one concise exterior and equipment check.
The most important part of the list is Step 9.
You should already know where you will go if shore power disappears, the campground electrical system cannot support the cooling load or the air conditioner stops working.
That destination might be another campground, a hotel, a library, a cooling center or another suitable air-conditioned location.
Save it in your phone before the trip.
Rear and local-view cameras can add selected visual context during parking and campsite checks. Their solar-assisted charging supports the camera itself. Reliable cooling, dependable electrical power and a workable relocation plan remain the tools that matter when extreme heat becomes the main travel condition.
Save this 10-step extreme-heat RV checklist to your phone before the next summer trip, and decide in advance where you will go if campground power fails, the air conditioner stops working, or the RV can no longer stay adequately cooled for the people and pets inside.


