


The rear of an RV may carry more value than it appears to at first glance.
A factory ladder may be attached to the upper rear wall. A bike rack may hold two bicycles several inches behind the bumper. A spare tyre, cargo carrier, storage box, tow bar, or generator rack may extend the vehicle even farther.
From the driver's seat, the RV body still looks like the main reference point. During backing, however, the first part approaching a tree, wall, parking post, or storage-bay door may be a bicycle wheel, ladder corner, cargo tray, or spare-tyre mount.
A slow contact can affect more than the accessory itself.
Force may transfer into the hitch receiver, mounting bolts, brackets, seals, rear body panel, paint, lights, or camera mount. A small bend in a rack can become a loose connection. A ladder impact can stress a sealed mounting point. A cargo carrier can contact a steep driveway before the rear bumper appears close to the ground.
These issues may also matter during a future sale. Visible damage, uneven repairs, loose accessories, and incomplete maintenance records may affect how a buyer evaluates the condition of the RV. That does not mean careful maintenance will preserve a specific resale price, but it can help present a clearer ownership history.
A multi-view RV backup camera system may help the driver see selected parts of the extended rear footprint. It cannot protect every component, judge distance to a precise measurement, or replace mirrors, a walk-around, and a visible spotter.
This guide explains how rear-mounted equipment changes the RV's dimensions, how small contact can affect mounting points and body panels, what drivers need to see during backing, and how to build a repeatable inspection and parking routine.
Quick Navigation
- Quick Rear-Gear Answer
- Identify Every Rear Accessory
- Understand the Updated Footprint
- Understand the Damage Chain
- Inspect Gear Before Travel
- Plan Stops Around the New Length
- Know What the Driver Needs to See
- Use a Repeatable Backing Routine
- Use CampSync D1
- Consider CampSync D1 Lite
- Compare WF4
- Consider a Portable Dual-Camera Kit
- Use the Inspection Checklist
- Frequently Asked Questions
Important: Camera views can support rear awareness, but they cannot show every high, low, side, and out-of-frame hazard around an RV. Continue using mirrors, direct observation, a walk-around, a visible spotter, and driver judgment. Follow the RV and accessory manufacturers' inspection, loading, mounting, and sealing instructions.
Quick Answer: How Do You Protect Rear-Mounted RV Gear?
Begin by treating every installed and loaded accessory as part of the RV's real footprint.
Measure the vehicle after the rack, bicycles, spare tyre, storage box, or cargo carrier is in place. Inspect the accessory and the points where it connects to the RV. Check that lights, reflectors, the licence plate, and camera views remain visible.
Before backing, walk the space and identify the farthest, widest, highest, and lowest points at the rear. Assign each camera view a specific job, keep the spotter visible, and stop when the image, clearance, or instruction becomes uncertain.
| Rear-Mounted Item | Easy-to-Miss Risk | First Inspection Point |
|---|---|---|
| Ladder | Upper corner approaches a tree, wall, or storage door | Standoffs, bolts, seals, and rear-wall movement |
| Bike rack | Bicycle wheels extend beyond the bumper | Receiver, pins, wheel trays, straps, and bicycle movement |
| Spare-tyre mount | Added length or blocked camera view | Bracket, fasteners, tyre security, and image obstruction |
| Cargo carrier | Low ground clearance on slopes and curbs | Load rating, tray condition, receiver, and locking hardware |
| Storage box | Box corners become first contact points | Base, hinges, latches, and mounting hardware |
| Rear bumper | Contact during turning or grade changes | Deformation, welds, paint, rust, and body connection |
| Hitch equipment | Low scraping or contact with the ground | Receiver, pin, lock, attachment, and clearance |
The protection plan should include the accessory, its mount, the body surface around it, and the route the RV must follow.
Step 1: Identify Everything That Extends Beyond the RV
The length printed in an RV brochure or registration document may describe the vehicle before aftermarket equipment and travel gear are added.
For parking and backing, the useful measurement is the loaded footprint.
Create a Rear-Accessory Inventory
List every component that changes the rear outline:
- factory or aftermarket ladder
- spare tyre and carrier
- bike rack
- loaded bicycles
- cargo tray
- storage container
- generator carrier
- tow bar
- hitch receiver and attached equipment
- rear bumper accessories
- camera and antenna mounts
Include removable items when they remain installed during travel.
Measure After Loading
Record:
- the rear wall to bumper distance
- the bumper to accessory distance
- the extension created by loaded bicycles
- the overall loaded length
- the widest rear accessory point
- the lowest hitch or carrier point
- the highest ladder or rack point
Keep the final length near the driver's seat with the RV height and width.
Do Not Forget the Bicycle Itself
A rack may fit within the bumper line while a bicycle wheel, handlebar, pedal, or frame extends farther.
Check both sides because the loaded width may be uneven. A handlebar turned during loading can move closer to a wall or neighbouring vehicle than expected.
Recheck After Every Configuration Change
Measure again after:
- adding another bicycle
- changing bicycle size
- replacing the rack
- adding a storage box
- changing the spare-tyre position
- installing a cargo tray
- adding a tow bar or hitch accessory
A familiar RV can become unfamiliar when the rear load changes.
Driver's tip: The bumper is no longer the stopping reference when another component extends behind it.
Step 2: Rear Accessories Change the Vehicle's Movement
Rear-mounted equipment changes more than the parked length. It changes which part of the RV reaches an obstacle first during a turn, slope transition, or backing maneuver.
The First Contact Point May Move Rearward
Depending on the setup, the first point may be:
- a bicycle wheel
- a rack arm
- a ladder corner
- a cargo-tray edge
- a storage-box corner
- a spare tyre
- a hitch-mounted accessory
The rear camera may still be aimed at the original bumper line. Recheck the image after loading to make sure the extended edge remains understandable.
Rear Overhang Swing Still Applies
When the front of a motorhome turns left, the rear overhang may move right. A right turn can move the rear overhang left.
Rear accessories extend that movement. The effect matters in:
- campground loops
- fuel stations
- storage facilities
- ferry staging lanes
- roadside parking
- residential driveways
- repair-shop entrances
The tow vehicle or front of the motorhome may clear an obstacle while the rear accessory continues moving toward it.
Grade Changes Reduce Ground Clearance
Low-mounted equipment can approach the ground at:
- steep driveways
- drainage dips
- raised campsite pads
- ferry ramps
- curbs
- storage-lot slopes
- road transitions
The rear bumper may remain clear while a hitch, cargo carrier, or generator tray scrapes the surface.
Loaded Gear Can Move
Road vibration may cause bicycles, straps, trays, and cargo to shift.
Movement can:
- bring a wheel closer to the RV
- change the loaded width
- loosen a strap
- increase movement at the receiver
- block a light or camera
- allow a pedal or handlebar to touch the body
Stop and inspect after rough roads or repeated vibration.
Step 3: Small Contact Can Affect More Than the Accessory
A scrape on the rack may be the visible result, but the force can travel into the parts that hold it in place.
| Initial Contact Area | Possible Related Damage |
|---|---|
| Bike-rack arm | Bent rack, receiver stress, loose pin, bicycle damage, or body contact |
| Ladder corner | Bent tubing, loose standoff, damaged sealant, or rear-wall stress |
| Spare-tyre mount | Bent bracket, loose hardware, rear-panel movement, or blocked camera |
| Cargo carrier | Bent tray, receiver stress, damaged cargo, or reduced ground clearance |
| Storage box | Cracked shell, damaged hinge, loose base, or moved mounting plate |
| Rear bumper | Paint damage, weld stress, deformation, nearby light damage, or body-panel contact |
| Camera mount | Changed angle, loose bracket, pulled wiring, or damaged seal |
Inspect the Mounting Points
After contact or heavy movement, inspect:
- bolts and nuts
- mounting plates
- welds
- hitch receiver
- ladder standoffs
- camera brackets
- sealant around fasteners
- nearby body panels
- electrical wiring
A loose fastener or cracked seal may require attention even when the accessory still looks straight.

Watch for Delayed Water Intrusion
Ladders, cameras, lights, and other components may attach through the rear wall.
If a contact moves the mounting point, the seal around the fastener can be affected. Water intrusion may appear later rather than at the time of impact.
Inspect the area using the RV manufacturer's recommended method and materials. Do not apply a random household sealant that may be incompatible with the roof or wall surface.
Check Nearby Lights and Wiring
Rear contact may pull or pinch wiring near:
- taillights
- marker lights
- licence-plate lights
- camera power leads
- trailer connectors
Test the lights and camera image before returning to the road.
Frame Resale Value Carefully
Visible damage, loose accessories, poorly repaired mounting points, and missing maintenance records may reduce buyer confidence during a later inspection.
Keeping clear photos, installation instructions, receipts, inspection notes, and repair records can help explain how the equipment was installed and maintained. These records do not promise a specific resale value.
Step 4: Inspect Rear-Mounted Gear Before Every Trip
A short inspection can identify movement before it becomes a larger problem.
Check the Accessory
Look for:
- cracks
- bent tubing
- rust
- loose joints
- damaged locks
- worn straps
- missing pins
- damaged wheel trays
- loose storage-box lids
- damaged cargo tie-down points
Check the Connection to the RV
Inspect:
- bolts
- mounting plates
- welds
- receiver movement
- ladder standoffs
- sealant
- body-panel movement
- camera and light wiring
Follow the accessory manufacturer's torque and maintenance guidance rather than tightening hardware by feel.
Check Lights, Plate, and Camera Visibility
Make sure the loaded gear does not block:
- brake lights
- turn signals
- marker lights
- reflectors
- the licence plate
- the rear-camera field of view
Requirements for lights and plates vary by location. Confirm the rules that apply to the route.
Check Every Load Rating
The accessory rating is not the entire capacity question.
Confirm:
- the RV bumper rating
- the hitch receiver rating
- the rack rating
- the cargo-carrier rating
- the weight of bicycles or cargo
- dynamic-load restrictions
- manufacturer restrictions on bumper-mounted equipment
A rack rated for a certain weight may still be unsuitable for an RV bumper or receiver with a lower rating.
Photograph the Loaded Setup
Take clear photos of:
- the complete rear view
- the left rear corner
- the right rear corner
- the hitch or receiver
- rack attachment points
- loaded bicycle positions
- the camera image
These photos make it easier to identify movement after a rough section of road.
Step 5: Plan Stops Around the Updated Rear Footprint
Route planning should account for the vehicle after the rear gear is installed and loaded.
Campsites
Check:
- site length
- rear clearance beyond the parking pad
- fire-ring position
- picnic-table position
- trees and branches
- utility posts
- space for removing bicycles
- whether the rack must remain loaded
- the exit route
A site that fits the RV body may still leave the bicycles or cargo carrier close to a tree or neighbouring campsite.

Garages and Covered Storage
Confirm:
- door height
- bay length
- distance to the rear wall
- garage-door tracks
- shelves and cabinets
- space for opening the storage box
- whether bicycles stay installed
Do not assume the RV is fully inside because the front clears the door.
Ferry and Transport Queues
Staging lanes and ramps may involve:
- tight spacing
- sudden grade changes
- staff-directed positioning
- length declarations
- limited room to reset
Include the loaded rear extension when reporting vehicle length.
Storage Lots
Inspect:
- neighbouring RV spacing
- posts and fences
- security barriers
- snow or debris buildup
- rear-wall clearance
- space to unload bicycles
Walk the storage position before backing into it.
Roadside and Scenic Parking
A rear rack should not extend into:
- a traffic lane
- a bicycle lane
- a pedestrian path
- an adjacent parking space
- landscaping
- a driveway
Choose a longer space or a perimeter area where the rear extension remains clear.
Step 6: What Drivers Need to See When Backing
Protecting rear-mounted gear requires more than watching the original bumper line.
| Viewing Area | Question for the Driver |
|---|---|
| Main rear line | What is the overall approach path behind the RV? |
| Lower rear area | How close are the bumper, hitch, rack, or carrier to the boundary? |
| Left rear corner | Is the left-side accessory edge moving toward an obstacle? |
| Right rear corner | Is the passenger-side corner near a post, tree, or vehicle? |
| Ground transition | Will a low hitch or carrier approach a slope, curb, or dip? |
Match the Camera Angle to the Gear
After loading a bike rack, storage box, spare tyre, or cargo carrier, check whether the camera:
- is blocked
- shows the accessory but not the ground behind it
- misses the farthest accessory corner
- moves because of vibration
- creates glare or reflection at night
- shows a misleading stopping line based on the original bumper
Adjust parking guidelines according to the product instructions and practise with cones. Guidelines remain visual references rather than precise measurements.
One Rear View May Not Answer Every Question
A farther rear view can help show the road and approach area. It may provide less detail around the hitch, rack, or parking boundary.
A lower rear view can help with the accessory area. It may provide less information about traffic farther behind.
Side views may add context around rear corners during a turn or angled backing.
Cameras Remain Awareness Tools
A camera may not show:
- the complete side of the RV
- the roof or ladder top
- hidden mounting points
- soft ground
- a person outside the frame
- the exact distance to an obstacle
- a cargo carrier approaching the ground outside the lens angle
Use direct inspection before the maneuver begins.
Step 7: Build a Rear-Gear Backing Routine
A repeatable routine reduces the chance that the group forgets the accessory extending farthest.
- Stop before the final parking position.
- Walk around the complete rear of the RV.
- Identify the farthest, widest, highest, and lowest accessory points.
- Check both rear corners.
- Inspect the ground, slope, curb, and drainage dips.
- Choose one primary spotter.
- Select the camera views needed for the maneuver.
- Move slowly enough to stop immediately.
- Stop if the spotter disappears.
- Stop if the image freezes or disconnects.
- Pull forward and reset when the angle becomes poor.
- Inspect the gear and mounts after parking.
Give the Spotter the Correct Reference Point
The spotter should watch the component extending farthest, not the original bumper.
That may be:
- a bicycle wheel
- the outer rack arm
- a ladder corner
- a storage-box edge
- a cargo tray
- a spare tyre
The spotter should also monitor the lowest component during a slope transition.
Stop After Any Contact
Do not move farther until the group understands what touched the obstacle and whether the mount, body, wiring, or seal has been affected.
Photograph the position and inspect the connection points before continuing.
Driver's tip: The spotter should watch the accessory that extends farthest, not the bumper the RV had before the accessory was installed.
Step 8: Use CampSync D1 for Multiple Rear Perspectives
For an RV with rear-mounted gear and difficult rear corners, the CampSync D1 multi-camera RV system uses three cameras with four lenses.
The configuration includes:
- one dual-lens rear camera
- one left-side camera
- one right-side camera
- a 7.2-inch multi-view display
Assign the Views to the Extended Rear Footprint
| CampSync D1 View | Rear-Gear Use |
|---|---|
| Farther rear lens | Show the rear approach and traffic behind the RV |
| Lower rear lens | Show the bumper, hitch, bike rack, cargo carrier, or spare-tyre area |
| Left-side camera | Add context around the left rear corner and turning swing |
| Right-side camera | Add context around the passenger-side corner and nearby posts |
Where the Multi-View Setup May Help
- backing into storage bays
- entering narrow campsites
- turning near posts or trees
- monitoring a bike rack or cargo carrier
- checking a spare-tyre mount
- comparing the close and farther rear areas
The selected views may help reduce blind spot uncertainty. They do not provide measurement-level precision, protect every accessory, or show the entire environment.
Power, Signal, and DVR
Wireless refers to video-signal transmission. The cameras and monitor still require appropriate DC power.
Actual signal performance depends on vehicle length, construction, antenna placement, interference, power stability, and installation.
CampSync D1 supports DVR loop recording with compatible local storage. An SD card is sold separately. Recording may help review available context but does not promise a legal, insurance, or responsibility outcome.
Step 9: When CampSync D1 Lite May Be Enough
An RV that mainly needs two rear perspectives may not require dedicated side cameras.
The CampSync D1 Lite dual-lens rear camera combines a farther rear view and a closer lower-rear view in one camera body.
D1 Lite May Suit an RV When
- the main concern is gear extending behind the RV
- the mirrors provide useful left and right side coverage
- side-marker camera installation is not suitable
- a bike rack or cargo carrier needs a close view
- the driver also wants to monitor the road behind
| Product | Rear Views | Side Views |
|---|---|---|
| CampSync D1 | Farther and closer rear perspectives | Left and right side cameras |
| CampSync D1 Lite | Farther and closer rear perspectives | No dedicated side cameras |
D1 Lite may help the driver compare the road behind with the accessory area. It still cannot show the complete left and right rear corners.
Wireless video requires camera and monitor power. Test the signal on the complete vehicle.
Where DVR recording is used, an SD card is sold separately. Recording may support later review but does not determine responsibility or repair costs.

Step 10: When WF4 May Fit Better
The multi-camera WF4 3-channel RV camera system combines one rear camera with two side cameras.
It may suit an RV where one rear view is sufficient and the larger concern is the left and right rear corners.
WF4 May Fit When
- rear-mounted gear extends toward one or both sides
- turning swing around posts is difficult to judge
- the RV frequently uses angled campsites
- one main rear view is suitable for the bumper or rack
- the vehicle supports rear and marker-light camera installation
WF4 supports single, dual, and triple display modes. Select the views relevant to the current maneuver rather than trying to monitor every image continuously.
Confirm Compatibility
Check:
- rear pre-wire and bracket
- side-marker positions
- DC 12V power
- camera angle
- monitor placement
- PWM power compatibility where relevant
Wireless refers to video transmission rather than power-free operation.
When DVR recording is used, an SD card is sold separately. Footage may provide context but does not promise a legal, insurance, or repair result.
Step 11: When a Portable Dual-Camera Kit Makes Sense
Some owners need flexible rear views without a fixed marker-light camera installation.
The Solar5B dual-camera kit combines one 7.2-inch monitor with two magnetic cameras.
A Portable Setup May Suit
- seasonal bike-rack use
- a temporary cargo carrier
- movement between different RVs
- a rented or borrowed vehicle with permission
- an RV without suitable side-marker camera positions
- one main rear view plus a movable gear view
Use the Second Camera for a Different Question
Possible positions include:
- the outer bike-rack corner
- the passenger-side rear corner
- the cargo tray
- the hitch
- a low rear boundary
The magnetic surface must be suitable, clean, and positioned away from direct branch contact. Recheck the mount after rough roads.
Solar charging provides supplemental charging. Check the battery and recharge manually when needed.
When DVR recording is used, an SD card is sold separately. Recording may help review available footage but cannot promise that every contact or accessory movement will be captured.
Rear-Mounted RV Gear Inspection Checklist
| Category | What to Check |
|---|---|
| Updated dimensions | Loaded overall length, width, highest point, and lowest point |
| Ladder | Bolts, standoffs, cracks, movement, and seals |
| Bike rack | Receiver, pin, trays, straps, bicycle movement, and load rating |
| Spare tyre | Bracket, fasteners, tyre security, and camera obstruction |
| Cargo carrier | Load, deformation, ground clearance, receiver, and tie-downs |
| Storage box | Base, hinges, latches, corners, and mounting hardware |
| Rear bumper | Deformation, welds, paint, rust, and body connection |
| Hitch | Receiver, pin, lock, attachment, and low-point clearance |
| Lights and plate | Brake lights, turn signals, reflectors, and licence-plate visibility |
| Camera | Lens, angle, mount, obstruction, signal, and power |
| Seals | Ladder, camera, light, and accessory mounting areas |
| Backing practice | Farthest edge, rear corners, slopes, ground clearance, and reset points |
| Records | Instructions, receipts, photos, maintenance notes, and repair documents |
Which AUTO-VOX Setup Fits Rear-Mounted RV Gear?
| Product | More Suitable For | Main View Structure |
|---|---|---|
| CampSync D1 | Close/far rear views plus left and right rear-corner context | Dual-lens rear + left side + right side |
| CampSync D1 Lite | Farther road view plus a close accessory-area view | Farther rear + closer rear |
| WF4 Multi-Camera | One rear view plus left and right corner context | Rear + left side + right side |
| Solar5B Dual-Camera Kit | Temporary or movable gear-view positions | Main rear + movable second view |
Camera Options for Rear-Mounted RV Gear


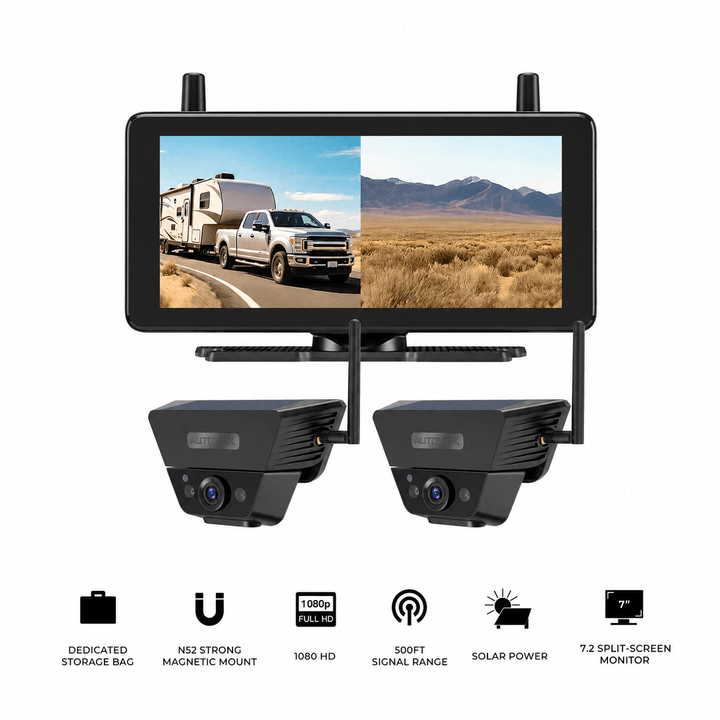
Prices, configurations, and availability may change. Confirm the current product page, RV compatibility, installation method, power circuit, and selected package before purchase.
Common Rear-Gear Protection Mistakes
Measuring the RV Before Adding the Rack
Use the overall dimensions after the rack, bicycles, storage box, or carrier is installed and loaded.
Watching the Bumper Instead of the Farthest Accessory
The stopping reference may be a bicycle wheel, rack arm, ladder, spare tyre, or cargo tray.
Ignoring Low Ground Clearance
A cargo carrier or hitch may contact a slope before the bumper appears close to the ground.
Assuming a Small Contact Damages the Rack Alone
Force may reach the receiver, mounting bolts, seals, body panels, lights, or wiring.
Forgetting That Bicycles Move
Road vibration can loosen straps and change the loaded outline.
Blocking the Rear Camera
A spare tyre, bicycle, or storage box may cover the area the driver expects to see.
Pointing Two Rear Lenses at the Same Area
Farther and closer rear lenses should answer different visibility questions.
Using Side Cameras as Mirror Replacements
Side cameras add selected context. Continue using mirrors and direct observation.
Skipping the Walk-Around
A camera cannot show every overhead, ground-level, and out-of-frame risk.
Continuing When the Image Freezes
A frozen image does not represent the current space. Stop and inspect directly.
Assuming Wireless Means Power-Free
Wireless refers to video transmission. The camera and monitor still need power.
Assuming DVR Decides Responsibility
Recording may provide useful context, but it does not determine liability, repair charges, or insurance treatment.
Promising Better Resale Value
Maintenance and clear records may support buyer confidence, but they do not promise a specific future price.
Frequently Asked Questions
What counts as rear-mounted RV gear?
Examples include ladders, spare tyres, bike racks, cargo carriers, storage boxes, generator racks, tow bars, hitch accessories, and rear cameras.
How do bike racks change an RV's length?
The rack and loaded bicycles extend beyond the original bumper. Bicycle wheels, pedals, or handlebars may become the farthest rear or side points.
Should I include bicycles when measuring the RV?
Yes. Measure the complete loaded setup in the configuration used during travel.
Can a bike rack damage an RV bumper?
A rack can transfer movement and load into the bumper, hitch receiver, or mounting points. Use a rack and connection method approved for the RV and load.
How can ladder damage affect the RV body?
A ladder impact may bend the ladder, loosen standoffs, stress the rear wall, or affect sealant around mounting points.
Can a spare tyre block a backup camera?
Yes. The tyre or carrier may block part of the image or change which area the camera shows. Recheck the view after installation.
How do I protect a cargo carrier on steep driveways?
Know the carrier's lowest point, approach slowly, use a spotter where helpful, and stop when the grade transition is uncertain.
What should I inspect on an RV bike rack?
Check the receiver, pin, locks, frame, wheel trays, straps, bicycle position, load rating, movement, and clearance from the RV body.
How often should rear-mounted accessories be checked?
Inspect before each trip, during long travel days, after rough roads, after severe weather, and after any contact or unusual movement.
Can rear-accessory damage affect resale value?
Visible damage, loose mounting points, poor repairs, and incomplete records may affect buyer confidence. The effect on a future selling price depends on many factors.
What should a rear camera show when a bike rack is installed?
The useful view depends on the setup. It may need to show the rack's farthest edge, the ground behind it, the rear approach, or a separate side corner.
Is one rear camera enough for rear-mounted gear?
It may be enough for a straightforward rear need. Two rear angles or rear-and-side views may be useful when the gear creates several difficult-to-see areas.
What is the difference between a far and close rear view?
A farther rear view shows the road and approach area. A close rear view focuses on the bumper, hitch, rack, carrier, or parking boundary.
Do side cameras help with rear corners?
They can add selected visual context around left and right rear areas during turns and angled backing. They do not show the complete environment.
What is the difference between CampSync D1 and D1 Lite?
CampSync D1 Lite uses one dual-lens rear camera. CampSync D1 adds left and right side cameras to the dual-lens rear configuration.
Does WF4 fit every RV?
No system should be assumed to fit every vehicle. Check the pre-wire, marker-light positions, power, mounting space, PWM compatibility, and product instructions.
Do wireless RV cameras still need power?
Yes. Wireless describes video-signal transmission. The camera and monitor still require appropriate power.
Do solar cameras still need manual charging?
Yes. Solar charging is supplemental and varies with sunlight, weather, mounting angle, shade, and use.
Is an SD card required for DVR recording?
Compatible local storage is required where DVR recording is used. An SD card is sold separately unless the current product package explicitly states otherwise.
Can a camera promise that a bike rack will not be damaged?
No. It can provide selected additional views, but the driver must still inspect the full area, monitor the accessory, and stop when clearance is uncertain.
What should I do after a rear accessory contacts an obstacle?
Stop, photograph the position, unload if needed, and inspect the accessory, mount, receiver, body surface, wiring, lights, and seals before continuing.
Should I remove bicycles before storing the RV?
Follow the storage facility and rack manufacturer's guidance. Removing bicycles may reduce rear length, load, weather exposure, and obstruction during long-term storage.
Final Thoughts: Protect the Parts You Added After Buying the RV
Protecting rear-mounted equipment is not simply about avoiding a scratch on the rack.
It begins with understanding how the accessory changes the RV's dimensions and how contact can transfer force into mounting points, seals, wiring, lights, and body panels.
Record every rear accessory. Measure the loaded footprint. Check the farthest, widest, highest, and lowest points. Inspect the accessory and the RV surface where it connects.
Before backing, walk the space and choose the views that answer the real questions. A farther rear lens may show the approach. A lower rear lens may show the rack or hitch. Side views may add context around the rear corners.
Keep the spotter visible and stop when the image, instruction, or clearance becomes uncertain. After rough roads or contact, check the mount rather than looking at the accessory surface alone.
Keep installation records, inspection photos, receipts, and repair documents. These records may support a clearer future condition assessment without promising a specific resale value.
- List every rear-mounted accessory.
- Measure the RV after loading.
- Inspect the accessory and its connection points.
- Check lights, the licence plate, and camera visibility.
- Map the farther rear, close rear, left corner, and right corner.
- Walk unfamiliar parking areas.
- Keep the spotter visible.
- Inspect mounts and seals after contact.
- Save maintenance and repair records.
Measure what you added, inspect where it connects, and make the extended rear edge part of every backing plan.


