


Opening an RV slide-out feels like one of the easiest parts of setting up camp.
You park, level the rig, press a switch, and a few seconds later the interior feels dramatically larger.
The problems usually appear when one of those steps gets rushed.
A campsite may have enough room for the closed RV while leaving too little space for the slide once it extends. A tree trunk can sit just outside the driver's view. A utility pedestal may be farther into the slide path than it looked from the cab. Inside, a rug, chair or open cabinet door can create another kind of obstruction.
Then there are the mechanical and electrical problems: the slide does nothing when you press the switch, moves slowly, stops halfway, makes a new clicking sound or begins moving unevenly from one side to the other.
Those are two different situations, and they deserve two different checklists.
The first happens before the slide moves: confirm the space, the RV position and the operating conditions.
The second begins when the slide behaves abnormally: stop, check the simple causes first, and move toward professional service when the problem goes beyond a basic inspection.
This guide covers both sides of the process so you can approach an RV slide-out with a repeatable routine rather than guessing every time something feels wrong.
Quick Navigation
- Quick Slide-Out Checklist
- Part 1: Check Clearance First
- 1. Walk the Slide-Out Area
- 2. Add a Selected Side View
- 3. Use a Local Phone View
- 4. Confirm Operating Conditions
- Part 2: Troubleshooting
- 5. Check Power
- 6. Check Switch, Fuse and Breaker
- 7. Check for Obstructions
- 8. Watch for Uneven Movement
- 9. Recognize Mechanical Warning Signs
- 10. Know the Manual Retraction Procedure
- When to Call for Service
- Slide-Out Maintenance
- Frequently Asked Questions
Important: RV slide-out systems vary widely. Operating conditions, power requirements, leveling procedures, manual override methods and maintenance instructions should come from the manual for your specific RV and slide mechanism. Stop using the slide when movement becomes abnormal or when an electrical or structural problem is suspected.
Quick Answer: What Should You Check Before Extending an RV Slide-Out?
Before pressing the slide switch, make sure the RV is in its final position and the complete extension area is clear inside and outside.
| Before You Press the Switch | What to Check |
|---|---|
| RV position | The rig is parked where the fully extended slide will have enough room |
| Operating condition | Parking, leveling, brake, ignition and power conditions match the RV manual |
| Outside clearance | Trees, branches, posts, pedestal, fence, neighboring RVs and campsite equipment |
| Inside clearance | Furniture, rugs, bags, drawers, cabinet doors, bedding and loose gear |
| Power | Battery and shore-power conditions meet the system requirements |
| Slide path | Seals, visible tracks and surrounding areas are free of debris or obstruction |
| Movement | The slide moves smoothly and both sides appear to stay synchronized |
| Sound | No new grinding, repeated clicking, binding or other unusual noise appears |
If the slide does nothing, moves unevenly or sounds different from normal, release the switch and inspect the basic causes before trying again.
Part 1: Check the Space Before the Slide-Out Moves
A slide-out clearance problem often begins with the original parking position.
The RV fits inside the campsite, so the parking job feels finished.
Then the slide starts extending toward a tree, utility pedestal, fence or neighboring RV.
The better time to think about slide clearance is while the vehicle is still being positioned.
Park for the Expanded RV
Picture the campsite after the setup is complete.
That footprint can include:
- one or more slide-outs
- awning
- entry steps
- entry door
- exterior storage doors
- outdoor kitchen or entertainment equipment
- utility hoses and cables
A few inches of parking adjustment can make a major difference once everything opens.
| Area | What to Check Before Extending |
|---|---|
| Trees | Trunk position, branches and the complete path of the slide |
| Utility pedestal | Slide edge, service access and attached cords |
| Fence or post | Full extension path rather than only the current body clearance |
| Neighboring RV | Its body, slide-outs, awning and shared space |
| Picnic table | Slide path and usable outdoor space |
| Ground area | Gear, hoses, blocks, debris and anything near the lower mechanism |
| Awning | Make sure the slide and awning systems have suitable surrounding space |
What to remember: Judge the campsite by the RV's fully expanded footprint while the vehicle is still easy to reposition.
Step 1: Walk the Full Slide-Out Area
Once the RV reaches its intended parking position, get out and walk around it before touching the slide switch.
This is one of the simplest checks in the entire setup process.
Stand beside each slide and look at the space it will occupy from several angles.
Check the Outer Edge
Look for:
- tree trunks
- posts
- utility pedestals
- fences
- neighboring RVs
- neighboring slides
- campground structures
Look Above the Slide
A clear side wall can still have a branch hanging into the upper extension area.
Check:
- branches
- roof-level obstructions
- neighboring awnings
- anything attached to a nearby structure

Look Near the Lower Edge
The lower area deserves attention too.
Look for:
- camping gear
- chairs
- hoses
- electrical cables
- leveling blocks
- rocks
- sticks and other debris
Check Inside the RV
Before operating the slide, walk through the room and clear the interior path.
Common problems include:
- a rug folded into the slide path
- a chair that shifted during travel
- a bag resting against the slide
- an open drawer
- a cabinet door left open
- bedding or cushions in the mechanism's path
- pet toys or other loose items on the floor
A full clearance check covers both sides of the wall.
Once the outside and inside paths are clear, the slide can be operated under the conditions specified for that RV.
Step 2: Add a Selected Side View When Positioning the RV
Some campsites make one side of a large RV difficult to judge from the driver's seat.
The passenger-side slide may face a tree line. A pedestal may sit close to the rear corner. The final parking position may leave very little margin for moving the RV again after leveling begins.
A second camera angle can provide another selected view while the rig is being positioned.
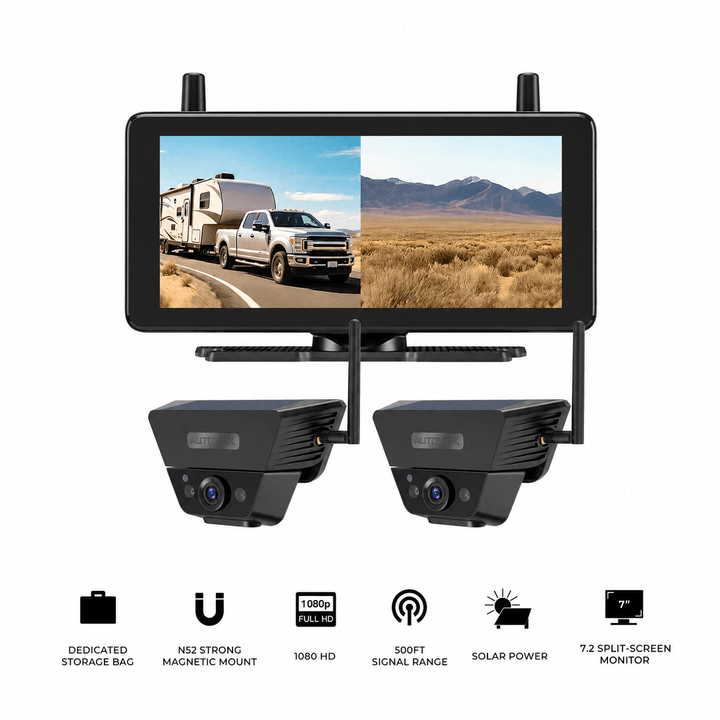
The Solar5B Dual-Camera Kit combines a dedicated monitor with two cameras.
One can remain focused on the normal rear approach while the second camera is positioned, where the vehicle and mounting surface allow, toward an area such as:
- the passenger-side slide area
- the utility pedestal
- a tree near the campsite edge
- the rear corner beside the slide
- another selected side reference point
The extra view can be useful while deciding where the RV should stop.
After parking, direct inspection still provides the final clearance check before the slide moves.
Camera images are visual references and do not provide an exact physical clearance measurement.
What to remember: Use an extra camera to keep a difficult area visible while positioning the rig, then confirm the actual slide clearance outside.
Step 3: Use a Local Phone View for One Selected Side Area
A portable phone-based camera can be useful when you want to keep one side of the RV visible without adding another permanent monitor.
Solar4 Wifi sends a live image to a compatible phone or tablet through AUT VIEW.
For campsite positioning, the camera can be aimed toward a selected area such as:
- the passenger-side slide zone
- a utility pedestal
- a tree line
- a campsite boundary
The phone or tablet needs to remain within the camera's local WiFi connection range.
The direct connection works without an external cellular network or internet service once the local camera-to-device connection is established.
That makes it useful at campgrounds where mobile coverage is weak.
It also keeps the role of the camera simple: provide a live view of one selected area while the RV is being positioned or rechecked.
Final slide clearance should still be confirmed directly before operation.

Remember the Power Routine
Solar4 Wifi uses a rechargeable battery with solar assistance and USB-C charging.
Solar charging is supplemental. Sunlight, shade, temperature, camera use and mounting angle can affect battery level, so include the charge status in the normal pre-trip check.
Local-view reminder: Solar4 Wifi provides nearby live viewing through its local WiFi connection. Keep the viewing device within connection range and use the image as visual context rather than a clearance measurement.
Step 4: Confirm the RV Is Ready for Slide-Out Operation
Once the physical space is clear, check the operating conditions specified for the RV.
This step varies more than many owners expect.
Depending on the vehicle and slide mechanism, the manufacturer's sequence may specify conditions involving:
- parking brake
- transmission position
- ignition state
- RV leveling
- house battery condition
- shore-power connection
- travel locks
- other safety interlocks
Use the procedure written for the exact motorhome, travel trailer, fifth wheel or slide-out system.
A rule remembered from a different RV may not apply to the one parked in front of you.
Keep the Manual Easy to Find
It helps to keep a digital or paper copy of the relevant slide-out instructions with the RV.
Before a trip, know where to find:
- normal extension procedure
- normal retraction procedure
- fuse or breaker information
- manual retraction instructions
- manufacturer troubleshooting guidance
- service contact information
Those details are much easier to locate at home than when a slide is stuck halfway out at a campsite.
Part 2: What to Check When an RV Slide-Out Does Not Move Normally
You press the switch and nothing happens.
Or the slide starts moving, slows down and stops.
Maybe one side moves farther than the other, or a familiar motor sound has been replaced by repeated clicking or grinding.
This is the point to stop and observe.
Repeatedly holding the switch can add load to a system when the cause is still unknown.
Begin with the simple checks you can perform without dismantling the mechanism.
Step 5: Check the Power Supply First
Slide-out mechanisms often place a significant demand on the RV's electrical system.
When a slide has no response or begins moving unusually slowly, power is one of the first things to check.
Start With the Basic Power Questions
Depending on the system, confirm:
- house battery state
- shore-power connection
- battery disconnect or master switch position
- visible battery connection condition
- other power conditions specified by the manufacturer
A weak electrical supply can show up in several ways:
- no movement
- slow movement
- movement that stops partway
- a motor sound that seems weaker than normal
Use the RV's normal battery monitor or manufacturer-recommended test procedure to assess the power condition.
If the issue involves damaged wiring, overheating, exposed conductors or an electrical fault you cannot identify safely, move to professional diagnosis.
Step 6: Check the Switch, Fuse, and Circuit Protection
If the available power appears normal, move to the next simple controls in the circuit.
Observe the Switch Behavior
Notice what happens when you operate the control normally.
Useful clues include:
- no response in either direction
- intermittent response
- extension works while retraction does not
- retraction works while extension does not
- a click is heard elsewhere in the system
Record the symptom rather than repeatedly cycling the switch.
Check the Correct Fuse or Breaker
Use the RV or slide-system manual to identify the appropriate fuse, breaker or reset device.
Look for:
- a blown fuse
- a tripped breaker
- an accessible reset device in the state described by the manual
Replace a fuse only with the specified rating.
A fuse that blows again or a breaker that repeatedly trips is useful diagnostic information. Repeated failure points to an underlying problem that needs attention.
What to remember: A repeated fuse or breaker failure deserves diagnosis rather than another series of resets.
Step 7: Look for Anything Blocking the Slide Path
A slide can have power and still struggle because something is physically interfering with movement.
Check inside and outside before assuming the motor or drive mechanism has failed.
Inside the RV
Look for:
- rugs
- chairs
- bags
- drawers
- cabinet doors
- bedding
- pet items
- loose travel gear
An item that moved only a few inches during travel can end up exactly where the slide needs to move.
Outside the RV
Check the visible slide path and surrounding mechanism for:
- sticks
- stones
- leaves
- dirt buildup
- campground debris
- objects placed beside the RV after parking
Inspect the Seals
Look around the accessible slide seals for:
- folding or bunching
- trapped material
- visible tearing
- debris along the sealing surface
If the slide is already partway open and stops unexpectedly, release the control first and inspect the area before another attempt.

Step 8: Watch for Uneven Movement, Skewing, or New Noises
A healthy slide-out movement becomes familiar over time.
You get used to the sound of the motor, the speed of travel and the way both sides reach the end of their movement.
A sudden change deserves attention.
Stop and Check When You Notice:
- one side starting noticeably ahead of the other
- the slide appearing crooked in the opening
- one corner lagging behind
- repeated clicking
- grinding
- jerky movement
- movement becoming much slower than normal
- the slide stopping partway
- an unusual gap after extension or retraction
These symptoms can relate to alignment, synchronization, drive components or another mechanical issue.
The correct diagnostic procedure depends on the slide mechanism.
This is a good point to consult the model-specific troubleshooting section rather than trying to adjust tracks, gears or synchronization points from generic instructions.
What to remember: Uneven movement is information. Stop while the symptoms are still easy to observe and identify.
Step 9: Recognize Signs That the Motor or Mechanism Needs More Attention
Power and obstruction checks can rule out several simple causes.
When the problem remains, the motor or mechanical drive system may need closer diagnosis.
Possible warning signs include:
- repeated clicking with little or no movement
- grinding from the mechanism
- the slide stopping at the same point repeatedly
- slow movement despite normal power conditions
- visible track or gear damage
- strong side-to-side movement differences
- the slide failing to seat correctly when closed
At this stage, identifying the slide mechanism matters.
RV slide-outs can use different drive systems, and the service procedure for one design may be inappropriate for another.
A technician or manufacturer support team will usually need details such as:
- RV make and model
- slide-system make and model
- what happens when the switch is pressed
- where the slide stops
- what sound is present
- whether both sides move evenly
- which basic power and obstruction checks have already been completed
Taking a short video of the symptom can also make a service conversation easier.
Step 10: Know the Manual Retraction Procedure Before You Need It
A slide that will not retract can quickly turn a campground problem into a travel problem.
Many slide systems provide some form of emergency or manual retraction procedure.
The method varies considerably between mechanisms.
Depending on the system, the manual may describe:
- a crank point
- a wrench or socket connection
- motor access
- a release procedure
- another system-specific override
Find that section of the manual before the trip and identify the required access point and tool.
Keep the Right Information With the RV
A useful slide-out emergency file can include:
- RV owner's manual
- slide-system manual
- slide model number
- fuse and breaker information
- manual retraction instructions
- required override tool
- manufacturer or service contact
Follow the specified procedure exactly.
Forcing a slide by hand or improvising an override without knowing the mechanism can create additional damage or personal injury risk.
When to Stop Troubleshooting and Call for Service
Basic troubleshooting is most useful when the problem is simple and visible.
Some symptoms point toward electrical, mechanical or structural work that belongs with a qualified technician.
Arrange professional diagnosis when you find:
- a fuse that repeatedly fails
- a breaker that repeatedly trips
- burning smell
- overheated wiring or connectors
- visible wiring damage
- severe slide skew
- structural movement around the opening
- grinding from the drive mechanism
- damaged tracks or gears
- a slide that cannot be secured safely for travel
- persistent water intrusion around the slide structure
- a problem that remains after the basic checks in the manual
At that point, continued switch operation may make diagnosis harder and increase the load on already stressed components.
Document what happened, leave the slide in the safest condition available, and follow the manufacturer's service guidance.

Prevent Slide-Out Problems With a Simple Maintenance Routine
Slide-out maintenance works best when it is part of the normal RV routine rather than something saved for the first failure.
Keep Accessible Areas Clean
Leaves, grit and campsite debris can collect around seals and visible slide components.
Clean the areas specified by the manufacturer and inspect them before long trips.
Inspect the Seals
Look for:
- tears
- hardening
- areas that no longer sit correctly
- debris trapped against the sealing surface
- signs of water entry
Catching seal deterioration early can make it easier to address before interior water damage develops.
Follow the Correct Lubrication Guidance
Slide mechanisms have different maintenance requirements.
Use only the lubricant and maintenance procedure specified for the actual slide system.
Applying a generic lubricant to every visible track can attract dirt or conflict with the manufacturer's instructions.
Watch the Hardware and Movement
During normal use, pay attention to:
- visible fasteners
- brackets
- wiring
- seals
- changes in slide speed
- new sounds
- changes in how evenly the slide moves
Small changes are easier to investigate before they become a campsite failure.
When a Larger RV Needs More Side Context During Parking
Slide clearance starts with the final parking position, so larger RVs may benefit from more rear and side context while the rig is being placed.
The CampSync D1 uses three cameras and four lenses: one dual-lens rear camera plus two side cameras.
The two rear perspectives can provide farther and closer rear context, while the left and right cameras add selected side views.
The WF4 multi-camera setup uses one rear camera and two side cameras, with single, dual and triple display modes.
These layouts can provide additional context when positioning a large motorhome, fifth wheel or travel trailer in a campsite where both sides matter.
The camera views remain part of the parking process. The final slide-out clearance check happens outside the RV before the slide moves.
Wireless on these systems refers to video-signal transmission. The cameras and monitor still require their supported electrical power.
RV Slide-Out Clearance and Troubleshooting Checklist
| Stage | Check |
|---|---|
| Parking | Plan for the complete slide-out extension before finalizing the RV position |
| Outside clearance | Check trees, branches, pedestal, fence, neighboring RV and campsite equipment |
| Inside clearance | Check rugs, furniture, bags, drawers, doors and loose gear |
| RV condition | Follow the model-specific parking, leveling, brake, ignition and power requirements |
| Camera view | Use selected views as additional visual references during RV positioning |
| Power | Check house battery, shore power and applicable system switches |
| Control | Observe switch response without repeatedly cycling an abnormal system |
| Fuse / breaker | Check the specified circuit protection and correct rating |
| Slide path | Look for debris, interior objects and seal interference |
| Movement | Watch whether both sides move evenly |
| Sound | Listen for new grinding, repeated clicking, binding or unusual noise |
| Manual override | Follow the exact procedure for the installed slide mechanism |
| Maintenance | Inspect seals, accessible hardware, cleanliness and movement regularly |
| Service | Stop when structural, electrical or significant mechanical problems appear |
AUTO-VOX Viewing Options for RV Positioning and Slide-Side Checks
| Product | Useful Viewing Need | Role in This Setup |
|---|---|---|
| Solar5B Dual-Camera Kit | Main rear + selected movable angle | Keep one difficult side area visible while positioning the RV |
| Solar4 Wifi | Local phone or tablet view | View one selected side area through a local WiFi connection |
| CampSync D1 | Farther/closer rear + left/right side context | Multi-view positioning option for larger rigs |
| WF4 | Rear + left/right side context | Three-camera option for compatible larger RVs and trailers |
Camera Options for RV Positioning and Side-Area Checks


Prices and configurations may change. Confirm the current product page, RV compatibility, mounting position, selected configuration and power requirements before purchase.
Common RV Slide-Out Mistakes
Parking for the Closed RV
The slide's full extension changes the campsite footprint. Include that space while positioning the RV.
Checking Clearance Only From Inside
The driver may have no clear view of a tree, pedestal or neighboring slide. Walk outside before operation.
Treating a Camera Image as a Measurement
A camera can help you see a selected area. Physical clearance still needs direct confirmation.
Pressing the Switch Repeatedly When Nothing Happens
Pause and check the power supply, control circuit, fuse or breaker and visible obstructions first.
Continuing When the Slide Moves Unevenly
A side that begins lagging or running ahead can be a sign of alignment, synchronization or mechanical trouble. Stop and identify the system before continuing.
Using a Generic Manual Override Method
Manual retraction procedures vary by slide mechanism. Use the instructions for the installed system.
Applying Lubricant Without Checking the Manual
Different mechanisms have different maintenance requirements. Use only the specified product and procedure.
Frequently Asked Questions
How much clearance does an RV slide-out need?
There is no useful universal clearance number for every RV. Use the actual extension dimensions for the specific slide and confirm the full area outside the RV. Include trees, branches, pedestals, posts, fences, neighboring rigs and outdoor equipment in the check.
Should an RV be level before extending the slide?
Follow the operating instructions for the specific RV and slide system. Many manufacturers specify parking, leveling or stabilization conditions before slide operation, and the required sequence can vary between rigs.
Why is my RV slide-out not moving?
Basic causes can include insufficient power, battery condition, an incorrect operating condition, a switch issue, a fuse or breaker problem, an obstruction or a mechanical fault. Start with the simple checks described in the RV manual and stop if the system shows signs of electrical or mechanical damage.
Why is one side of my RV slide moving faster than the other?
Uneven movement can be associated with alignment, synchronization or drive-system problems. Release the control when the movement becomes visibly uneven and consult the troubleshooting procedure for that specific slide mechanism.
Can I manually retract an RV slide-out?
Many systems include an emergency or manual retraction procedure. The method depends on the mechanism, so locate the exact instructions, access point and required tool in the RV or slide-system manual before attempting it.
Can a backup camera tell me whether a slide has enough clearance?
A camera can provide a live view of a selected side or rear area while the RV is being positioned. It cannot provide an exact physical clearance measurement. Walk outside and directly confirm the slide's full extension area before pressing the switch.
Final Thoughts: Check the Space Before You Touch the Switch
RV slide-out problems become much easier to manage when clearance and troubleshooting are treated as two separate routines.
Before extension, focus on the campsite and the operating conditions:
- Park for the fully expanded RV.
- Walk the complete slide-out area.
- Check inside for loose objects and obstructions.
- Use an additional camera view where it helps with RV positioning.
- Confirm the final clearance directly.
- Follow the operating conditions specified for the RV.
- Watch and listen while the slide moves.
If something feels wrong, release the switch and move into troubleshooting:
- Check the available power.
- Check the normal controls and applicable fuse or breaker.
- Inspect the inside and outside paths for obstruction.
- Watch for uneven movement or skewing.
- Listen for clicking, grinding or other new sounds.
- Use the model-specific manual for further diagnosis.
- Follow the specified emergency retraction procedure when required.
- Arrange professional service for electrical, structural or significant mechanical problems.
A calm inspection usually provides more useful information than another series of switch presses.
Check the space first, operate the slide under the conditions specified for your RV, and stop when movement becomes uneven or abnormal. Save this checklist for the next campground setup so clearance checks and troubleshooting follow the same reliable sequence every time.


