



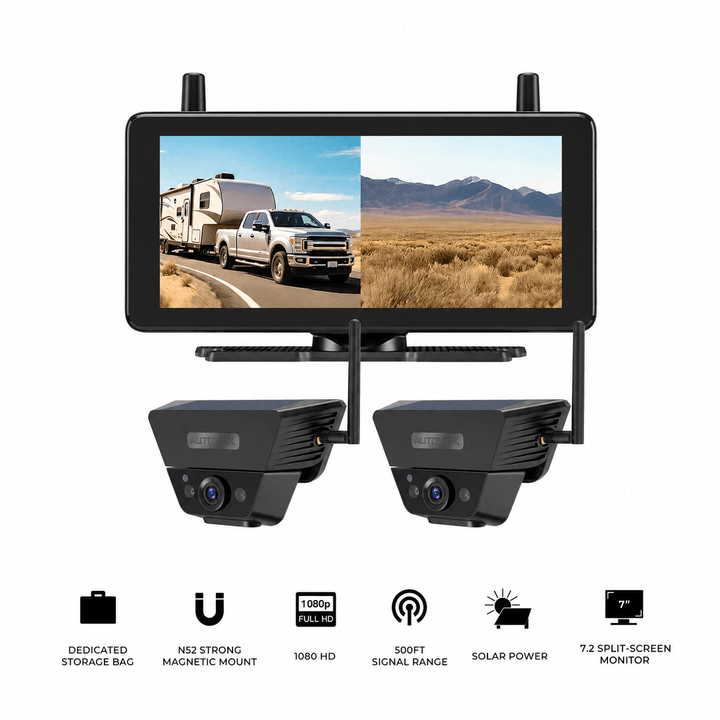


Ist die Installation einer AUTO-VOX Rückfahrkamera kompliziert?
exklusiv für australien · frühlingsaktion
Frühlingsausflüge. Bessere Sicht.
Mit Rückfahrkameras von AUTO-VOX sind Sie bereit für Roadtrips und Campingabenteuer.

neuheit
die nächste generation:
wlan-rückfahrkamera
Kein zusätzlicher Monitor am Armaturenbrett, kein Kabelverlegen. HD-Live-Bilder direkt auf Ihrem Smartphone.


Von führenden deutschen Technikmedien als „Beste Rückfahrkamera“ ausgezeichnet.
in deutschland als „beste rückfahrkamera“ ausgezeichnet
Von FAZ und Heise auf Platz 1 bewertet. Unsere meistverkaufte kabellose 1080P-Solar-Kamera lässt sich universell in nur 3 Minuten montieren.

Solar5B AI
Intelligent zurücksetzen,
übersichtlicher rangieren
Der intelligente Rückfahrassistent erkennt Fußgänger und Fahrzeuge automatisch und hilft, auch auf engem Raum den Überblick zu behalten.

Über AUTO-VOX
Mehr als 500.000 Fahrer weltweit vertrauen uns.
Seit 2007 entwickeln wir kabellose und solarbetriebene Technik für mehr Fahrzeugsicherheit. Für einen besseren Blick nach hinten.

Weltweiter Versand
In mehr als 20 Ländern erhältlich.
SUPPORT RUND UM DIE UHR
Support rund um die Uhr, wann immer Sie ihn benötigen.
100 % SICHERE ZAHLUNG
Offizielle Shopify-Zahlungsabwicklung mit garantierter 100 % sicherer Zahlung.
30-Day Return Policy
Support 30-day no-reason return and exchange.
Schnell zum passenden Modell

Mit DVR-Aufzeichnung
Für Pkw und SUVs
Für Wohnmobile
Für Anhänger
Mehrkamerasysteme
Rückspiegel
Schnell zum passenden Modell
Rückfahrkameras

Dashcam

CarPlay

Für Pkw und SUVs

Für Wohnmobile und Reisemobile

Für Anhänger

Rückfahrkamerasystem mit mehreren Kameras

Rückfahrkamerasystem mit DVR-Aufzeichnung
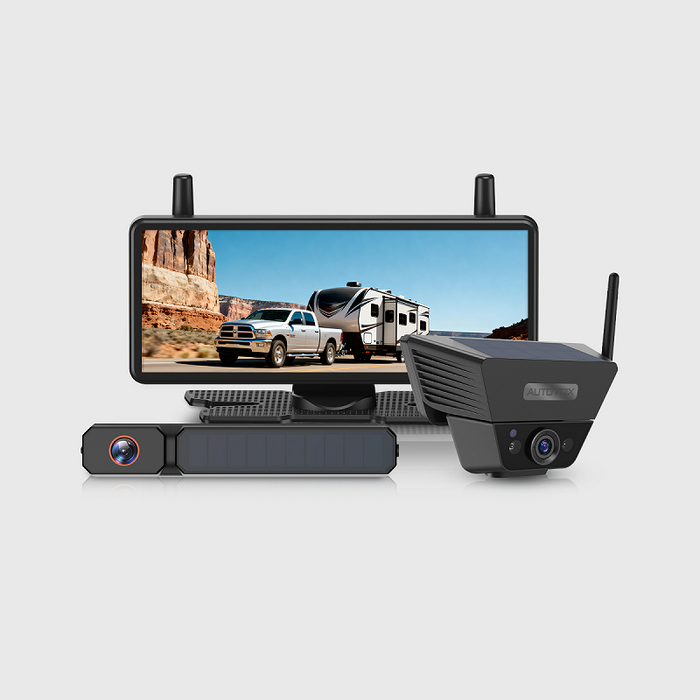
Rückfahrkamera mit Spiegelmonitor
Unsere Empfehlungen für jeden Fahrer
Nach Kategorie einkaufen
Camping und Wohnmobilreisen
Frei entdecken. Entspannt einparken.

Fahren mit Anhänger
Ankuppeln. Sicher rückwärtsfahren.

Tägliche Fahrten
Einfach parken. Den Überblick behalten.

Stromversorgung und Verbindung

Solar-Serie
Flexibel dank Solarenergie. Ohne Kabelverlegen. In nur 60 Sekunden montiert, ohne Bohren und ohne Werkstattkosten. Kontinuierliche Solarladung und eine besonders stabile Signalübertragung machen die Nachrüstung unkompliziert.

Kabellose Serie
Klare HD-Live-Bilder. Stabiles Signal. AutoLink™-Technologie mit 2,4 GHz ermöglicht eine verzögerungsarme 1080P-Live-Übertragung auch bei langen Fahrzeugen. Anschließen, einschalten und mit klarem Überblick losfahren.

Kabelgebundene Serie
Bewährte Verbindung, zuverlässige Übertragung. Die feste Kabelverbindung liefert jederzeit Live-Bilder ohne Funkstörungen. Entwickelt für Familien, die auf gleichbleibende Leistung und Langlebigkeit Wert legen.

Bekannt aus
Das Bild ist hell und gestochen scharf, sodass auch Details wie Kennzeichen lesbar sind.


Testsieger ist die Auto-Vox Solar 3A Plus: stabile Signalübertragung und tolle Bildqualität, bei Tag und Nacht.

In der Wohnmobil-Community von Harvest Hosts als Begleiter für unterwegs bekannt.

T9Pro: Das Bild ist so klar, als würde man es mit eigenen Augen sehen.

Dank kabelloser Anbindung lässt sich die Rückfahrkamera leicht nachrüsten, ohne ein Kabel aufwendig durch den Innenraum zu verlegen.

Das Bild ist hell und gestochen scharf, sodass auch Details wie Kennzeichen lesbar sind.
Testsieger ist die Auto-Vox Solar 3A Plus: stabile Signalübertragung und tolle Bildqualität, bei Tag und Nacht.
Dank kabelloser Anbindung lässt sich die Rückfahrkamera leicht nachrüsten, ohne ein Kabel aufwendig durch den Innenraum zu verlegen.
T9Pro: Das Bild ist so klar, als würde man es mit eigenen Augen sehen.
In der Wohnmobil-Community von Harvest Hosts als Begleiter für unterwegs bekannt.


Seit 19 Jahren entwickeln wir Technik für mehr Sicherheit auf jeder Fahrt.
Seit 2007 leistet AUTO-VOX Pionierarbeit bei kabelloser Fahrzeugtechnologie. Mehr als 10 Millionen Nutzer in über 20 Ländern vertrauen uns. Mit unseren Kameras nehmen wir Ihnen die Unsicherheit beim Fahren, damit Sie sich auf die Straße vor Ihnen konzentrieren können.
Erfahrungen von Content-Creatorn
YouTube-Creator

YouTube-Creator
YouTube-Creator
YouTube-Creator
YouTube-Creator
Das sagen unsere Kunden
Steven Tucker
⭐️⭐️⭐️⭐️⭐️

„Ein Freund, der diese Kameras an seinem Wohnmobil nutzt, hat sie mir empfohlen. Ich habe das Zweier-Set mit 7-Zoll-Monitor gekauft. Bildschärfe und Reichweite sind beeindruckend, besonders die Infrarot-Nachtsicht. Damit lässt sich nachts vom Fahrzeug aus einiges beobachten. Die Qualität ist hervorragend und auf Langlebigkeit ausgelegt – definitiv auch robust genug für einen ehemaligen Soldaten wie mich.“
Jerry
⭐️⭐️⭐️⭐️⭐️

„Normalerweise schreibe ich keine Bewertungen, aber hier muss es sein! Anfangs hatte ich ein paar Schwierigkeiten. Das Team hat mir Schritt für Schritt geholfen und sogar Ersatzgeräte geschickt. Großartig! Sehr gute Qualität, klares Bild und einfach zu installieren.“
Adan
⭐️⭐️⭐️⭐️⭐️

„Ich nutze die Kamera hinten an meinem Pick-up. Damit lässt sich die Anhängerkupplung viel leichter auf die Deichsel des Wohnwagens ausrichten. Das Bild auf meinem Smartphone ist klar, und meistens passt alles gleich beim ersten Versuch, ohne ständig aus- und einsteigen zu müssen. Wirklich praktisch.“
John
⭐️⭐️⭐️⭐️⭐️

„Ich habe die Rückfahrkamera kürzlich für unser neues Wohnmobil gekauft. Die Installation an der vom Hersteller vorgesehenen Stelle war einfach. Eine passende Dichtung schützt den Montagebereich vor Wasser. Zusätzlich habe ich etwas transparente Dichtmasse verwendet. Die Kamera funktioniert gut, und der Kundendienst hat meine technische Frage sehr schnell beantwortet.“
sgallery
⭐️⭐️⭐️⭐️⭐️

„Im September 2023 habe ich eine Rückfahrkamera für mein Wohnmobil gekauft. Sie hat mich so überzeugt, dass ich eine zweite gekauft habe, die vorne an meinem Jeep beim Offroadfahren in Arizona den Weg zeigt. Es ist wichtig, vorher zu sehen, welches Hindernis man gleich überfahren wird.“
Sandra
⭐️⭐️⭐️⭐️⭐️

„Perfekt für ein älteres Auto ohne Kamera und auch für lange Fahrzeuge wie Wohnmobile oder Lkw. Meine Schwester möchte sie sich ausleihen und in ihrem Schulbus ausprobieren. Installation und Einrichtung sind einfach, das Bild ist klar. Zum Aufbewahren ist ein robustes Etui dabei. Auch als Katzenkamera macht sie sich gut.“
Product not found
Blog

By AaliyahGloria
Guides
Jul 30, 2026
Ein Anhänger, der mit 20 Fuß noch übersichtlich wirkt, kann bei 30, 35 oder 40 Fuß eine ganz andere Herausforderung für die Sicht darstellen.
Auf gerader, freier Autobahn fällt das nicht immer auf. Deutlicher wird es, wenn Zugfahrzeug und Anhänger unterschiedliche Fahrspuren durchlaufen.
Beim Spurwechsel muss der Fahrer beurteilen, ob ein Fahrzeug die Anhängerseite vollständig passiert hat. Auf einer Campingplatzschleife können die inneren Räder zum Bordstein laufen, während die äußere Heckecke zu einem Baum ausschwenkt. Eine Tankstellenausfahrt wirkt vom Zugfahrzeug breit genug, doch der Anhänger muss die Kurve und die Zapfsäuleninsel ebenfalls passieren.
Hinzu kommt das Rückwärtsfahren.
Eine Heckkamera zeigt je nach Winkel die Straße hinter dem Anhänger oder den Bereich am Stoßfänger, aber möglicherweise nicht beides gleich gut. Bei der Einfahrt auf einen schrägen Stellplatz können die linken und rechten Seitenbereiche außerhalb des Bildes bleiben.
Die Heckkamera ist deshalb nicht nutzlos. Die Sichtanforderungen sind lediglich mit dem Anhänger gewachsen.
Ein Mehrkamera- Rückfahrkamerasystem für Anhänger kann ausgewählte Heck-, Nahbereichs- und Seitenansichten liefern. Sie können Unsicherheit durch tote Winkel verringern, beseitigen aber nicht alle toten Winkel, garantieren keine Unfallvermeidung und ersetzen weder Anhängerspiegel noch direkte Beobachtung, Rundgang oder sichtbaren Einweiser.
Dieser Ratgeber erklärt die Grenzen einer einzelnen Heckkamera, den Nutzen verschiedener Blickwinkel, wichtige Einsatzbereiche und die Prüfung der Anhängerkompatibilität vor der Installation.
Inhaltsübersicht
- Kurzantwort für lange Anhänger
- Wie die Länge die Sicht verändert
- Schwer einsehbare Bereiche erfassen
- Grenzen einer Heckkamera verstehen
- Nutzen mehrerer Kameraansichten
- Wichtige Einsatzbereiche
- Heck- und Seitenansichten beim Abbiegen
- Eine Rückfahrroutine entwickeln
- Installationskompatibilität prüfen
- CampSync D1 nutzen
- CampSync D1 Lite erwägen
- WF4 vergleichen
- Ein mobiles Zweikamera-Set erwägen
- Checkliste für lange Anhänger
- Häufige Fragen
Wichtig: Kameras liefern ausgewählte zusätzliche Ansichten, zeigen aber nicht die gesamte Umgebung eines langen Anhängers. Nutzen Sie weiterhin korrekt eingestellte Anhängerspiegel, direkte Beobachtung, Rundgänge, einen sichtbaren Einweiser, sichere Spurwechsel und Ihr Urteilsvermögen. Prüfen Sie Installation, Stromversorgung und Fahrzeugkompatibilität.
Kurzantwort: Wann reicht eine Heckkamera nicht aus?
Eine Heckkamera kann genügen, wenn hauptsächlich eine einfache Sicht hinter den Anhänger benötigt wird.
Bei längeren Anhängern können zusätzliche Ansichten helfen, wenn gleichzeitig die Straße dahinter, Stoßfänger oder Kupplung sowie beide Seiten beobachtet werden müssen.
Ein Mehrkamera-System kommt infrage, wenn:
- die Seitenbereiche wegen der Anhängerlänge schwer einzuschätzen sind
- der Hecküberhang beim Abbiegen nahe an Hindernisse kommt
- häufig auf mehrspurigen Straßen gefahren wird
- regelmäßig rückwärts auf schräge Stellplätze gefahren wird
- Tankstellenkurven und Campingplatzschleifen wiederholte Korrekturen verlangen
- Fahrradträger, Reserverad, Leiter oder Gepäckträger die Sicht verändern
- ein Heckwinkel nicht gleichzeitig Straße und Stoßfängernähe sinnvoll zeigt
| Fahrsituation | Was eine Heckkamera zeigen kann | Was schwer einzuschätzen bleiben kann |
|---|---|---|
| Gerades Rückwärtsfahren | Rückfahrweg und Abstand zum Anhalten | Linke und rechte Heckecke |
| Autobahnfahrt | Verkehr hinter dem Anhänger | Fahrzeuge neben dem Anhänger |
| Rückwärts auf einen schrägen Stellplatz | Teil des Rückfahrwegs | Innere Heckecke und äußeres Ausschwenken |
| Enge Kurve | Teil der Heckumgebung | Radlauf und seitlicher Abstand |
| Kupplung oder Stoßfänger prüfen | Nahbereich am unteren Heck | Weiter entfernter Verkehr dahinter |
| Spurwechsel | Nachfolgende Fahrzeuge | Ob ein Fahrzeug die Anhängerseite passiert hat |
| Tankstellenausfahrt | Bereich hinter dem Anhänger | Seitliche Sicht, Radlauf und Ausschwenken der Heckecke |
Entscheidend ist nicht die mögliche Kamerazahl, sondern welche Bereiche unklar bleiben und ob eine weitere Ansicht vor der Bewegung relevante Informationen liefert.
Schritt 1: Wie die Anhängerlänge die Sicht verändert
Mehr Länge bedeutet größere Entfernung, mehr Seitenfläche, veränderte Kurvenbewegungen und zusätzliche Installationsanforderungen.
Die Heckkamera ist weiter vom Fahrer entfernt
Mit der Anhängerlänge wächst der Abstand zwischen Heckkamera und Display.
Das Signal muss möglicherweise durch oder um folgende Hindernisse gelangen:
- Metallstrukturen
- Geräte
- Staufächer
- Wassertanks
- Ladung
- Fahrräder und Träger
- elektrische Ausrüstung
- andere Funkgeräte
Funkvideo benötigt kein Mobilfunknetz. Entfernung, Hindernisse, Antennenposition, Störungen und stabile Stromversorgung können die Verbindung dennoch beeinflussen.
Testen Sie das System am tatsächlichen Gespann statt nur auf die maximale Reichweitenangabe zu vertrauen.
Mehr Länge schafft mehr Seitenfläche
Mehrere Zonen können wichtig werden:
- Bereich hinter dem Zugfahrzeug
- vordere Hälfte der Anhängerseite
- hintere Hälfte der Anhängerseite
- Heckbereich auf der Beifahrerseite
- Spurwechselbereich auf der Fahrerseite
- Heckecke
- Stoßfänger, Kupplung oder Zubehörbereich
Ein einzelnes Heckobjektiv kann nicht jede Frage zu diesen Bereichen beantworten.
Die Anhängerräder folgen einer inneren Spur
In Kurven laufen die Anhängerräder innerhalb der Spur des Zugfahrzeugs.
Das Zugfahrzeug kann einen Bordstein, ein Schild, eine Zapfsäuleninsel oder einen Pfosten passieren, während der Anhänger näher daran vorbeifährt. Gleichzeitig kann die äußere Heckecke zu einem anderen Hindernis ausschwenken.
Eine Manöverbewegung erzeugt somit zwei Aufgaben: innerer Radlauf und äußeres Heckschwenken.
Heckzubehör verändert die Sicht
Prüfen Sie die Sicht nach der Montage von:
- Reserverad
- Fahrradträger
- Gepäckträger
- Leiter
- Staubox
- Boots- oder Gerätehalterungen
Zubehör kann Bildbereiche verdecken, den Endpunkt beim Anhalten verändern oder als erstes Teil auf ein Hindernis treffen.
Schritt 2: Schwer einsehbare Bereiche vor der Auswahl erfassen
Beginnen Sie mit Anhänger, Spiegeln und tatsächlicher Sitzposition, nicht mit der Produktliste.
Ein einfacher Sichttest zeigt, wo weitere Blickwinkel nützlich wären.
Eine sichere, offene Fläche nutzen
- Zugfahrzeug und Anhänger korrekt verbinden.
- Anhängerspiegel einstellen.
- Auf einer zulässigen, offenen Fläche mit wenig Verkehr parken.
- Eine Hilfsperson leichte Pylonen um den Anhänger aufstellen lassen.
- Markieren, wo die Pylonen aus den Spiegeln verschwinden.
- Beide Seiten und beide Heckecken prüfen.
- Mit dem bestehenden Kamerabild vergleichen.
- Nach dem Beladen wiederholen.
Die Hilfsperson bleibt außerhalb des Fahrwegs. Verwenden Sie Pylonen statt echter Hindernisse.
Vier grundlegende Sichtfragen festlegen
| Sichtbereich | Frage des Fahrers |
|---|---|
| Fernbereich hinter dem Heck | Nähert sich Verkehr oder folgt jemand dicht hinter dem Anhänger? |
| Nahbereich hinter dem Heck | Wie viel Platz bleibt an Stoßfänger, Kupplung oder Parkplatzgrenze? |
| Linke Seite | Hat ein Fahrzeug den Anhänger passiert und wie groß ist der Abstand auf der Fahrerseite? |
| Rechte Seite | Befinden sich Fahrzeuge, Bordsteine, Pfosten oder Hindernisse auf der Beifahrerseite? |
Jede zusätzliche Kamera sollte eine konkrete Frage beantworten.
Mehrere ähnliche Ansichten können die Anzeige komplizierter machen, ohne Informationen hinzuzufügen.
Fahrertipp: Fragen Sie nicht zuerst nach der möglichen Kamerazahl, sondern welche Entscheidung mit Spiegeln und Heckansicht noch unsicher bleibt.
Schritt 3: Möglichkeiten und Grenzen einer Heckkamera kennen
Eine gut positionierte Heckkamera bleibt in vielen Situationen hilfreich.
Eine Heckkamera kann unterstützen bei:
- geradem Rückwärtsfahren
- Abschätzen des Anhalteabstands
- Kontrolle von Stoßfänger und Kupplung
- Beobachtung des Verkehrs hinter dem Anhänger
- Kontrolle vor dem Verlassen eines Stellplatzes
- Beobachtung von Fahrrad- oder Gepäckträgern
Ein Heckwinkel erfüllt nicht jede Aufgabe
Ein nach unten gerichtetes Objektiv zeigt Stoßfänger, Kupplung oder Parkplatzgrenze gut, liefert aber möglicherweise weniger Informationen über weiter entfernten Verkehr.
Ein auf die Straße gerichtetes Objektiv hilft während der Fahrt, zeigt aber weniger Details unmittelbar unter dem Heck.
Eine Heckkamera zeigt nicht unbedingt die Seiten
Spurwechselzonen, Radlauf und Heckeckenbewegungen können außerhalb des Bildes bleiben.
Das ist besonders wichtig bei:
- mehrspuriger Autobahnfahrt
- Einfädeln
- engen Campingplatzkurven
- schrägem Rückwärtsfahren
- Tankstellenausfahrten
- Parken am Straßenrand
Weitwinkelansichten haben Grenzen
Ein breiteres Objektiv zeigt mehr Umgebung, kann aber die Darstellung von Entfernungen verändern.
Üben Sie vor der Reise mit Pylonen, wie 5, 10 oder 20 Fuß im gewählten Bild aussehen.

Eine Heckkamera erfasst nicht die gesamte Umgebung
Sie zeigt möglicherweise nicht:
- Äste über dem Fahrzeug
- weichen Untergrund
- Anhängerreifen
- Hindernisse neben der vorderen Anhängerhälfte
- Personen außerhalb des Bildes
- die gegenüberliegende Heckecke beim schrägen Rangieren
Nutzen Sie weiterhin Anhängerspiegel und direkte Kontrollen.
Schritt 4: Was ein Mehrkamera-System ergänzt
Der Nutzen liegt nicht einfach in einer längeren Ausstattungsliste.
Verschiedene Objektive übernehmen unterschiedliche Aufgaben; die passende Ansicht wird für das aktuelle Manöver gewählt.
| Kameraperspektive | Hauptaufgabe |
|---|---|
| Hauptansicht hinten | Straße, nachfolgender Verkehr und normale Heckkontrolle |
| Untere Heckansicht | Stoßfänger, Kupplung, Parkplatzgrenze und nahe Hindernisse |
| Linke Seitenansicht | Fahrerseitige Spur, seitlicher Abstand und Kurvenkontrolle |
| Rechte Seitenansicht | Beifahrerseite, Bordsteine, Pfosten und eingeschränkt einsehbare Rückfahrbereiche |
Split-Screen erleichtert den Vergleich
Geteilte Anzeigen ermöglichen den Vergleich ausgewählter Bereiche ohne ständigen Kanalwechsel.
Zum Beispiel:
- Fern- und Nahbereich hinten während der Fahrt
- Heck und rechte Seite bei schräger Stellplatzeinfahrt
- Heck und linke Seite beim Spurwechsel
- Heck und beide Seiten beim langsamen Rangieren
Mehr Bilder machen jede Einzelansicht kleiner. Nicht jeder verfügbare Kanal muss ständig angezeigt werden.
Die zur Aufgabe passenden Ansichten wählen
Entscheiden Sie vor der Bewegung, welche zwei oder drei Ansichten die aktuellen Fragen beantworten.
Auf der Autobahn können Fernheck- und relevante Seitenansicht wichtig sein. Beim finalen Einparken helfen eher Nahheck- und Heckeckenansichten.
Kamerabilder sollen Unsicherheit reduzieren, nicht zu langem Wegschauen von der Straße führen.
Schritt 5: Wo mehrere Ansichten besonders helfen
Spurwechsel mit langem Anhänger
Vor dem Spurwechsel muss klar sein:
- ob die Zielspur belegt ist
- ob ein Fahrzeug den Anhänger vollständig passiert hat
- ob sich Verkehr schnell von hinten nähert
- ob der Anhänger stabil in seiner Spur bleibt
Eine Seitenkamera ergänzt Informationen, ersetzt aber weder Spiegel, Blinker, direkte Beobachtung noch das Warten auf eine freie Lücke.
Führen Sie keinen Spurwechsel nur anhand des Bildschirms durch.
Campingplatzschleifen
Enge Wege können gesäumt sein von:
- Bäumen
- Versorgungspfosten
- geparkten Zugfahrzeugen
- Picknicktischen
- Kindern und Haustieren
- Schildern
- ausgefahrenen Slide-outs der Nachbarn
Der innere Radlauf und die äußere Heckecke müssen gegebenenfalls gleichzeitig beobachtet werden.
Rückwärts auf einen schrägen Stellplatz
Die beifahrerseitige Heckecke kann dabei aus der Spiegelsicht geraten.
Verschiedene Ansichten helfen bei:
- dem Haupt-Rückfahrweg
- dem Anhalteabstand hinten
- der fahrerseitigen Stellplatzgrenze
- der beifahrerseitigen Heckecke
- Stoßfänger und Kupplung
- der Position des Einweisers
Der Einweiser muss sichtbar bleiben. Verschwindet er aus der Sicht, wird angehalten.
Enge Tankstellen
Vor der Einfahrt prüfen:
- Höhe des Dachs
- Breite der Tankspur
- Kurvenraum des Zugfahrzeugs
- Radlauf des Anhängers
- Ausschwenken des Hecks
- Ausfahrtsweg
- Verkehr hinter und neben dem Anhänger
Eine etwas teurere Tankstelle kann besser geeignet sein, wenn sie eine breite Zufahrt und Vorwärtsausfahrt bietet.
Auf die Autobahn einfädeln
Eine Seitenkamera ergänzt die Spiegel, besonders wenn Verkehr neben der hinteren Anhängerhälfte auftaucht.
Beschleunigen Sie angemessen, blinken Sie früh, halten Sie die Spur und warten Sie auf eine klare Lücke. Der Bildschirm bleibt eine zusätzliche Referenz.
Schritt 6: Heck- und Seitenansichten in Kurven nutzen
Vor der Kurve
- Geschwindigkeit reduzieren
- Straßenbreite prüfen
- Fußgänger und Verkehr beachten
- Ausfahrtsspur bestimmen
- Raum für den Anhängerradlauf lassen
- Ausschwenken der Heckecke prüfen
In der Kurve
Beobachten Sie Aufbau und Radlauf mit den Anhängerspiegeln. Ergänzen Sie die relevante Seitenansicht. Die Heckansicht hilft bei Heckeckenbewegung und nachfolgendem Verkehr.
Wechseln Sie nicht ständig zwischen allen Kanälen. Wählen Sie wichtige Ansichten vor der Kurve.
Nachdem das Zugfahrzeug passiert hat
Der Anhänger hat ein Hindernis nicht automatisch passiert, sobald das Zugfahrzeug vorbei ist.
Beobachten Sie weiter, bis Räder und Heckecke die Kurve beendet haben.
Bei unklarem Abstand sicher anhalten und direkt prüfen.
Schritt 7: Eine wiederholbare Rückfahrroutine entwickeln
Split-Screen hilft am besten als Teil eines klaren Plans.
- Vor der Stellplatzeinfahrt anhalten.
- Den Platz begehen, wenn es sicher ist.
- Gefahren an beiden Heckecken erkennen.
- Höhenfreiheit und Untergrund prüfen.
- Endposition von Rädern und Stoßfänger festlegen.
- Einen Haupt-Einweiser bestimmen.
- Passende Kameraansichten wählen.
- So langsam fahren, dass sofort angehalten werden kann.
- Anhalten, wenn der Einweiser verschwindet.
- Anhalten, wenn das Bild einfriert oder ausfällt.
- Bei schlechtem Winkel vorziehen und neu ansetzen.

Jeder Ansicht eine Aufgabe geben
| Ansicht | Aufgabe beim Rückwärtsfahren |
|---|---|
| Fernheck | Breitere Straße oder Stellplatzumgebung hinter dem Anhänger beobachten |
| Nahheck | Stoßfänger, Kupplung oder Endpunkt beurteilen |
| Linke Seite | Fahrerseitige Platzgrenze und Abstand prüfen |
| Rechte Seite | Beifahrerseitige Heckecke und nahe Hindernisse beobachten |
Fahrertipp: Split-Screen unterstützt den Plan, ersetzt aber weder Platzbegehung noch einen sichtbaren Einweiser.
Schritt 8: Anhängerkompatibilität vor der Installation prüfen
Wählen Sie erst, wenn Montage und Stromversorgung am tatsächlichen Anhänger geklärt sind.
Vorverkabelte Heckkamera-Halterung prüfen
Klären Sie:
- ob eine vorverkabelte Halterung vorhanden ist
- ob ihr Typ zum System passt
- welcher Fahrzeugstromkreis die Versorgung übernimmt
- ob Positions- oder Rückfahrlicht die Versorgung steuern
- ob ein Adapter nötig ist
- ob die Spannung stabil bleibt
Eine sichtbare Halterung ist nicht unbedingt versorgt. Prüfen Sie den Anschluss nach Herstelleranweisung.
Positionen der Seitenmarkierungsleuchten prüfen
Für Seitenkameras in Markierungsleuchten prüfen:
- Größe und Position der Leuchten
- verfügbare 12-V-Versorgung
- linke und rechte Montagehöhe
- Hindernisse durch Slide-out, Tür, Markise oder Verkleidung
- korrekte Markierungslichtfunktion
- nötiges Bohren oder Änderungen an der Verkabelung
Die Anforderungen unterscheiden sich zwischen Caravans, Sattelauflieger-Caravans, Wohnmobilen und Zugfahrzeugen.
Monitorposition prüfen
Das Display sollte:
- sichtbar sein, ohne die Straße zu verdecken
- kurze Blicke statt langes Hinsehen erlauben
- Stromkabel von Bedienelementen fernhalten
- auf schlechten Straßen stabil bleiben
- Split-Screen vom Fahrersitz gut lesbar zeigen
Das Signal am vollständigen Gespann testen
Testbedingungen:
- Anhänger mit Zugfahrzeug verbunden
- Kamera an der endgültigen Position
- Monitor an der normalen Fahrposition
- Motor läuft
- Positionslicht und relevante Stromkreise eingeschaltet
- normale Kabinenelektronik in Betrieb
- Einzel-, Doppel- und Mehrfachansichten
- realistische Tageslicht- und Schwachlichtbedingungen
- mehrere Minuten durchgehender Betrieb
Bei eingefrorenem oder ausgefallenem Bild anhalten. Ein scharfes Standbild ist keine Live-Ansicht.
PWM und Stromversorgungskompatibilität prüfen
Manche Stromkreise nutzen pulsweitenmodulierte Versorgung, die nicht für jedes Kamerasystem stabil genug ist.
Prüfen Sie Zugfahrzeug, Anhängerstromkreis und Produktanleitung vor Bestellung oder Montage. Spannungswert oder Steckerform allein belegen keine stabile Kompatibilität.
Schritt 9: CampSync D1 für Heck- und Seitenperspektiven
Für lange Anhänger mit Nah- und Fernheckbedarf sowie beiden Seiten nutzt das CampSync D1 Mehrkamera-Wohnmobilsystem drei Kameras mit vier Objektiven.
Zur Ausstattung gehören:
- eine Heckkamera mit zwei Objektiven
- eine linke Seitenkamera
- eine rechte Seitenkamera
- ein 7,2-Zoll-Display mit Mehrfachansichten
Den vier Objektiven konkrete Aufgaben zuweisen
| CampSync D1 Perspektive | Praktischer Nutzen |
|---|---|
| Fernheckobjektiv | Straße und sich nähernder Verkehr |
| Unteres Heckobjektiv | Stoßfänger, Kupplung, Gepäckträger und Nahheckbereich |
| Linke Seitenkamera | Fahrerseitige Spur und Kurvenabstand |
| Rechte Seitenkamera | Beifahrerseitige Spur, Bordstein und Stellplatzhindernisse |
Mögliche Einsatzbereiche
- lange Caravans
- Sattelauflieger-Caravans
- größere Wohnmobile
- regelmäßige mehrspurige Fahrten
- schräges Stellplatz-Rückwärtsfahren
- enge Campingplatzschleifen
- Tankstellenkurven
- getrennter Bedarf für Nah- und Fernheckansicht
Zusätzliche Ansichten können Unsicherheit verringern, zeigen aber nicht alle toten Winkel, Höhenhindernisse, Bodenrisiken oder Bereiche außerhalb des Bildes.

Grenzen von Versorgung, Signal und Aufzeichnung
Kabellos bezeichnet die Videoübertragung. Kameras und Monitor benötigen weiterhin passende Gleichstromversorgung.
Die tatsächliche Signalqualität hängt von Länge, Fahrzeugaufbau, Antennen, Versorgung, Störungen und Montage ab.
CampSync D1 unterstützt DVR-Loop-Aufnahme mit kompatiblem lokalen Speicher. Die SD-Karte ist separat erhältlich. Aufnahmen können bei der Prüfung helfen, garantieren aber keine Unfallvermeidung, rechtliche Anerkennung, Schuldzuweisung oder Versicherungsleistung.
Schritt 10: Wann CampSync D1 Lite genügen kann
Nicht jeder längere Anhänger benötigt Seitenkameras.
Die CampSync D1 Lite Heckkamera-Lösung eignet sich für Fahrer, die vor allem unterschiedliche Heckperspektiven benötigen.
Sie verwendet zwei Kameras an derselben Position am Heck:
- eine weiter nach hinten gerichtete Perspektive
- eine näher auf den Heckbereich gerichtete Perspektive
D1 Lite kann passen, wenn:
- die Anhängerspiegel bereits brauchbare Seitensicht liefern
- hauptsächlich zwei Heckwinkel benötigt werden
- Seitenkamera-Montage nicht geeignet ist
- überwiegend gerade rückwärtsgefahren und gezogen wird
- Stoßfänger, Kupplung, Fahrradträger oder Ladung nah betrachtet werden sollen
D1 Lite hat keine separaten linken oder rechten Seitenkameras und keine Dreifachansicht wie eine Konfiguration mit Seitenkameras.
Auch Funkvideo benötigt Kamera- und Monitorversorgung. Testen Sie die Signalqualität am vollständigen Gespann.
Bei DVR-Nutzung ist die SD-Karte separat erhältlich. Aufnahmen unterstützen eine Prüfung, garantieren aber kein rechtliches oder versicherungsbezogenes Ergebnis.
Schritt 11: Wann WF4 besser passen kann
Das Mehrkamera- WF4 3-Kanal-Wohnmobilsystem nutzt eine Heckkamera und zwei Seitenkameras.
Es kann passen, wenn eine Heckperspektive genügt und vor allem die linke und rechte Seite fehlen.
| System | Heckaufbau | Seitenaufbau |
|---|---|---|
| CampSync D1 | Eine Heckkamera mit zwei Objektiven für Fern- und Nahbereich | Linke und rechte Seitenkamera |
| WF4 Multi-Camera | Eine Heckkamera | Linke und rechte Seitenkamera |
WF4 kann passen, wenn:
- ein Heckwinkel den Hauptbedarf erfüllt
- linke und rechte Seite hauptsächlich fehlen
- die nötige Heck- und Markierungsleuchten-Montage möglich ist
- Einzel-, Doppel- oder Dreifachansichten gewünscht sind
Prüfen Sie Heckvorverkabelung, Seitenpositionen, 12-V-Gleichstrom, Monitorposition und gegebenenfalls PWM-Kompatibilität.
Kabellos bezeichnet die Videoübertragung, nicht stromlosen Betrieb.
Bei DVR-Loop-Aufnahme ist eine SD-Karte separat erhältlich. Aufnahmen garantieren kein Versicherungs-, Rechts- oder Verantwortlichkeitsergebnis.
Schritt 12: Wann ein mobiles Zweikamera-Set sinnvoller ist
Ein festes Heck- und Seitensystem ist nicht für jeden Anhänger die passende Lösung.
Das Solar5B Zweikamera-Set kann praktischer sein für:
- gemietete oder geliehene Anhänger
- saisonales Ziehen
- vorübergehende Installationen
- Kamerawechsel zwischen Fahrzeugen
- Anhänger ohne geeignete Seitenkamera-Positionen
- eine Hauptheckansicht und einen beweglichen zweiten Winkel
Die zweite Kamera für einen anderen Bereich nutzen
Mögliche Positionen:
- beifahrerseitige Heckecke
- Kupplung
- Stellplatzgrenze
- vorübergehender Nahheckwinkel
- Ladungs- oder Fahrradträgeransicht
Eine mobile Magnetkamera erfüllt auf Fernfahrten nicht automatisch die Aufgabe einer festen Seitenmarkierungskamera.
Montage und Ladung prüfen
Die Montagefläche muss geeignet und sauber sein; Äste dürfen nicht direkt an die Kamera gelangen. Nach schlechten Straßen erneut prüfen.
Solar ist nur eine ergänzende Ladequelle. Beobachten Sie den Akku und laden Sie bei Bedarf manuell nach.
Prüfen Sie Paket und Aufnahmevoraussetzungen vor der Reise. Video garantiert nicht die Erfassung jedes Ereignisses oder ein rechtliches beziehungsweise Versicherungs-Ergebnis.
Checkliste für Sicht und Ziehen langer Anhänger
| Kategorie | Prüfpunkte |
|---|---|
| Zugfahrzeug | Spiegel, Bremsen, Licht, Kupplung, Steuergerät und Versorgung |
| Anhänger | Reifen, Kaltdruck, Ladung, Radmuttern, Türen und Außenrüstung |
| Abmessungen | Höhe, Breite, Anhängerlänge und Gespannlänge |
| Heckkamera | Objektiv, Winkel, Halterung, Strom, Signal und verdeckte Sicht |
| Seitenkameras | Leuchtenpositionen, Strom, Winkel und Hindernisse |
| Monitor | Position, Strom, Stabilität und Split-Screen-Lesbarkeit |
| Signal | Laufender Motor, Elektronik, vollständige Länge und Dauertest |
| Ladung | Sichtbeeinflussung durch Fahrradträger, Reserverad, Leiter oder Gepäckträger |
| DVR | Kompatibler Speicher, korrekte Uhrzeit, Aufnahmestatus und Dateischutz |
| Übung | Spurwechsel, weite Kurven, schräges Rückwärtsfahren und Neuansetzen |
| Einweiser | Einfache Zeichen, sichtbarer Standort und sofortiges Anhalten |
| Route | Geeignete Straßen, Tankzugang, Wetter und Ankunft bei Tageslicht |
| Stellplatz | Einfahrt, Schleifenbreite, Winkel, Seitenhindernisse und Ausfahrt |
Welche AUTO-VOX Lösung passt zu langen Anhängern?
| Produkt | Besonders geeignet für | Hauptansichten |
|---|---|---|
| CampSync D1 | Lange Gespanne mit Nah-/Fernheck und beiden Seiten | Heck mit zwei Objektiven plus linke und rechte Seite |
| CampSync D1 Lite | Fahrer mit Bedarf für zwei Heckperspektiven | Fernheck und Nahheck |
| WF4 Multi-Camera | Bedarf für eine Heck- und zwei Seitenansichten | Heck plus linke und rechte Seite |
| Solar5B Zweikamera-Set | Vorübergehende oder bewegliche Doppelansichten | Hauptheck plus bewegliche zweite Ansicht |
Kameraoptionen für lange Anhänger
Preise, Konfigurationen und Verfügbarkeit können sich ändern. Prüfen Sie Produktseite, Anhängerkompatibilität, Stromkreis, Montage und gewähltes Paket vor dem Kauf.
Häufige Fehler bei Kameras für lange Anhänger
Mehr Kameras ohne Sichtbereichsanalyse hinzufügen
Zusätzliche Objektive helfen nur, wenn sie unterschiedliche Fragen beantworten.
Beide Heckobjektive auf denselben Bereich richten
Zwei Perspektiven sind sinnvoller, wenn eine den entfernten Verkehr und die andere Stoßfänger oder Kupplung zeigt.
Seitenkameras als Spiegelersatz nutzen
Sie ergänzen ausgewählte Ansichten. Spiegel und direkte Beobachtung bleiben nötig.
Alle Split-Screen-Bilder gleichzeitig beobachten
Wählen Sie die aufgabenrelevanten Ansichten und lassen Sie sich nicht von der Straße ablenken.
Anhänger-Radlauf ignorieren
Eine Seitenansicht zeigt nicht zwingend die genaue Radposition. Üben Sie Kurven und nutzen Sie weiter die Spiegel.
Vor der Prüfung der Vorverkabelung kaufen
Halterung, Anschluss, Stromkreis und Adapter vor dem Kauf klären.
Jede Markierungsleuchte für eine Kamera geeignet halten
Gleichspannung, Stromkreissteuerung, PWM und Anleitung prüfen.
Nur im Stand testen
Das vollständige Gespann mit laufendem Motor und normaler Elektronik testen.
Mit eingefrorenem Bild weiterfahren
Ein Standbild ist keine Live-Ansicht. Anhalten und direkt prüfen.
Kabellos mit strom- oder kabelfrei verwechseln
Funk betrifft das Videosignal. Kameras und Monitor benötigen Strom.
Aufnahme als Beweisgarantie ansehen
Video kann Kontext liefern, garantiert aber keine Unfallvermeidung, rechtliche Anerkennung, Schuldzuweisung oder Versicherungsleistung.
Vollständige Beseitigung aller toten Winkel versprechen
Treffender ist: Ausgewählte Blickwinkel können Unsicherheit durch tote Winkel verringern.
Häufige Fragen
Genügt eine Heckkamera für einen Caravan?
Bei einfachem Heckbedarf möglicherweise ja. Ein langer Anhänger kann zusätzliche Heck- oder Seitenansichten benötigen, wenn mehrere Bereiche unklar bleiben.
Wann sollte ich Seitenkameras ergänzen?
Wenn die Spiegel beim Spurwechsel, Abbiegen oder schrägen Rückwärtsfahren die hintere Anhängerhälfte nicht ausreichend zeigen.
Warum ist die Sicht bei langen Anhängern schwieriger?
Mehr Seitenfläche, größere Kameraentfernung, weitere Kurvenbewegungen sowie zusätzliche Heck- und Radlaufanforderungen.
Was kann eine Heckkamera übersehen?
Seitenbereiche, Räder, Höhenhindernisse, die gegenüberliegende Heckecke und Objekte außerhalb des Sichtfeldes.
Was unterscheidet Fern- und Nahheckansicht?
Fernheck zeigt Straße und nachfolgenden Verkehr; Nahheck zeigt Stoßfänger, Kupplung, Ladungsträger oder Parkplatzgrenze.
Wo werden Seitenkameras montiert?
Das hängt von Anhänger und Kamera ab. Oft werden Seitenmarkierungspositionen genutzt; Versorgung, Winkel, Abstand und Kompatibilität müssen passen.
Ersetzen Seitenkameras Anhängerspiegel?
Nein. Sie ergänzen Ansichten, ersetzen aber korrekt eingestellte Spiegel und direkte Beobachtung nicht.
Kann Split-Screen alle Kameras gleichzeitig zeigen?
Das hängt vom System ab. CampSync D1 zeigt drei Kanäle; der Heckkanal enthält zwei Objektivperspektiven. WF4 unterstützt Einzel-, Doppel- und Dreifachansicht.
Soll ich während der Fahrt alle Ansichten beobachten?
Nein. Wählen Sie relevante Ansichten und schauen Sie nur kurz hin. Straße, Spiegel und Verkehr bleiben im Mittelpunkt.
Was ist eine Heckkamera mit zwei Objektiven?
Ein Kameragehäuse enthält zwei auf unterschiedliche Bereiche gerichtete Objektive, etwa Fernverkehr und Stoßfänger- oder Kupplungsnähe.
Was unterscheidet CampSync D1 und D1 Lite?
D1 Lite hat zwei Kameras an derselben Heckposition, keine Seitenkameras und keine Dreifachansicht. D1 nutzt eine Heckkamera mit zwei Objektiven sowie linke und rechte Seitenkamera: drei Kameras mit vier Objektiven.
Was unterscheidet CampSync D1 und WF4?
D1 hat eine Heckkamera mit zwei Objektiven und zwei Seitenkameras. WF4 hat eine Heckkamera und zwei Seitenkameras.
Passt D1 an vorverkabelte Anhänger?
Kompatible Vorverkabelung wird unterstützt. Halterung, Stecker, Stromkreis und anhängerspezifische Passform müssen vor dem Kauf bestätigt werden.
Benötigen Funkkameras weiterhin Strom?
Ja. Funk bezeichnet Videoübertragung. Kamera und Monitor benötigen richtige Gleichstromversorgung oder einen unterstützten Akku.
Können Markierungsleuchten Seitenkameras versorgen?
Bei kompatibler Installation gegebenenfalls ja. Spannung, Stromkreis, Stecker, PWM und Lichtfunktion müssen geprüft werden.
Warum friert Funkvideo bei langen Anhängern ein?
Mögliche Ursachen sind Entfernung, Metallhindernisse, Antennen, Störungen, instabile Versorgung oder Montageprobleme. Bei unklarer Live-Anzeige anhalten.
Brauche ich eine SD-Karte für DVR?
DVR benötigt kompatiblen lokalen Speicher. Bei D1, D1 Lite und WF4 ist die SD-Karte separat erhältlich.
Beseitigen Kameras alle toten Winkel?
Nein. Sie können Unsicherheit in ausgewählten Bereichen verringern, doch manche Bereiche bleiben außerhalb der Objektive.
Wie teste ich vor einer langen Reise?
Am vollständigen Gespann mit Motor, Positionslicht und normaler Elektronik. Jede Ansicht, Versorgung, Position und das Signal mehrere Minuten prüfen.
Welche Ansichten helfen auf schrägen Stellplätzen?
Nahheck hilft beim Anhalteabstand, Seitenansichten bei Heckecken und Platzgrenzen. Einweiser und direkte Begehung bleiben wichtig.
Fazit: Sichtkonzept mit der Anhängergröße erweitern
Ein langer Anhänger benötigt nicht automatisch das größte Kamerasystem.
Der Fahrer muss aber verstehen, welche Bereiche unklar bleiben und ob weitere Ansichten Entscheidungen erleichtern.
Beginnen Sie mit Spiegeln und Heckkamera. Erfassen Sie Nahheck, Fernheck und beide Seiten. Bestimmen Sie schwierige Situationen: Spurwechsel, Schleifen, schräge Stellplätze, Tankstellen oder Kupplungskontrolle.
Prüfen Sie anschließend den Anhänger.
Klären Sie Halterung, Seitenpositionen, Gleichstrom, PWM, Monitor, Signalweg und Montage. Testen Sie am vollständigen Gespann statt nur auf Werkbank oder Einfahrt.
Wählen Sie passende Ansichten, nutzen Sie weiter Spiegel, blinken Sie früh und halten Sie die Spur. Stoppen Sie bei unklarer Sicht. Beim Rückwärtsfahren Platz begehen, Einweiser sichtbar halten und bei schlechtem Winkel vorziehen.
- Erfassen, was die vorhandene Heckkamera zeigt.
- Schwer einsehbare Bereiche bestimmen.
- Fernheck, Nahheck und beide Seiten getrennt betrachten.
- Blickwinkel für echte Fahrsituationen wählen.
- Stromversorgung und Montage prüfen.
- Am vollständigen Gespann testen.
- Einzel- und Split-Screen-Nutzung üben.
- Spiegel, direkte Kontrollen und Einweiser weiter nutzen.
Mit der Länge sollte auch das Sichtkonzept wachsen – jeweils um einen wirklich nützlichen Blickwinkel.

By AaliyahGloria
Guides
Aug 28, 2026
A Class A motorhome can feel surprisingly manageable once it is rolling down a wide interstate.
The difficult moments often arrive much more slowly.
A narrow campground entrance. A fuel island with concrete posts on both sides. A right turn between trees. A crowded parking lot. The final few feet while backing into a site.
From the driver's seat, the front of the coach may be easy to judge. The rear of the vehicle can be thirty feet or more behind you, with a tall body, a rear section extending behind the axle, and very little direct sightline to anything close to the bumper.
Add a small car behind the motorhome and the visual picture changes again.
This is why rear cameras have become such a useful feature on Class A motorhomes. Many newer models already include a factory rear camera, and some also offer left- and right-side camera views.
That leads to a more useful question than simply asking whether a Class A needs a backup camera:
Does the camera system already on your motorhome show the areas you actually need to see?
For one owner, the factory rear camera may be enough. Another driver may regularly tow a car, maneuver through tight campgrounds, or have limited visibility around both rear corners. In that case, additional rear or side views can make the camera system more useful.
The goal is to identify the missing view first, then choose the simplest setup that fills that gap.
Quick Navigation
- Quick Answer
- Check the Factory System First
- Why Rear Visibility Matters
- Why One Rear Camera May Be Limited
- Tail Swing and Side-Rear Views
- What Three Cameras Add
- Multi-View Options for Class A RVs
- Why Class A Owners Tow Cars
- Three Common Towing Methods
- Flat-Towing Backing Restriction
- Camera Views With a Toad
- Portable Second-Camera Option
- Should You Upgrade?
- Camera & Towing Checklist
- Frequently Asked Questions
Towing reminder: Camera views do not change the operating limits of a tow bar, tow dolly, trailer, motorhome chassis, hitch, or towed vehicle. Standard flat-tow systems commonly prohibit backing while connected. Follow the instructions for the exact motorhome, hitch, tow equipment, supplemental braking system, and towed vehicle before towing or maneuvering.
Quick Answer: Does a Class A Motorhome Need a Backup Camera?
A rear camera is highly useful on a Class A because the driver has limited direct visibility immediately behind such a large vehicle.
Many modern Class A motorhomes already include one from the factory.
The next question is whether that factory system provides enough coverage for the way you travel.
| Your Current Setup | What to Consider |
|---|---|
| Good factory rear camera + useful left/right cameras | Use and evaluate the existing system before buying additional equipment |
| Good rear camera but no useful side views | Consider whether left/right side context would help with turns and campground maneuvering |
| Rear camera view is narrow or poorly positioned | Identify which rear area is missing before choosing another camera |
| Factory system works but you tow a car | Consider whether the tow connection, toad, or another selected rear area needs a supplemental view |
| No usable rear camera | An aftermarket rear or multi-camera setup becomes more relevant |
| Flat-towed vehicle behind the coach | Use cameras for visual context while continuing to follow flat-tow operating restrictions |
More cameras are useful only when each one answers a real visibility problem.
A practical Class A setup may consist of a single good rear view, a rear-plus-side system, or an existing factory system supplemented by one portable camera.
Start With the Factory Camera System
Before installing anything, sit in the driver's seat and understand what the motorhome already has.
Camera packages vary by manufacturer, model year, floorplan and option package.
Some recent Class A motorhomes include a rear camera as standard equipment while offering side-view cameras as an option. Other coaches may already have rear, left and right views integrated into the dash display.
Check the Exact Coach, Not the Model Name Alone
Verify:
- model year
- floorplan
- factory option package
- rear camera presence
- left-side camera presence
- right-side camera presence
- turn-signal camera activation
- display size
- single, split or multi-view capability
If you are buying a used Class A, also check whether the camera system is still original.
A previous owner may have replaced the monitor, changed the camera position or added aftermarket equipment.
Test the System in the Situations That Matter
A camera that looks fine while the RV is parked on a dealer lot may feel very different during an actual campground maneuver.
Test:
- the area immediately behind the coach
- the farther rear area
- both rear corners
- side views during slow turns where available
- night or low-light image quality
- the display while wearing your normal driving glasses or sunglasses
Use the existing system long enough to identify a real limitation before deciding what to add.
What to remember: “Class A motorhome” does not describe one universal camera package. Verify the exact factory equipment before planning an aftermarket upgrade.
Why Rear Visibility Matters More on a Class A
A Class A motorhome places the driver far ahead of the rear bumper.
Large mirrors help enormously with side awareness, but they cannot create a direct line of sight through the entire coach.
The Rear of the Coach Is Far Away
The farther the driver's seat is from the back of the RV, the harder it becomes to judge close rear objects through normal direct observation.
At a campsite, that may include:
- a utility pedestal
- a picnic table
- a tree
- a short post
- another vehicle
- camping gear
- the back edge of the parking pad
A rear camera can keep a selected area behind the coach visible while the motorhome moves slowly.

The Body Is Tall
The height of a Class A creates another visibility challenge.
A driver looking through mirrors may see a large vehicle behind the RV while missing something much closer to the bumper and lower to the ground.
The actual view depends on camera height, angle, lens and installation.
The Rear Axle May Be Well Ahead of the Rear Bumper
Depending on the chassis, wheelbase and coach design, a meaningful section of the motorhome may extend behind the rear axle.
That matters when turning because the rear body follows a different path from the front of the coach.
This is one reason campground turns and fuel stops deserve as much attention as backing itself.
Why One Rear Camera May Still Leave Important Areas Hard to See
A rear camera usually does its strongest work directly behind the coach.
That leaves several other viewing questions.
| Area | Why It May Still Be Difficult to See |
|---|---|
| Main rear area | A centered rear camera generally covers this area most directly |
| Left rear corner | An object close beside the coach may sit outside the main rear-camera frame |
| Right rear corner | The passenger-side rear area can be difficult to judge from the driver's position |
| Very close rear area | A camera aimed farther behind the RV may provide less detail immediately below or near the rear body |
| Tow connection | A view optimized for farther rear traffic may not be ideal for the hitch or tow-bar area |
| Towed vehicle | A close rear view may show the connection clearly while providing less context around the full toad |
This does not mean a single rear camera is inadequate for every Class A.
It means camera placement involves a tradeoff.
A lens aimed downward provides different information from one aimed farther toward the road.
A wide rear view provides different information from dedicated left- and right-side cameras.
The right number of cameras depends on which of those views matters to your driving and towing setup.
Tail Swing Makes Side-Rear Awareness Important
A large motorhome does not rotate around its front bumper.
During a turn, the body behind the rear axle can move toward the opposite side of the turn.
This movement is commonly discussed as rear overhang or tail swing.
Think About a Right Turn
As the front of the motorhome turns to the right, the rear body behind the axle can move toward objects on the left side.
Depending on the coach geometry, that can matter around:
- fuel pumps
- bollards
- parked vehicles
- campground posts
- trees
- gate structures
- tight parking-lot entrances
The opposite pattern can occur during a left turn.
A Rear Camera and Side Camera Answer Different Questions
A centered rear view tells you what is happening behind the coach.
A side camera can add a selected view alongside the vehicle or near a rear corner.
Mirrors remain an essential part of the process.
The additional camera view gives the driver another reference while planning and completing a slow maneuver.
It does not provide complete coverage of every surrounding area.
What to remember: Class A visibility is about more than the space directly behind the bumper. Rear overhang and side-rear movement make the left and right sides worth evaluating too.
What a Three-Camera RV System Adds
A three-camera layout typically assigns one camera to the rear and one to each side.
The value comes from giving each camera a specific job.
Main Rear Camera
The rear camera can provide visual context for:
- backing
- campsite positioning
- the area behind the motorhome
- a toad or trailer where the installation supports that view
Left-Side Camera
A left-side view can supplement the mirror during:
- campground turns
- selected lane-change situations
- fuel-station approaches
- slow maneuvers near the driver-side rear area
Right-Side Camera
A passenger-side view can be especially useful because that side is farther from the driver.
It may add context for:
- right-side campground boundaries
- slow turns
- selected lane-change situations
- objects near the passenger-side rear quarter
Three cameras do not create a guaranteed 360-degree view or eliminate blind spots.
They provide three selected perspectives that can be used with mirrors, direct sight, walk-arounds and a spotter where appropriate.
Multi-View Camera Options for a Larger Class A
For a Class A owner who has identified missing rear and side views, a multi-camera system can consolidate several perspectives on one display.
CampSync D1: Two Rear Perspectives Plus Both Sides
The CampSync D1 uses three physical cameras and four lenses.
The layout consists of:
- one dual-lens rear camera
- one left-side camera
- one right-side camera
The dual-lens rear camera can provide two different rear perspectives while the side cameras add selected left- and right-side views.
For a long Class A, that arrangement can be useful when the driver wants both:
- a closer rear reference
- a farther rear reference
- left-side context
- right-side context
The exact usefulness depends on mounting position, coach geometry and how the cameras are aimed.

WF4: Rear + Left + Right
The WF4 multi-camera setup uses:
- one rear camera
- one left-side camera
- one right-side camera
Its 7.2-inch monitor supports single, dual and triple viewing modes.
This gives the driver a straightforward rear-plus-two-sides arrangement when one main rear perspective is enough.
Wireless Still Requires Power
With these RV systems, “wireless” refers to transmission of the video signal.
The cameras and display still require their supported electrical connections.
Installation on a long Class A should also account for coach length, mounting position, electrical access and expected wireless transmission conditions.
Do not assume that every camera position on every long motorhome will produce identical signal performance.
Why Class A Owners Often Tow a Smaller Vehicle
The same features that make a Class A comfortable at a campground can make it inconvenient for short local trips.
Once the motorhome is parked, the owner may have:
- leveled the coach
- extended slide-outs
- connected shore power
- connected water
- set up outdoor equipment
Breaking down the campsite for a grocery run can become a surprisingly large task.
A smaller vehicle solves that problem.
It can handle:
- grocery trips
- restaurant visits
- trailhead parking
- city driving
- attraction parking lots
- day trips away from the campground
For many travelers, the Class A handles the long-distance journey while the smaller vehicle handles local transportation after arrival.
That smaller vehicle is often called a toad or dinghy vehicle.
Three Common Ways to Bring a Car Behind a Motorhome
The camera needs can change depending on how the vehicle is transported.
1. Flat Towing / Four-Down / Dinghy Towing
With flat towing, all four wheels of the towed vehicle remain on the road.
A typical setup can involve equipment such as:
- a compatible motorhome receiver
- a tow bar with an appropriate rating
- a vehicle-specific baseplate
- safety cables
- lighting or wiring equipment
- a supplemental braking system as required by the applicable setup and rules
The towed vehicle itself must be approved for the intended flat-towing procedure.
Check its owner's manual and manufacturer guidance before choosing this method.
2. Tow Dolly
A tow dolly typically supports one end of the car while another pair of wheels remains on the road.
This creates its own questions involving:
- vehicle compatibility
- dolly capacity
- loading procedure
- tie-down procedure
- braking and lighting
- campground storage
Follow the dolly, motorhome and vehicle manufacturers' instructions for the specific combination.
3. Car Trailer
A full car trailer carries the complete vehicle off the road surface.
This adds another large piece of equipment behind the Class A.
Planning needs to include:
- trailer weight
- vehicle weight
- motorhome towing rating
- receiver and hitch ratings
- trailer brakes and lighting
- overall combination length
- parking and campground storage
Whichever towing method you choose, use the ratings and procedures for the actual motorhome, chassis, hitch, towing equipment and vehicle.

Important: A Camera Does Not Change Flat-Towing Backing Restrictions
This distinction matters because adding a clearer rear camera can create more confidence in the view behind the coach.
The tow equipment still has the same mechanical limits.
For example, Blue Ox instructs users not to back up with its tow bar connected to the towed vehicle.
Reverse movement can cause the towed vehicle to track incorrectly, bind or jackknife and can place loads on the tow bar, baseplate and vehicle structure that the system was not designed to handle.
A clearer image of the toad does not make that maneuver acceptable.
Plan the Exit Before Entering a Tight Area
When flat towing, think ahead at:
- fuel stations
- restaurants
- parking lots
- campground registration areas
- dead-end roads
- tight campsite loops
Look for a route that allows the motorhome and toad to continue forward.
If backing becomes necessary, follow the tow-bar, motorhome and towed-vehicle instructions for disconnecting and repositioning the equipment.
Flat-tow rule: Never use a camera view as justification for reversing a connected flat-tow setup when the equipment manufacturer prohibits it. The towing system's operating instructions control the maneuver.
Towing a Car Changes the Visual Picture Behind the RV
Without a toad, the rear camera can focus entirely on the area behind the motorhome.
With a toad attached, several reference areas may become important at the same time.
The Connection Area
You may want visual context around the area immediately behind the motorhome where towing equipment is located.
A camera can help you see the general relationship of the equipment from the driver's position.
The physical pre-trip inspection still needs to verify items such as:
- tow-bar attachment
- pins and retaining devices
- safety cables
- electrical connection
- supplemental braking equipment
- lighting
A camera image cannot confirm that those components are installed, rated or secured correctly.
The Towed Vehicle
A farther rear perspective can help keep the toad within the driver's visual context while traveling.
The useful field of view depends on camera height, angle and the distance between the motorhome and towed vehicle.
Both Sides of the Coach
The addition of a towed vehicle increases the overall combination length.
Left- and right-side views can add context when the driver is:
- approaching a campground turn
- moving through a fuel station
- evaluating selected lane-change situations
- passing roadside objects at low speed
The cameras supplement the mirrors and normal driving observations.
What to remember: Towing can create three different viewing needs: the connection area, the towed vehicle farther behind, and the left/right sides of the motorhome.
When a Portable Second Camera Can Be Useful
A complete multi-camera replacement is not always necessary.
Some Class A owners already have a factory rear camera that works well.
The missing view may be one temporary or highly specific area.
The Solar5B Dual-Camera Kit provides a dedicated monitor with two portable magnetic cameras.
Depending on suitable mounting surfaces and the vehicle layout, one camera can provide the main selected view while the second can be moved toward another area such as:
- a rear corner
- a hitch or tow connection area
- a selected side-rear area
- a temporary campsite positioning reference
A standard Solar5B offers the simpler one-camera version for owners who need only one portable rear perspective.
Portable and Fixed Systems Solve Different Problems
A fixed rear-plus-side system makes sense when the same views are useful on most travel days.
A portable camera can make more sense when the missing view changes with the task.
For example, an owner may use the factory rear camera for normal driving and place a portable camera near another suitable area during a campsite maneuver.
The camera remains a visual reference.
It does not verify towing-system installation, exact clearances or safe load limits.
Should You Upgrade the Factory Camera System?
The decision becomes much easier once you evaluate the existing system in real driving and parking situations.
Keep the Factory System When It Already Does the Job
An upgrade may add little value if you already have:
- a clear rear view
- useful left/right side views
- a display you can read comfortably
- camera positions that work with your towing setup
Use those features first.
Consider More Side Context When Rear Coverage Is Already Good
If the rear view is useful but the motorhome has no side-camera views, evaluate whether the difficult areas occur during:
- turns
- campground roads
- fuel-stop maneuvering
- selected lane-change situations
A rear-plus-left-plus-right system may address that pattern more directly than adding another rear-only camera.
Consider a Supplemental Camera When the Missing View Is Specific
If the factory system works most of the time and towing introduces one additional viewing need, a portable second camera may be enough.
Review Installation Limits Before Buying
Check:
- camera mounting locations
- available power
- existing side-marker configuration
- monitor location
- coach length
- wireless transmission path
- weather exposure
- compatibility with existing equipment
Also decide whether you prefer:
- one permanent multi-view monitor
- the existing factory display plus a supplemental display
- a portable system used only when needed
Class A Camera and Towing Checklist
| Check | What to Confirm |
|---|---|
| Motorhome | Exact year, manufacturer, model, floorplan, length and applicable chassis information |
| Factory rear camera | Whether it is installed, functional and positioned usefully |
| Factory side cameras | Whether left/right cameras are installed and how they activate |
| Display | Screen size and single, split or multi-view capability |
| Close rear view | Whether the area immediately behind the coach is visible enough for your needs |
| Farther rear view | Whether the system provides useful context farther behind the motorhome |
| Side areas | Which left/right areas remain difficult to observe |
| Towing method | No toad, flat tow, tow dolly or full trailer |
| Motorhome towing limits | Chassis, receiver and manufacturer ratings |
| Towed vehicle | Approved towing procedure from its manufacturer |
| Tow equipment | Correct ratings, setup and operating procedures |
| Camera location | Which physical area each camera is intended to show |
| Power | Compatible and properly installed electrical supply |
| Physical inspection | Hitch, tow equipment, safety devices and surroundings checked directly |
| Manuals | Motorhome, chassis, hitch, tow equipment and towed-vehicle instructions available |
AUTO-VOX Camera Options for Class A Motorhomes
| Product | Camera Layout | Best Fit in This Article |
|---|---|---|
| CampSync D1 | 3 cameras / 4 lenses | Closer/farther rear context plus selected left and right views |
| WF4 | 1 rear + 2 side cameras | Straightforward rear, left and right multi-view setup |
| Solar5B Dual-Camera Kit | 2 movable cameras | Flexible main view plus a selected supplemental angle |
| Solar5B | 1 portable camera | Simple portable rear-view option |
Camera Options for Class A Rear and Side Visibility
Prices, configurations and availability may change. Confirm the current product page, selected configuration, motorhome compatibility, camera mounting locations, electrical requirements and expected transmission conditions before purchase.
Common Class A Camera and Towing Mistakes
Assuming Every Class A Has the Same Factory Camera Package
Rear and side-camera equipment can vary by manufacturer, model year, floorplan and option package. Check the exact coach.
Looking Only Directly Behind the Motorhome
Evaluate the rear corners and side-rear areas too, especially when the coach has significant body length behind the rear axle.
Assuming Three Cameras Create Complete Surround Coverage
A three-camera system provides selected rear, left and right perspectives. Areas outside those fields of view still require mirrors, direct checks and normal observation.
Forgetting That a Toad Changes the Combination Length
The motorhome may feel familiar by itself, while the connected toad adds another vehicle and towing system behind it.
Using the Camera Instead of Inspecting the Tow Equipment
Physically verify the tow bar or trailer connection, pins, safety equipment, lighting and supplemental braking components according to their instructions.
Assuming Better Rear Visibility Makes Flat-Tow Backing Acceptable
Camera visibility does not change a tow-bar manufacturer's prohibition on reversing while connected.
Buying an Aftermarket System Before Testing the Factory Cameras
Identify the actual missing view first. The existing rear and side cameras may already cover the areas you need.
Frequently Asked Questions
Do Class A motorhomes come with backup cameras?
Many newer Class A motorhomes include a factory rear camera, and some also include or offer side-view cameras. Equipment varies by manufacturer, model year, floorplan and option package, so check the specification sheet and actual coach before assuming a particular camera configuration.
Is one rear camera enough for a Class A RV?
It can be enough when the rear view is clear and the mirrors provide adequate side context for the driver's normal use. Additional left and right cameras may be useful on larger coaches, in tight campground maneuvering, or when important side-rear areas remain difficult to observe.
What is the advantage of a three-camera RV system?
A typical three-camera system provides a main rear view plus selected left- and right-side views. CampSync D1 uses three physical cameras and four lenses because its rear camera contains two lenses, adding two different rear perspectives alongside the two side-camera views.
Can I back up a Class A while flat towing a car?
Standard tow-bar flat-towing setups commonly prohibit backing while the towed vehicle remains connected. Blue Ox, for example, specifically instructs users not to back up with its tow bar connected. Follow the instructions for your exact tow bar, motorhome and towed vehicle and disconnect according to those procedures when backing is required.
What is the difference between flat towing, a tow dolly, and a car trailer?
Flat towing keeps all four wheels of the towed vehicle on the road. A tow dolly supports one end of the vehicle while another pair of wheels remains on the road. A full car trailer carries the complete vehicle. Each method has its own compatibility, weight, braking, connection and operating requirements.
Can an aftermarket RV camera replace a spotter or towing inspection?
No. Cameras add selected visual information. Continue using mirrors, direct observation, walk-arounds and a spotter where appropriate. Tow-bar connections, hitch components, safety cables, lighting, supplemental braking equipment and other towing hardware still require direct inspection according to their manuals.
Final Thoughts: Start With the Views You Already Have
A Class A motorhome benefits greatly from rear visibility, but the upgrade decision should begin with the equipment already installed.
Start with four questions:
- What rear and side cameras does this exact motorhome already have?
- Which area is still difficult to see during actual travel or campsite maneuvering?
- Will the motorhome travel by itself, flat tow a car, use a tow dolly, or pull a trailer?
- Does the missing view justify a portable supplemental camera or a fixed rear-plus-side system?
If the factory rear and side cameras already give you the views you need, there may be little reason to replace them.
If the main rear view is useful but one towing or campsite angle remains difficult to see, a portable dual-camera setup can fill a specific gap.
If the coach regularly needs rear, left and right context, a multi-camera system such as CampSync D1 or WF4 may better match the way the Class A is driven.
Towing adds another layer to every decision. Camera placement should account for the motorhome, towing connection and towed vehicle, while the physical towing setup continues to follow the ratings and procedures in the relevant manuals.
Most importantly, a better camera image does not change what the tow equipment can safely do.
Before upgrading a Class A motorhome camera system, verify the factory rear and side-camera configuration and confirm how the motorhome will tow and park. Then decide whether a flexible dual-camera setup or a rear-plus-side multi-camera system fills the actual view that is missing.

By AaliyahGloria
Guides
Aug 28, 2026
An RV renovation can look perfect while the vehicle is parked.
The pillows are arranged, the plants are in place, the new wall treatment looks better in person than it did in the sample, and the slide-out trim finally feels more like something you would choose for a house.
Then travel day arrives.
The plant needs somewhere to go before the first turn. A decorative frame rattles against the wall. A rug folds into a walkway. A new piece of trim sits closer to the slide than expected. The beautiful storage basket becomes another object that has to be moved before the RV can leave.
That is when an RV renovation gets its real test.
A travel-friendly upgrade needs to work in two modes. It should make the RV more comfortable when parked, and it should remain practical when the slides come in, the cabinets are latched and the vehicle starts moving again.
That does not mean your RV has to feel plain or temporary. It means each renovation decision deserves four questions:
How much weight does it add? How will it stay secure? Does it preserve clearance? Can the systems behind it still be inspected and serviced?
The eight upgrades below use those questions to balance style, comfort and actual travel-day use.
Quick Navigation
- The Travel-Day Renovation Test
- 1. Lightweight Soft Furnishings
- 2. Give Décor a Travel Position
- 3. Use Lightweight Wall Art
- 4. Test Peel-and-Stick Materials
- 5. Keep the Headboard Inspectable
- 6. Respect Slide-Out Clearance
- 7. Create No-Decor Zones
- 8. Add Flexible Visibility
- Travel-Day Renovation Checklist
- Common Renovation Mistakes
- Frequently Asked Questions
Before modifying the RV: Preserve access to emergency exits, safety labels, electrical panels, ventilation, plumbing, wiring, slide-out mechanisms and other service points. Follow the RV and component manufacturers' instructions when a renovation affects a structural, electrical, plumbing, gas, mechanical or safety-related area.
Before You Renovate: Use the Travel-Day Test
It is easy to judge an upgrade from a campground photo.
A more useful test imagines the RV ten minutes before departure.
| Test | Question to Ask |
|---|---|
| Weight | How much weight does this add, and where is that weight located? |
| Securement | Will it stay secured during acceleration, braking, turns and normal road vibration? |
| Travel position | If it cannot stay where it is, where does it go before departure? |
| Clearance | Can slides, cabinets, doors, windows and furniture still move normally? |
| Visibility | Does the driver still have a clear view through required windows and mirrors? |
| Emergency access | Can every emergency exit and safety device still be reached immediately? |
| Serviceability | Can wiring, seals, panels, equipment and fasteners still be inspected? |
| Reset time | Can the RV move from camp mode to travel mode without a long packing routine? |
There is one more question for any renovation that adds permanent material:
What does this do to the RV's available cargo capacity?
One small piece of décor is unlikely to transform the weight of a large RV. A complete renovation can.
Flooring, lumber, furniture, countertops, tile, batteries, appliances and storage additions accumulate quickly.
Use the ratings and cargo information for your specific RV, pay attention to axle loading, and use actual scale weights when you need to understand the loaded rig rather than estimating from individual items.
Upgrade 1: Use Lightweight Soft Furnishings for a Big Visual Change
Textiles are one of the easiest ways to make an RV feel intentional without rebuilding anything.
A different rug, a few pillow covers and a throw can change the room more than a complicated wall project.
They also work well in a moving vehicle when you choose them with travel day in mind.
Prioritize Things That Are Easy to Wash and Store
Useful choices include:
- removable pillow covers
- lightweight throws
- washable rugs
- compact bedding
- fabrics that fold into existing cabinets or storage bins
The goal is to add color and texture without creating a second cargo-management system.
Think About the Travel Position Before Buying
If six decorative pillows have to be moved before every drive, decide where they will go.
If a rug needs to be rolled up because it interferes with a slide or moving furniture, make sure the rolled rug has a secure storage location.
When the storage answer is “we'll put it somewhere,” that usually becomes a travel-day annoyance later.
Watch Cumulative Weight
Soft furnishings are generally lighter than furniture or construction materials, which is one reason they are a practical place to begin.
Still, RV renovations tend to happen in layers.
A heavy rug, weighted blanket, additional mattress topper and several storage baskets all become part of the loaded vehicle.
Choose the visual change you want with as little unnecessary weight as practical.
Travel-day test: If the item is loose when the RV moves, it needs a secure travel position before it becomes part of the renovation.
Upgrade 2: Give Plants and Tabletop Décor a Travel-Day Position
Plants can make a compact RV interior feel warmer almost immediately.
Small lamps, bowls, books and decorative objects can do the same.
The parked-RV question is where they look good.
The moving-RV question is where they go next.
Think in Two Modes
Camp mode: the object is displayed where you want to use or see it.
Travel mode: the object is secured, removed or relocated before the vehicle moves.
A small plant might live on a shelf at camp and travel in a secured container.
A decorative bowl might stay on the table while parked and move into a cabinet before departure.
A lamp may need a lower, more secure travel position.
Use Retention Methods Within Their Limits
Depending on the object and surface, people commonly use:
- removable hook-and-loop strips
- museum-style putty or wax
- non-slip liners
- small containment trays
- dedicated travel bins
These can reduce everyday shifting, but they should not be treated as a guarantee that an object will remain secure during every braking event, rough road or sudden maneuver.
Anything heavy, fragile or capable of becoming a projectile deserves a more conservative travel position.

Avoid Creating Twenty Tiny Departure Tasks
One plant takes seconds to move.
Twelve decorative objects scattered across shelves, counters and tables can turn departure into a scavenger hunt.
A simple renovation works better when most items either:
- stay safely secured in place, or
- move to one obvious travel-storage location.
The fewer decisions required on departure morning, the easier the RV is to use.
Upgrade 3: Mount Photos and Wall Art With Travel in Mind
Wall décor solves one advantage that tabletop décor does not: it can add personality without occupying a counter.
The challenge is that an RV wall moves, vibrates and may contain wiring, plumbing or lightweight construction that is very different from a residential wall.
Choose Lightweight Pieces
For a moving RV, consider:
- small lightweight frames
- acrylic glazing instead of heavy glass where appropriate
- fabric wall art
- thin prints
- lightweight signs
- low-profile decorative pieces
A heavy mirror or thick glass frame requires much more confidence in both the wall structure and the mounting method.
Use the Least Invasive Mounting Method That Works
Removable strips and other low-impact mounting methods can be useful for lightweight décor when they are compatible with the wall surface.
Test first.
RV interior panels can react differently to:
- adhesive
- heat
- humidity
- surface cleaners
- long-term pressure
Do not assume that an adhesive labeled removable on a residential wall will leave every RV finish unchanged.
Know What Is Behind the Wall Before Drilling
A screw or nail introduces a different set of questions.
Before drilling, understand the wall construction and verify that you are not entering an area containing:
- electrical wiring
- plumbing
- structural components
- slide-related hardware
- other concealed equipment
When that information is uncertain, use a mounting solution that does not require guessing what is behind the panel.
Travel-day test: Wall décor should remain secure through normal road movement without turning the RV wall into a hidden wiring or structural experiment.
Upgrade 4: Test Peel-and-Stick Materials Before Covering a Whole Wall
Peel-and-stick wallpaper, backsplash panels and decorative films are attractive RV renovation tools because they can transform a surface without major demolition.
An RV also exposes adhesive to conditions that a climate-controlled house may never experience.
Summer heat, winter storage, humidity and repeated vibration all matter.
Start With a Small Hidden Test Area
Before covering an entire wall, test the exact material on the exact RV surface.
Check:
- initial adhesion
- edge lifting
- bubbling
- reaction to heat
- cleanability
- how the original surface looks after removal
- whether adhesive residue remains
Give the test enough time to experience realistic temperature changes if possible.
Kitchen Areas Need Extra Thought
A backsplash near a cooking area has to deal with more than vibration.
Consider:
- heat exposure
- grease
- cleaning products
- moisture
- clearance from appliances
Follow appliance and RV manufacturer requirements around heat-producing equipment.

Keep Access Panels Accessible
A continuous decorative surface can make an access panel look less attractive, but permanently covering that panel may turn a future five-minute inspection into a removal project.
If the original RV provides removable access, preserve it.
Use seams, removable sections or another design that allows technicians and owners to reach the equipment behind the finish.
Upgrade 5: Keep the Headboard Lightweight and Inspectable
The wall behind an RV bed is often a good renovation target.
It is visually important, relatively small and can make a bedroom feel much less generic.
It is also an area where a decorative panel can accidentally hide something you may need later.
Check What the Wall Already Does
Before adding a headboard, inspect the area for:
- windows
- emergency-exit windows
- electrical outlets
- USB ports
- reading lights
- ventilation
- wall seams
- signs of condensation
- access to wiring or equipment
An emergency-exit window must remain accessible and usable.
Do not allow decorative fabric, panels or furniture to interfere with opening it.
Use Lightweight Construction
If you want a more architectural look, lightweight materials can often create the visual effect without adding thick hardwood or a heavy upholstered structure.
Potential approaches include:
- fabric panels
- tapestry
- thin decorative board
- lightweight slats
- removable wallpaper or wall covering
Whatever you use, make sure the mounting method is appropriate for the wall.
Plan for Future Inspection
Suppose a moisture stain appears behind the bed next year.
Can you still inspect the wall seam?
If a reading light fails, can you reach its wiring?
If a window seal needs attention, can the trim be removed without dismantling half the bedroom?
A good headboard decorates the wall while leaving future maintenance possible.
Travel-day test: Keep decorative headboards light, securely mounted and removable enough that windows, seams and service areas remain inspectable.
Upgrade 6: Treat Slide-Out Trim as Part of a Moving System
Replacing dated slide-out fascia can make a major visual difference because the original trim often occupies a large part of the room.
It is also one of the renovation areas where appearance needs to follow mechanical clearance.
The decorative trim may be stationary relative to part of the interior, but the slide-out itself is a moving system.
Observe the Complete Slide Cycle First
Before removing or adding material, watch the slide operate through its normal extension and retraction cycle.
Note the relationship between the trim and:
- moving slide structure
- seals
- flooring
- furniture
- wiring where visible
- tracks or other accessible mechanism components
- service and inspection points
Use the manufacturer's documentation for the installed slide mechanism when clearance requirements are involved.
Do Not Let Decorative Material Enter the Travel Path
New wood, fabric, fasteners or adhesive should not interfere with:
- slide movement
- seal compression
- rollers or tracks where applicable
- moving wiring
- inspection access
Even a small decorative change can become a mechanical problem when it occupies space the slide needs during movement.
Think About Fasteners
A longer screw can reach farther into the structure than the original fastener.
A heavier piece of trim may require a different mounting method.
Do not choose fastener length or placement by appearance alone.
Confirm what is behind the attachment point and whether the modification is compatible with the slide structure.

Keep It Easy to Inspect
The finished renovation should still allow you to look at:
- seals
- visible fasteners
- edges
- signs of water intrusion
- changes in slide alignment
If the new fascia makes inspection harder, revise the design while the renovation is still easy to change.
Upgrade 7: Create No-Decor Zones Around Driving and Safety Areas
Some areas of the RV benefit from a simple renovation rule:
Do not decorate across the function.
A hanging organizer may be attractive and useful until it covers a window. A plant may look good beside the driver's seat until it moves into the driver's sightline. A decorative panel may make an electrical compartment disappear visually and also make the reset switch harder to reach.
Mark the No-Decor Zones Before Renovating
| Area | What Must Remain Available |
|---|---|
| Driver position | Windshield, side windows, mirrors, controls and normal driving visibility |
| Emergency exits | Opening mechanism, clear approach and full usable exit path |
| Safety equipment | Fire extinguisher and other installed emergency equipment |
| Safety labels | Warning, operating and capacity information that needs to remain readable |
| Electrical area | Breakers, fuses, disconnects and service access |
| Ventilation | Air returns, vents and required airflow paths |
| Utility panels | Plumbing, electrical and appliance inspection points |
| Slide-outs | Movement, seal and service clearance |
Check the Driver's Seat After Every Front-Cabin Change
Sit in the normal driving position after installing:
- curtains
- window coverings
- phone mounts
- organizers
- plants
- decorative signs
Look through the windshield, both side windows and mirrors.
Then check again with the item in the position it might take after vibration or a turn.
A hanging object that stays outside the sightline while parked may swing into it while moving.
Keep Emergency Exits Obvious
An emergency window should not disappear behind:
- a fixed headboard
- decorative shelving
- storage boxes
- heavy curtains that restrict operation
- wall panels
Everyone who travels in the RV should know where the exits are and how they operate.
Travel-day test: If a renovation makes a driving view, emergency exit, warning label, control or inspection point harder to use, redesign that area before considering the project finished.
Upgrade 8: Add Flexible Visibility Without Rebuilding the RV
Some useful RV upgrades do not require replacing furniture or opening walls.
A flexible camera can add a selected rear or exterior view without turning the project into a major body modification.
The useful distinction is how you prefer to view that image.
Solar4 Wifi: Use the Phone or Tablet You Already Carry
Solar4 Wifi provides a live camera view on a compatible phone or tablet rather than requiring a separate dashboard monitor.
The camera connects locally to the device over WiFi, so the live view does not depend on cellular service or an external internet connection.
That can suit an RV renovation where the goal is to keep the dashboard relatively simple.
Depending on camera placement, it can provide a selected view such as:
- the rear of the RV
- a selected side-rear area
- a hitch or cargo area
- another nearby exterior reference point
The viewing device needs to remain within the camera's local WiFi connection range.
Solar-assisted charging supports the camera battery and remains supplemental charging.
Solar5B: Use a Dedicated Display
Some drivers prefer to keep the phone available for navigation, calls or another task.
The Solar5B pairs a portable magnetic camera with its own display, creating a dedicated rear-view setup.
This can be useful for:
- backing into campsites
- checking a selected rear approach
- temporary or seasonal installations
- RVs where a portable setup makes more sense than a large installation project
The Solar5B Dual-Camera Kit can add a second movable camera angle when two selected views are more useful than one.
Keep the Role of the Camera Clear
A flexible camera is an additional visual tool.
It does not replace:
- mirrors
- direct observation
- walk-arounds
- a spotter where appropriate
- child supervision
- pet supervision
- physical inspection of the campsite
Solar4 Wifi should not be treated as a security or unattended child- or pet-monitoring system.
Camera images also provide visual references rather than exact physical clearance measurements.
Renovation angle: Visibility upgrades can be useful precisely because they may add a selected view without requiring a major interior rebuild. Choose between a phone-based local view and a dedicated display according to how the RV is actually used.
The Travel-Day RV Renovation Checklist
After finishing an upgrade, run this check before the next trip.
| Check | What to Confirm |
|---|---|
| Added weight | You understand what the renovation added and how it affects the loaded RV |
| Loose objects | Every plant, decoration and portable item has a secure travel position |
| Wall-mounted items | Frames, panels and décor remain securely attached |
| Cabinets and doors | All doors, drawers and latches operate normally |
| Slides | The complete extension and retraction paths remain clear |
| Windows | Normal windows and emergency exits still open as intended |
| Driver visibility | Windshield, side windows and mirrors remain unobstructed |
| Safety equipment | Emergency equipment and warning labels remain accessible |
| Service access | Electrical, plumbing, mechanical and appliance access points remain usable |
| Travel reset | The RV can move from camp mode to travel mode without a complicated packing process |
AUTO-VOX Options for Flexible RV Viewing
| Product | Viewing Style | Practical Fit |
|---|---|---|
| Solar4 Wifi | Phone / tablet local WiFi view | For users who prefer a live selected view without adding a separate dashboard display |
| Solar5B | Dedicated monitor | Portable rear-view setup for parking and campsite approaches |
| Solar5B Dual-Camera Kit | Dedicated monitor + two cameras | Main rear plus a movable second selected perspective |
| Solar5B AI | Dedicated monitor with Smart Reversing Assist | Additional low-speed reversing cues within the parking-guideline area |
Flexible Camera Options for RV Travel Days
Prices and configurations may change. Confirm the current product page, selected configuration, RV compatibility, mounting position and power requirements before purchase.
Common RV Renovation Mistakes That Show Up on Travel Day
Designing Only for Camp Mode
An RV spends time parked, but it also accelerates, brakes, turns and travels over imperfect roads.
Every loose item needs a travel position and every permanent installation needs to tolerate normal vehicle movement.
Adding Heavy Materials Without Reviewing Weight
Residential materials may be attractive because they feel substantial.
That same weight travels with the RV permanently.
Track large renovation additions and evaluate the loaded RV against its applicable ratings.
Giving Décor No Storage Position
If every departure requires finding a new place for plants, pillows and counter décor, the renovation creates work instead of simplifying the space.
Using Permanent Adhesive Before Testing the Surface
Test peel-and-stick products and mounting adhesives before covering visible areas.
Heat and long-term contact can change both adhesion and removal behavior.
Covering Inspection Panels
A smooth uninterrupted wall can look better in photos.
Electrical, plumbing and mechanical access remains more valuable when something needs inspection on the road.
Changing Slide-Out Trim Without Checking the Full Movement
Inspect extension, retraction, seals and service clearance before finalizing decorative slide modifications.
Blocking Visibility or Emergency Access
Keep the driver's sightlines, mirrors, windows, emergency exits, warning labels and safety equipment outside the decoration plan.
Frequently Asked Questions
How much weight can I add during an RV renovation?
There is no single safe renovation-weight allowance for every RV. Review the specific vehicle's GVWR, axle ratings and cargo information, account for passengers, water, fuel, gear and installed equipment, and use actual scale weights when needed to understand how the loaded RV is distributed. Large renovation projects deserve more weight planning than a few lightweight decorative changes.
Is peel-and-stick wallpaper safe for RV walls?
Compatibility depends on the wall finish, adhesive, temperature exposure, humidity and cleaning products. Test the exact product on a small inconspicuous section first, then check adhesion and removal before covering a larger area.
Can I hang regular glass picture frames in an RV?
They can add unnecessary weight and breakage risk in a moving vehicle. Lightweight frames and acrylic or other less fragile glazing are often easier to manage. Whatever material you choose, use a mounting method appropriate for the wall and normal RV vibration.
Can I replace the trim around an RV slide-out?
Decorative slide-out trim can be changed on many RVs, but the renovation must preserve movement clearance, seals and access to the installed mechanism. Observe the complete slide cycle and follow the RV or slide-system manufacturer's requirements before adding material or fasteners.
Can Solar4 Wifi work without internet?
Yes. Solar4 Wifi connects locally between the camera and a compatible phone or tablet, so the live view does not require cellular data or an external internet connection. The viewing device still needs to remain within the camera's local WiFi connection range.
Should I use an RV camera to watch children or pets inside the RV?
A backup camera should not be treated as a substitute for appropriate child or pet supervision. Solar4 Wifi is designed to provide a selected camera view and should not be relied on as an unattended caregiving or security system.
Final Thoughts: Renovate for the Road, Not Just the Campsite
An RV can feel personal without turning every travel day into a packing project.
The upgrades that usually work best share a few characteristics.
They add reasonable weight. Loose items have a travel position. Mounted items stay secure. Slides and doors keep their clearance. The driver keeps a clear view. Emergency exits remain accessible. Service panels can still be opened.
That gives you a simple renovation sequence:
- Choose lightweight materials where practical.
- Give every loose object a secure travel position.
- Mount wall décor for a moving environment.
- Test adhesives before making a large commitment.
- Keep decorative panels removable enough for inspection.
- Treat slide-out areas as moving mechanical spaces.
- Protect visibility, exits, labels and service access.
- Use flexible viewing upgrades when they fit the way you travel.
The best test comes after the renovation looks finished.
Bring the slides in. Close the cabinets. Put every loose object into travel mode. Sit in the driver's seat. Walk to each emergency exit. Open the service panels you may need later. Then imagine the first hard turn, uneven campground road and backing maneuver of the next trip.
If the RV still works naturally in that state, the renovation is doing more than looking good.
Before you finish any RV renovation, ask one final question: Will this upgrade still be secure, practical, visible, and easy to inspect when the RV is actually moving, turning, backing, and parking?
Häufige Fragen
Nein. Modelle wie Solar5, Solar4B und Solar3A Plus sind mit einfachen Lösungen wie Magnetmontage und kabelloser Übertragung ausgestattet. So lassen sie sich an Wohnmobilen, Anhängern und anderen großen Fahrzeugen auch ohne professionelle Hilfe installieren.
Für welche Fahrzeugtypen gibt es AUTO-VOX Rückfahrkameras?
AUTO-VOX bietet verschiedene Modelle für Pkw, Lkw, Wohnmobile, Anhänger und Transporter. Solar3C ist beispielsweise speziell für große Fahrzeuge ausgelegt, während andere Modelle auf Pkw und kleinere Fahrzeuge abgestimmt sind.
Wie sind AUTO-VOX Produkte gegen widrige Wetterbedingungen geschützt?
AUTO-VOX Produkte werden aus hochwertigen, wetterbeständigen Materialien gefertigt. Sie sind auf den Einsatz bei Hitze, Kälte, Regen und Schnee ausgelegt und unterstützen einen zuverlässigen Betrieb unter anspruchsvollen Bedingungen.
What are the benefits of shopping with AUTO-VOX?
We offer free shipping across the US, 24/7 customer support, 100% secure payment, and a 30-day return policy to ensure a risk-free shopping experience.
Wie berücksichtigt AUTO-VOX Nachhaltigkeit bei der Produktentwicklung?
AUTO-VOX berücksichtigt Nachhaltigkeit bei der Produktentwicklung. Solar3A Plus kombiniert beispielsweise unterstützende Solarladung mit Energiespartechnik und reduziert den Akkuverbrauch um 50 %, ohne auf Leistung und Zuverlässigkeit zu verzichten.
Why are EU/UK prices different from US prices?
EU and UK prices reflect local taxes, import duties, and shipping costs, which may cause differences from US pricing.
Weitere Fragen? Alle häufigen Fragen ansehen