


Traveling with a motorcycle and an RV changes the rhythm of a road trip in a good way.
The RV becomes a comfortable base camp. The motorcycle handles the scenic roads, small towns, mountain passes and short day trips that are easier to enjoy on two wheels.
The combination also changes the vehicle you are actually driving.
A motorcycle carrier adds weight and length behind the RV. A motorcycle trailer adds another axle, another hitch connection and more space to manage at fuel stations and campgrounds. A loaded bike can block part of a rear-camera view that worked perfectly when the RV was empty.
That means route planning, parking and departure checks need to follow the complete setup.
A campsite that easily fits the motorhome may feel very different once a carrier or trailer is included. A fuel station that looks spacious from the driver's seat can tighten quickly when the motorcycle trailer begins tracking through the turn. Even the familiar rear bumper stops being the last point of the vehicle once a motorcycle sits several feet behind it.
The upside is that these changes are manageable once they become part of the travel routine.
Start with the transport method, measure the loaded rig, plan around the full combination and build a repeatable loading and parking process. Then use the motorcycle for what it does well: exploring the area after the RV is settled.
Quick Navigation
- What Changes When You Add a Motorcycle?
- Choose a Transport Method
- Measure the Whole Rig
- Plan Around a Riding Radius
- Route for the Full RV Setup
- Secure and Recheck the Motorcycle
- Recheck Rear Visibility
- Plan Turns and Lane Changes
- Handle Fuel Stations
- Park Before Unloading
- View a Nearby Parked Area
- Do the Final Full-Rig Check
- Frequently Asked Questions
Important: Motorcycle carriers, trailers, tie-down systems and RVs all have their own load and installation limits. Confirm the requirements from the RV, hitch, carrier, trailer and motorcycle manufacturers before travel. Cameras add selected visual context and should be used alongside mirrors, direct checks, proper tie-downs, wheel chocks and normal driving judgment.
Quick Answer: What Changes When You Travel With Motorcycles and an RV?
The motorcycle becomes part of the RV travel system from the moment it is loaded.
You now need to account for the transport method, added weight, total length, rear overhang, turning path, parking space and any changes to the rear-camera view.
| What Changes | Why It Matters |
|---|---|
| Overall length | The complete rig needs more room at campsites, fuel stations and parking areas |
| Rear overhang | A carrier or motorcycle can become the farthest point during backing and turning |
| Weight and axle load | The motorcycle, carrier and cargo must remain within the limits of the complete setup |
| Ground clearance | Low carriers, hitches and trailer components can approach slopes and driveway transitions |
| Rear-camera view | A motorcycle or trailer may block or change the view the driver used before |
| Turning path | A motorcycle trailer adds wheel tracking and increases the space needed around corners |
| Campsite layout | You need space to park the RV, unload the motorcycle and keep the bike clear of traffic |
The easiest way to stay organized is to treat the RV, motorcycle, carrier or trailer and attached equipment as one complete rig during every travel day.
Step 1: Choose the Motorcycle Transport Method First
The rest of the trip plan depends on how the motorcycle travels.
Common approaches include a hitch-mounted carrier, a dedicated motorcycle trailer or purpose-built motorcycle storage such as a toy-hauler garage.
Each option creates a different load and a different footprint.
Hitch-Mounted Motorcycle Carrier
A rear carrier keeps the overall setup relatively compact, but the motorcycle weight sits behind the rear axle or at the receiver.
Before loading, check:
- motorcycle wet weight
- carrier weight
- carrier capacity
- hitch or receiver rating
- RV manufacturer restrictions
- rear axle loading
- available payload
- ground clearance
- distance from the carrier to the body
A motorcycle that appears comfortably below the carrier rating can still affect another limit elsewhere in the RV.
For example, the carrier itself adds weight. Luggage or accessories on the motorcycle add more. The load also sits some distance behind the rear axle, so the complete setup deserves a proper weight check.
Motorcycle Trailer
A dedicated trailer can make sense for a heavier motorcycle, more than one motorcycle or a setup that needs separate cargo space.
It also adds another group of items to check:
- trailer GVWR
- loaded trailer weight
- tongue weight
- hitch rating
- coupler
- safety chains
- electrical connector
- trailer brakes where required
- tyres
- lights
- overall combination length
The trailer also changes campsite selection. A pull-through site may become much more convenient when the complete combination is long enough that disconnecting or repositioning takes extra time.

Toy Hauler or Purpose-Built Motorcycle Storage
A toy hauler keeps the motorcycle inside a dedicated cargo area, which changes the planning questions again.
Check the cargo-area rating, ramp rating, tie-down points, axle loads and overall weight after the motorcycle and riding gear are loaded.
Whatever transport method you choose, the useful number is the loaded configuration you actually take onto the road.
What to remember: Check the motorcycle, carrier or trailer and RV limits together before building the trip around the setup.
Step 2: Measure the Whole Rig After the Motorcycle Is Loaded
The dimensions printed in an RV brochure may stop being the dimensions that matter once the motorcycle equipment is installed.
A carrier can add several feet behind the original bumper. A trailer adds its own body and hitch length. Motorcycles may also add width through handlebars, panniers or luggage.
Record the Loaded Dimensions
Keep these numbers somewhere easy to reach from the driver's seat:
- overall loaded height
- overall loaded width
- overall loaded length
- motorcycle or carrier extension
- lowest rear point
- rear overhang
- RV axle weights
- trailer weight and tongue weight where applicable
A phone note works well. Many RV travelers also keep the numbers on a card near the dashboard.
Weigh the Setup in Travel Condition
Weights are most useful when the RV is prepared the way it actually travels.
That means including the motorcycle, carrier or trailer, riding gear, normal cargo, passengers and the typical amount of water and fuel carried during travel.
A certified vehicle scale can help show how the load is distributed across the axles.
The goal is to compare the real loaded configuration with the ratings that apply to the RV, hitch, carrier and trailer.
Measure Again After a Major Change
Recheck the setup when you:
- switch motorcycles
- add panniers or top boxes
- change the motorcycle trailer
- replace the carrier
- add a second motorcycle
- move heavy cargo
- change hitch equipment
A familiar RV can behave differently after the rear load changes.
Step 3: Let the RV Be the Base Camp and the Motorcycle Handle Local Exploring
One of the biggest advantages of bringing a motorcycle is that the RV does not need to move every time you want to explore.
A practical trip can be built around a series of base camps.
Park the RV for several nights, unload the motorcycle and explore the surrounding area on two wheels. Then move the RV to the next region and repeat.
This style works especially well when the main attractions are spread around:
- scenic mountain roads
- small towns
- national park gateways
- historic routes
- lakes and overlooks
- local restaurants
- riding destinations outside the campground
The reference strategy used by RV travelers who carry motorcycles is a good starting point: choose a base, explore within a practical riding radius and keep RV relocation days manageable.
A two-hour motorcycle radius can cover a surprisingly large area while still allowing the rider to return to the same campsite for the night.
Longer Stays Reduce Loading Work
Staying several nights in the same area also reduces the number of times you need to:
- load the motorcycle
- tighten tie-downs
- check the carrier or trailer
- unload at the next campsite
- reorganize riding gear
Weather becomes easier to manage too. A rainy riding day can move to tomorrow without forcing the RV itinerary to change.
This is where the RV-and-motorcycle combination becomes particularly useful: the RV handles long-distance relocation and comfortable living, while the motorcycle handles the local exploration.

Step 4: Plan the Route for the RV Setup
A road that looks appealing from a motorcycle saddle can be a very different experience in a large RV with a carrier or trailer behind it.
The motorcycle route and the RV relocation route deserve separate planning.
Check the Route for the Complete Rig
Review:
- bridge and tunnel height
- weight restrictions
- lane width
- steep grades
- tight switchbacks
- fuel access
- turnaround areas
- ferry rules
- campground entrance geometry
- site-length restrictions
- motorcycle-trailer restrictions where applicable
A narrow scenic road may be worth riding after the RV is parked. The relocation day can use a wider, more practical route to reach the same region.
Build Extra Time Into the Day
Longer combinations often make routine stops take more time.
Fuel stations may require a wider approach. Rest areas may have specific RV spaces. A missed entrance can require several miles before a practical turnaround appears.
Planning a slightly shorter driving day leaves more room for those realities and makes a daylight arrival easier.
Daylight is particularly useful when you still need to park the RV, inspect the unloading area and remove the motorcycle from a carrier or trailer.
Step 5: Secure the Motorcycle, Then Check It Again Early in the Trip
The motorcycle should feel like part of the vehicle before the RV moves.
Follow the instructions for the motorcycle, carrier, trailer and tie-down system, and use attachment points intended for the job.
Before Departure
Check:
- rated tie-down straps
- approved tie-down points
- wheel chock
- carrier bolts and fasteners
- hitch pin
- trailer coupler where applicable
- safety chains
- electrical connector
- trailer lights
- loose motorcycle accessories
- panniers and luggage
- anything that can rub against paint or bodywork
Make an Early Recheck
After the first stretch of real road, stop somewhere suitable and inspect the setup again.
Road vibration can settle straps and reveal movement that was difficult to notice in the driveway.
Look for:
- changed strap tension
- motorcycle movement
- a wheel that has shifted in the chock
- carrier movement
- hitch movement
- loose luggage
- cables or chains rubbing against another component
Continue checking during long travel days and after rough road sections.
What to remember: The first road check confirms how the motorcycle and tie-down system are behaving under real travel vibration.
Step 6: Check What the Motorcycle Does to Your Rear View
A motorcycle can change a rear-camera view without touching the camera itself.
A rear carrier may place a wheel, top box or windshield directly in the area that used to show open pavement. A trailer may move the most important rear reference point much farther away from the RV.
Load the motorcycle first, then sit in the normal driving position and review the complete visibility setup.

Check the Existing View
Ask:
- Can I still see the rear approach clearly?
- Is the motorcycle blocking the lower rear area?
- Can I see the outer edge of the carrier?
- Does the original parking guideline still make sense?
- Can I see traffic behind a motorcycle trailer?
- Are the side areas more important now that the rig is longer?
Camera placement should follow the new footprint.
For a carrier setup, one view may focus on the motorcycle and carrier while another provides the road behind. For a motorcycle trailer, the most useful main rear camera may be at the rear of the trailer rather than the original RV bumper.
Cameras add selected views. Tie-downs, hitch checks, load calculations and physical inspections remain separate parts of the travel routine.
Step 7: Give the Longer Setup More Room for Turns and Lane Changes
The complete rig needs to move through a turn, not just the front of the RV.
A motorcycle carrier can extend the rear overhang. A motorcycle trailer adds its own wheel path and rear swing.
Watch the Inside and Outside of the Turn
During a tight corner:
- the RV's inside wheels move closer to the curb or island
- a trailer follows an inside path behind the RV
- the rear of the RV or carrier can swing outward
- the motorcycle trailer still needs room after the RV has cleared the corner
This matters around campground posts, fuel pumps, narrow exits and roadside barriers.
Lane Changes Need a Longer Mental Picture
With a motorcycle trailer behind the RV, the driver needs to understand where the complete trailer sits before moving into another lane.
Properly adjusted mirrors remain the main reference. Additional side and rear views can provide more context around a long combination.
The CampSync D1 uses three cameras and four lenses: one dual-lens rear camera plus left and right side cameras. That gives the driver access to farther rear, closer rear and both-side perspectives from one system.
The WF4 3-channel RV camera system uses one rear camera and two side cameras, providing rear, left and right views.
Both systems can add selected rear and side information to a larger RV or long trailer setup. Vehicle wiring, mounting positions, power and the views you actually need should guide the choice.
Wireless on these systems refers to video-signal transmission. The cameras and monitor still require appropriate power.
Step 8: Treat Fuel Stations Like a Small Routing Problem
Fuel stations are one of the easiest places to notice how much the motorcycle has changed the rig.
The station may look spacious from the road, then become tight once the RV turns toward the pumps.
Look Before You Commit
Check:
- canopy height
- pump direction
- space between islands
- outside turning room
- motorcycle-carrier clearance
- motorcycle-trailer wheel path
- vehicles waiting behind you
- the exit route
A station with a clear forward exit is especially convenient for a motorcycle trailer.
Backing between crowded pump islands adds complexity, so it helps to identify the exit before entering the fueling lane.

Remember the New Rear Edge
With a hitch carrier, the motorcycle may sit several feet behind the original bumper.
That extra length matters when turning away from:
- pump islands
- bollards
- trash cans
- curbs
- parked cars
Approach slowly and keep the complete rear footprint in mind until the motorcycle has cleared the obstacle.
Step 9: Park the RV First, Then Unload the Motorcycle
Arriving at the campground is exciting when a good riding area is waiting outside.
Give the RV setup process time to finish before unloading the motorcycle.
A Practical Arrival Order
- Confirm the campsite and entry path.
- Walk the site.
- Park the RV or trailer in its final position.
- Stabilize and secure the RV as required.
- Inspect the motorcycle unloading area.
- Check the ground and ramp position.
- Keep unnecessary people clear of the unloading path.
- Prepare the carrier or trailer according to its instructions.
- Release tie-downs in the recommended sequence.
- Unload the motorcycle under controlled conditions.
Daylight makes this process easier to organize because the ground, ramp angle, tie-down points and nearby obstacles are easier to see.
A late arrival may call for a slower setup or leaving the motorcycle secured until morning when that works for the equipment and campsite.
Plan the Motorcycle Parking Spot Before Unloading
Choose a place that:
- stays clear of the RV's exit path
- does not block campground roads
- keeps the bike away from neighboring sites
- provides stable ground
- allows normal motorcycle security measures
- keeps the bike clear of slides, awnings and utility hookups
This saves the awkward situation of unloading the motorcycle and immediately needing to move it again.
Step 10: Use Solar4 Wifi for a Local View of a Nearby Parked Area
Once the motorcycle is unloaded, there may be times when you want a quick view of the area where it is parked while you are nearby.
Solar4 Wifi sends its live camera image directly to a compatible phone or tablet. This makes it useful as a flexible local view when the camera is positioned toward a selected nearby area.
For example, the camera could be aimed toward:
- a motorcycle parked behind the RV
- a bike parked beside the campsite
- the carrier after the motorcycle has been unloaded
- a nearby gear-loading area
The phone or tablet needs to remain within the camera's local WiFi connection range. Solar4 Wifi works as a direct nearby camera-to-device connection rather than an internet cloud-monitoring service.
The AUT VIEW interface allows the live view to appear on the phone or tablet, so a separate dash monitor is unnecessary for this setup.
One device can view the live feed at a time.
This kind of view works alongside normal motorcycle security. Locks, chains, secure parking choices and physical checks continue to handle the actual security task.
Keep the Power Routine Simple
Solar4 Wifi uses a rechargeable battery with solar assistance and USB-C charging.
Solar charging provides supplemental charging. Sunlight, shade, weather, mounting angle and use all affect battery level, so checking the charge remains part of the routine.
Local-view reminder: Solar4 Wifi is suited to nearby live viewing through its direct WiFi connection. Keep the phone or tablet within the camera's local connection range and continue using normal motorcycle locks and physical security measures.
Step 11: Do a Full Rig Check Before Moving Again
The departure check now has three parts: the motorcycle, the transport equipment and the RV.
Leaving one of those out creates a gap in the routine.
Motorcycle
- tie-down straps correctly positioned
- strap tension checked
- wheel secured
- wheel chock seated
- panniers and luggage secure
- loose accessories removed or secured
- nothing rubbing against another surface
Carrier or Trailer
- hitch pin secure
- receiver checked
- carrier hardware checked
- coupler secured where applicable
- safety chains connected correctly
- electrical connector secure
- trailer lights working
- tyres visually checked
- trailer jack fully stored
- ramps and loading equipment secured
RV
- storage doors latched
- steps retracted where required
- slides retracted
- awning stored
- utilities disconnected
- jacks and stabilizers retracted
- mirrors adjusted
- rear and side camera views checked
Finish by standing behind the complete setup.
Look at the motorcycle, carrier or trailer as part of the RV. Confirm the real rear edge, check that lights and the license plate remain visible where required, and make sure the cameras still show the areas the driver expects to see.
RV + Motorcycle Travel Checklist
| Stage | Key Check |
|---|---|
| Transport method | Carrier, trailer or cargo-area rating and manufacturer compatibility |
| Weight | Motorcycle, carrier, trailer, hitch, axle and overall vehicle limits |
| Dimensions | Loaded length, width, height, rear extension and lowest point |
| Route | RV-suitable roads, fuel access, campground entrance and turnaround room |
| Motorcycle | Tie-downs, wheel chock, luggage and loose accessories |
| Carrier | Receiver, hitch pin, hardware, movement and ground clearance |
| Trailer | Coupler, chains, lights, wiring, tyres and brakes where applicable |
| Visibility | Rear-camera obstruction, side views, live image and camera angle |
| Campsite | Rig length, unloading area and motorcycle parking location |
| Arrival | Park and stabilize the RV before unloading |
| Local parking | Stable motorcycle position, normal locks and optional nearby camera view |
| Departure | Re-secure the motorcycle and repeat the full-rig walk-around |
Which AUTO-VOX View Setup Fits an RV + Motorcycle Combination?
| Product | Viewing Need | Role in an RV + Motorcycle Setup |
|---|---|---|
| CampSync D1 | Farther rear, closer rear, left and right context | Multi-view option for larger RVs and longer combinations |
| WF4 Multi-Camera | Rear, left and right context | Three-direction view for compatible RV or trailer installations |
| Solar4 Wifi | Local phone/tablet live view | Flexible nearby view after the motorcycle is unloaded |
| Solar5B Dual-Camera Kit | Two movable rear-area perspectives | Portable option for selected rear and side-rear viewing needs |
Camera Options for RV + Motorcycle Travel


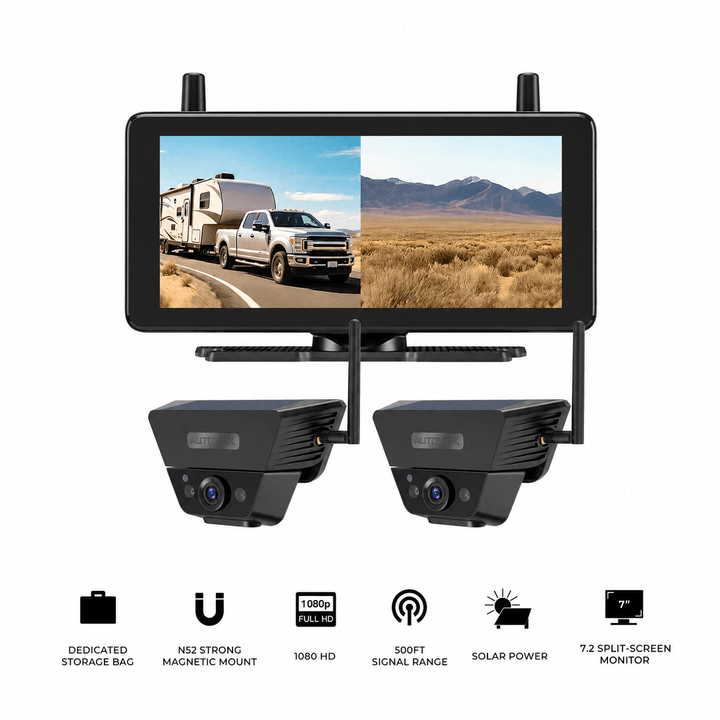
Prices and configurations may change. Confirm the current product page, vehicle compatibility, installation method, mounting positions and power requirements before purchase.
Common RV + Motorcycle Travel Mistakes
Measuring the RV Before the Motorcycle Is Loaded
Use the loaded overall dimensions for route, parking and campsite planning.
Planning the Relocation Route Like a Motorcycle Ride
Build the RV travel route around the complete rig's height, weight, width, length and turning needs. Save the tighter scenic roads for the motorcycle after camp is set up.
Looking at Motorcycle Weight Alone
The carrier, hitch, axle and overall RV ratings matter too. A trailer adds its own loaded weight, tongue weight and towing requirements.
Skipping the Early Tie-Down Check
An early stop gives you a chance to see how straps, wheel chocks and connection points have settled after real road vibration.
Assuming the Old Rear-Camera View Still Works
Load the motorcycle first, then review the camera image from the normal driver's position.
Forgetting the New Rear Edge at Fuel Stations
The motorcycle carrier or trailer may extend well beyond the original bumper, especially during a tight exit turn.
Unloading Before the RV Is Fully Positioned
Complete the RV parking process, inspect the unloading area and then organize the motorcycle unloading sequence.
Treating a Local Camera View as Motorcycle Security
Solar4 Wifi provides a nearby live view within its local WiFi connection range. Use normal locks, secure parking choices and physical checks for motorcycle security.
Frequently Asked Questions
What is the easiest way to carry a motorcycle with an RV?
The right method depends on the motorcycle weight, RV design, available payload, hitch rating and how much overall length you are comfortable managing. Common options include a rated hitch-mounted carrier, a motorcycle trailer and purpose-built toy-hauler storage. Confirm every relevant manufacturer limit before choosing the setup.
Does a motorcycle carrier change the effective length of an RV?
Yes. The carrier and motorcycle become part of the loaded rear footprint. Use the complete loaded length when planning campsites, fuel stops, storage spaces and backing maneuvers.
Can a motorcycle block an RV backup camera?
Yes. A wheel, windshield, top box, pannier or carrier can change the original camera view. Review the image after the motorcycle is fully loaded and adjust the camera setup where appropriate.
Do I need side cameras when towing a motorcycle trailer?
That depends on the trailer length, towing mirrors, vehicle geometry and the areas that remain difficult to judge. Side cameras can add selected left- and right-side context during lane changes and slow turns.
Can Solar4 Wifi monitor my motorcycle remotely?
Solar4 Wifi provides a live view to a compatible phone or tablet while the device remains within the camera's local WiFi connection range. It is suited to nearby viewing around the RV rather than internet-based cloud monitoring.
When should I recheck motorcycle tie-downs?
Check them before departure, then arrange an early stop after the motorcycle has experienced real road vibration. Continue checking during long travel days, after rough roads and whenever the setup appears to have shifted.
Final Thoughts: Plan for the Whole Rig
Bringing a motorcycle changes an RV trip in ways that go far beyond finding somewhere to store the bike.
The motorcycle becomes part of the dimensions, weight, turning path, parking plan and daily departure routine.
Once those changes are built into the plan, the combination makes a lot of sense.
The RV can handle the long relocation days and provide a comfortable base camp. The motorcycle can handle the smaller roads and local exploring after the RV is parked.
A simple routine keeps the two parts working together:
- Choose a transport method that fits the RV and motorcycle.
- Check every relevant weight and load limit.
- Measure the complete loaded rig.
- Plan relocation routes for the full RV combination.
- Secure the motorcycle and inspect it again early in the drive.
- Review the rear-camera view after loading.
- Allow room for the complete setup at turns and fuel stations.
- Arrive with enough time to park and organize unloading.
- Park the RV before unloading the motorcycle.
- Use local camera views as additional nearby visual context where useful.
- Finish every departure with a full motorcycle, carrier/trailer and RV check.
The most useful mindset is simple: plan around the complete RV-and-motorcycle setup every time it moves.
Then choose an AUTO-VOX visibility setup that fits the length, camera positions and parking situations you actually deal with on the road.


