


A semi-truck camera system has a more complicated job than a typical pickup backup camera.
The driver is operating two connected vehicle bodies: the tractor and the trailer. The combination is long, the trailer pivots at the fifth wheel, mirrors cannot show every area around the vehicle, and the view behind the tractor disappears as soon as a full-size trailer is attached.
That is why a useful Class 8 camera system usually starts with several different visibility problems rather than one “backup camera.”
A rear camera can show the area behind the trailer. Side cameras can add left- and right-side context during turns and lane positioning. A closer blind-side or curb-side camera can focus on an area that remains difficult to judge from the driver's seat. Multi-camera systems combine those selected views on one in-cab display.
The exact layout depends on the operation. A day cab pulling the same dry van every day may use a different camera architecture from a sleeper tractor that swaps trailers, a flatbed carrying oversized loads, or a tractor operating regularly in crowded distribution yards.
The most useful question is therefore:
Which areas around the complete tractor-trailer combination are still difficult to see with the existing mirrors?
Quick Navigation
Commercial-vehicle reminder: Cameras add selected visual information around a tractor-trailer. They do not create complete visibility, change the truck's turning or stopping limits, or replace mirrors, direct observation, walk-arounds, spotters, coupling inspections, or legally required equipment. Follow fleet procedures and applicable vehicle regulations for the actual Class 8 configuration.
What Camera Views Does a Semi-Truck Actually Need?
Large commercial vehicles have significant visibility limitations around the front, rear, and both sides. A camera system works best when each camera is assigned to one specific area instead of trying to make one lens cover the entire combination.
| Camera Position | Primary View | Typical Use |
|---|---|---|
| Trailer rear | Area directly behind the full combination | Backing, docking, yard maneuvering, rear traffic context |
| Tractor left side | Selected driver-side lane / rear-quarter area | Turns, lane positioning, yard movement |
| Tractor right side | Selected passenger-side / curb-side area | Right turns, merging, close-side awareness |
| Trailer side or rear-quarter | Area alongside the trailer | Dock approaches, trailer tracking, close obstacles |
| Tractor rear / fifth-wheel area | Coupling area behind the cab | Trailer connection and selected coupling checks |
| Front / curb-side camera | Close area near the tractor nose or passenger side | Urban turns and low-speed maneuvering |
Rear Visibility Starts at the Trailer, Not the Tractor
A camera mounted on the rear of the tractor can be useful for the fifth-wheel or coupling area while the tractor is bobtailing or connecting a trailer.
Once a full-length trailer is attached, that camera cannot show the road behind the complete combination.
For that job, the rear-view camera needs to be located on the trailer itself.
A high, centered trailer-rear position is a common starting point because it can provide a wider perspective and reduce immediate obstructions in the field of view.
The camera position should account for:
- rear doors
- door hinges
- lights and reflectors
- roof equipment
- liftgates where fitted
- trailer identification markings
- the required cable or power route
When possible, keeping a small part of the trailer's rear edge visible can provide a useful reference during slow backing.
A rear camera remains a visual reference. Distance and clearance still need to be judged through normal commercial driving procedures and direct checks where required.
Side Cameras Solve a Different Problem
A rear camera looks down the centerline behind the vehicle.
Side cameras are aimed along or beside the tractor-trailer combination.
They can be useful when the driver needs additional context around:
- the right side during a wide turn
- the left or right side during lane positioning
- the trailer rear quarter during a dock approach
- objects beside the trailer in a congested yard
On a tractor, side cameras may be mounted near the mirror assembly, cab side, or another location that provides the required perspective without creating excessive overlap with the existing mirrors.
Trailer-mounted side cameras serve a different purpose. They can show an area farther back along the trailer, which can become useful on long combinations where the tractor-mounted side view loses detail near the rear portion of the trailer.

Blind-Spot Cameras Should Target a Specific Zone
“Blind-spot camera” is a broad term.
On a semi, useful blind-zone views can include:
- the passenger-side area beside the tractor
- the right-front curb area
- the space beside the trailer
- a rear-quarter area near the trailer axles
The mounting position should be chosen around the actual missing view.
Installing several cameras that all show almost the same side angle adds screen clutter without adding much information.
Camera-layout rule: Start with the blind area, then choose the camera position. Rear, side, curb-side, coupling, and trailer-rear views solve different problems.
Rear, Side, and Blind-Spot Camera Placement on a Class 8 Truck
Camera placement becomes more important as the combination grows longer.
A semi-truck system has to account for vehicle height, trailer length, articulation, vibration, trailer doors, cargo type, and the fact that tractors and trailers may not always remain paired together.
Rear Trailer Camera
For a dry van or reefer, the rear camera is commonly placed high and close to the centerline.
A higher position can provide:
- a longer rear perspective
- a clearer view over low obstacles
- less direct exposure to road spray than a low bumper position
The mounting point should stay clear of rear lights and door hardware.
Camera angle matters too. An image aimed too far downward may work well at a dock while providing limited farther-rear context. An image aimed too high may show more roadway while making close backing reference harder.
For fleets using the camera both while driving and backing, the mounting angle usually needs to balance those two uses.
Flatbeds and Specialized Trailers
A flatbed may not have a permanent rear wall at the same height as a dry van.
Cargo height can also change from load to load.
Possible camera locations include:
- a protected trailer-rear bracket
- a high removable mount
- a camera attached to a suitable rear structure
The installation must account for cargo loading, securement equipment, forklift access, and anything that could strike or obscure the camera.
A lowboy, tanker, car hauler, dump trailer, or other specialized trailer should be evaluated around its actual moving parts and operating cycle.
Tractor Side Cameras
Side cameras are most useful when their image complements the mirror rather than simply reproducing it.
A passenger-side camera, for example, can be angled toward a selected area that is difficult to see from the cab during a right turn.
A driver-side camera can provide another perspective during lane positioning or close yard maneuvering.
Mounts must tolerate:
- highway vibration
- wind load
- rain and road spray
- truck washing
- door or hood movement where applicable
Tractor-to-Trailer Articulation Changes the Image
The tractor and trailer do not remain aligned during a turn.
As the articulation angle increases, a camera mounted on the tractor sees the trailer from a different perspective.
This matters when evaluating side views.
A side camera that looks perfect with the tractor and trailer straight may show much less useful information during a sharp yard turn.
Test camera placement through the normal range of low-speed articulation before making the installation permanent.
How to Build a Multi-Camera Semi-Truck System
A semi-truck system can grow from one camera to several channels very quickly.
The most useful approach is to add cameras only when each channel provides a distinct operational view.
Two-Camera Layout
A basic two-camera system might use:
- trailer rear
- right-side blind-zone view
This can suit a driver who already has strong mirror coverage and mainly wants help with backing plus one difficult side.
Three-Camera Layout
A common three-view architecture is:
- rear
- left side
- right side
This same rear-plus-two-sides arrangement appears in many large-vehicle camera systems because the three channels provide clearly different perspectives.
A three-camera monitor can display all feeds together in a yard or switch one channel to full screen when the driver needs more detail.

Four-Camera Layout
A fourth camera can be assigned to the operation that matters most.
Examples include:
- fifth-wheel / coupling area
- right-front curb-side area
- cargo or equipment view
- second trailer-side view
The right fourth camera depends on the trailer and route.
A regional dry-van fleet may value a curb-side camera. A flatbed operator may want a cargo-facing view. A yard tractor may prioritize the coupling area.
More Cameras Require Better Monitor Planning
Camera count and screen layout should be chosen together.
A 7-inch-class display can work well with two or three channels, especially when the driver can switch between split-screen and full-screen modes.
As channel count increases, each image becomes smaller in multi-view mode.
A practical interface may use:
- rear full screen during backing
- right-side full screen or triggered view during a right turn
- left-side view during selected lane maneuvers
- split screen in yards and loading areas
Automatic triggering can reduce the amount of manual screen switching, provided the system and installation support the intended trigger inputs.
Keep the monitor where the driver can glance at it without obstructing the windshield, mirrors, controls, or required safety equipment.
Cameras Supplement the Existing Mirror System
A camera system can expand visual context around the truck.
For ordinary aftermarket installations, keep the required mirrors and use the cameras as supplemental views unless the vehicle is equipped with an approved electronic mirror-replacement system that meets the applicable requirements.
Drivers should continue using normal mirror scans and direct observations even when several camera feeds are available.
Multi-camera rule: Add channels when they provide a new view. Three useful views are more valuable than five cameras aimed at overlapping areas.
Wired vs. Wireless Semi-Truck Cameras: Signal, Power, and Trailer Swaps
A Class 8 combination makes the wired-versus-wireless decision more complicated than it is on a pickup.
The rear of a long trailer can be a substantial distance from the monitor, and the signal path may pass through the trailer structure, cargo, sleeper cab, and other equipment.
Wired Systems
A commercial wired system can provide a predictable signal path when the installation is permanent.
It also requires more installation work.
The cable route may involve:
- the full trailer length
- protected exterior or underbody routing
- connectors between tractor and trailer
- flexible cabling around articulation
- service loops
- weather-resistant connections
For a tractor that stays paired with the same trailer, this can be a practical long-term solution.
For fleets that swap trailers frequently, connectors and installation standards become more important because the camera system has to work every time a different tractor and trailer are paired.
Wireless Systems
A wireless backup camera can reduce long signal-cable routing and make trailer installation easier.
The camera still needs power unless it uses its own rechargeable battery.
Wireless performance should be evaluated on the actual combination.
Factors include:
- tractor-to-camera distance
- trailer material
- cargo
- sleeper cab structure
- antenna position
- nearby RF interference
A 53-foot trailer and sleeper tractor create a very different radio path from a short work truck.
Published open-area ranges are useful specifications, though the real test is the complete truck and loaded trailer.

A Hybrid Layout Can Make Sense
Some operations may benefit from combining methods.
For example:
- wired side cameras permanently installed on the tractor
- a wireless rear camera installed on the trailer
This keeps the tractor-side channels consistent while reducing the amount of signal wiring that must cross between tractor and trailer.
For trailer-swapping fleets, a standardized wireless rear-camera position and power arrangement can also simplify deployment, provided pairing and compatibility are managed consistently.
Power Planning Is Separate From Video Transmission
“Wireless” describes the video connection.
A fixed trailer camera may use trailer electrical power. A rechargeable camera uses its own battery. Some specialized commercial installations may also include backup power for operation while the trailer is disconnected.
Before connecting an aftermarket camera, confirm:
- tractor voltage
- trailer voltage
- camera voltage range
- monitor power requirements
- the correct protected circuit
Class 8 vehicles and trailers should never be treated as automatically compatible with a 12V camera system.
Commercial installations should be planned around the electrical system actually present on the truck.
Wireless rule: Wireless removes the long video cable. Power, antenna position, trailer structure, distance, and trailer swapping still need their own installation plan.
Semi-Truck Camera Installation and System Selection Checklist
Before buying equipment, map the complete tractor-trailer combination.
| Check | What to Confirm |
|---|---|
| Operation | Long-haul, regional, yard, flatbed, reefer, tanker, specialized trailer, etc. |
| Trailer use | Dedicated trailer or frequent trailer swaps |
| Rear view | Exact area required behind the trailer |
| Side views | Left, right, curb-side, trailer-side, or rear-quarter areas |
| Additional view | Fifth wheel, cargo, front corner, or other operational need |
| Monitor | Number of channels and split-screen modes |
| Transmission | Wired, wireless, or hybrid architecture |
| Power | Actual tractor and trailer voltage and available circuits |
| Mounting | High-vibration, weather-resistant, unobstructed locations |
| Wireless testing | Complete tractor + trailer + normal load configuration |
| Articulation | Camera view checked with tractor and trailer at turning angles |
| Serviceability | Cameras, antennas, connectors, and wiring remain accessible |
Test the System Before Calling the Installation Finished
Check the truck in the conditions where the cameras will actually be used:
- tractor and trailer straight
- tractor and trailer articulated during a slow turn
- bright daylight
- night or low light
- all trailer doors closed
- normal cargo or operating configuration where practical
For wireless systems, test image stability at idle and while moving slowly in a controlled area.
For side cameras, verify that mirrors, fairings, trailer corners, and cargo do not block the intended field of view.
For rear cameras, confirm the image still gives useful close reference while showing enough of the roadway for the intended use.
Where AUTO-VOX Fits
AUTO-VOX offers several architectures that can help illustrate the differences between rear-only, dual-camera, and rear-plus-side systems.
For a backup camera for truck application, product selection should still be based on the exact truck length, power system, mounting location, and required signal range.
Class 8 installations deserve additional compatibility checks. Several AUTO-VOX multi-camera systems are designed around RV and trailer use and specify DC 12V operation, so they should only be considered where the actual commercial-vehicle electrical system and installation are confirmed compatible.
For fleet or continuous-duty applications, a purpose-built commercial camera system may be more appropriate.
| Product | Viewing Layout | How to Use It as a Reference |
|---|---|---|
| CampSync D1 | Dual-lens rear + left + right | Example of close/far rear perspectives plus both sides |
| WF4 | Rear + left + right | Example of a three-channel multi-view layout |
| Solar5B Dual-Camera Kit | Two movable cameras | Example of flexible supplemental rear / side views |
| Solar5C Dual | License-plate + magnetic camera | Example of two portable selected views with rechargeable cameras |
Class 8 compatibility: Verify vehicle voltage, monitor power, camera power, mounting surfaces, trailer length, wireless performance, operating duty cycle, and fleet requirements before adapting any RV- or light-truck-oriented camera system to a semi-truck.
Camera Layout Examples for Larger Vehicles


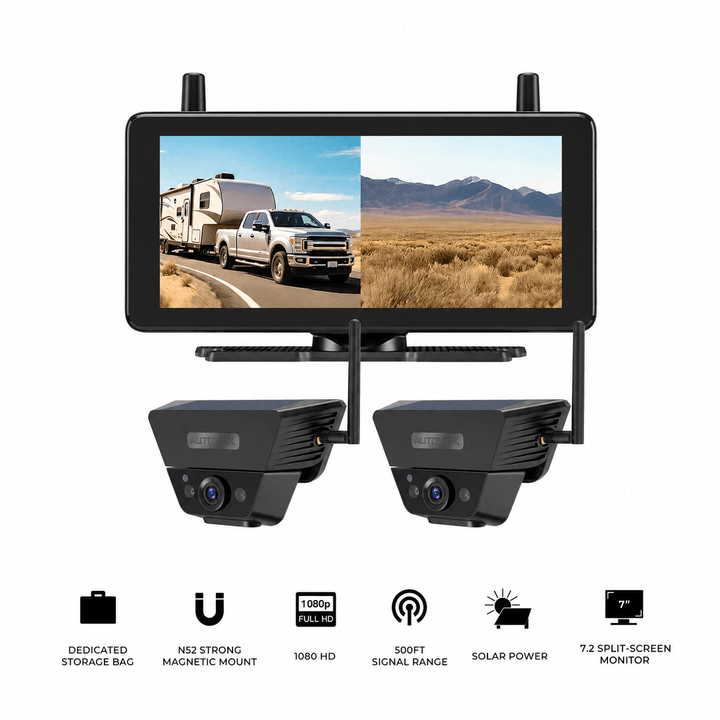

Prices and configurations may change. Confirm current specifications and compatibility before purchase. CampSync D1 and WF4 are DC 12V systems designed primarily for RV and trailer applications; commercial Class 8 use requires separate electrical, mounting, signal, and operational compatibility review.
Frequently Asked Questions
How many cameras does a semi-truck need?
There is no universal number. A basic setup may use one trailer-rear camera, while a more complete system can add left- and right-side cameras. A fourth channel can cover the fifth wheel, curb-side area, cargo, or another operational blind zone. Choose each camera around a specific missing view.
Where should a rear camera be mounted on a semi-trailer?
A high, near-center position on the trailer rear is a common starting point because it can provide a broad rear perspective with fewer immediate obstructions. The exact position must remain clear of doors, lights, liftgates, hardware, and other equipment, and the angle should match whether the main priority is backing, roadway context, or both.
Will a wireless backup camera work on a 53-foot semi-trailer?
Some long-range wireless systems may work across that distance, but trailer construction, cargo, sleeper-cab structure, antenna location, and RF interference can change real-world performance. Test the camera on the complete tractor-trailer combination rather than relying only on an advertised open-area range.
Can side cameras replace semi-truck mirrors?
Ordinary aftermarket side cameras should be used as supplemental views alongside the required mirrors. A camera can add selected side or blind-zone context, while mirror replacement requires equipment and installation that meet the applicable regulatory requirements.
What is the difference between a side camera and a blind-spot camera?
The terms can overlap. A side camera usually looks along the side of the tractor or trailer, while a blind-spot camera is aimed specifically at a difficult area such as the passenger-side curb zone, rear quarter, or another selected no-zone. Placement matters more than the label.
Is wired or wireless better for a semi-truck camera system?
Wired systems provide a dedicated signal path and work well for permanent installations. Wireless systems can reduce long cable runs and simplify trailer installation or swapping. Power requirements remain separate, and wireless performance must be validated on the actual tractor, trailer, and load configuration.
Final Thoughts: Build the Camera System Around the Whole Tractor-Trailer
A semi-truck camera system works best when it is designed around the complete combination rather than the tractor alone.
The trailer rear determines the true rear view. Tractor-side cameras can add selected left- and right-side context. Trailer-side or curb-side cameras can focus on areas that remain difficult to judge during turns, docking, or yard maneuvering.
From there, decide how many channels are actually useful.
A two-camera setup may be enough for rear plus one difficult side. Three cameras can provide rear, left, and right views. A fourth channel can be assigned to the fifth wheel, curb-side area, cargo, or another job-specific zone.
Then plan the signal and power architecture around the way the fleet operates.
A tractor that stays with one trailer can support a different installation strategy from a fleet that swaps trailers daily. Wired, wireless, and hybrid configurations each have practical uses.
Before installation, confirm:
- which areas are still difficult to see with the existing mirrors
- where each camera will provide a distinct useful view
- whether the tractor and trailer electrical systems match the equipment
- whether the wireless or wired connection works across the complete combination
- how the monitor will display and switch between the selected views
Finally, test the cameras with the tractor and trailer straight, articulated, loaded where practical, and operating in the lighting conditions the driver actually encounters.
For a Class 8 truck, the useful system is not the one with the most cameras. It is the one that adds the right rear, side, and blind-zone views without complicating the driver's normal mirror scan and operating routine.


