


Is installation of AUTO-VOX backup cameras complicated?

Drive Smarter Every Day — Safer Parking, Clearer Vision.
Drive Smarter Every Day — Safer Parking, Clearer Vision.
Perfect for city driving, trailers, and family vehicles.

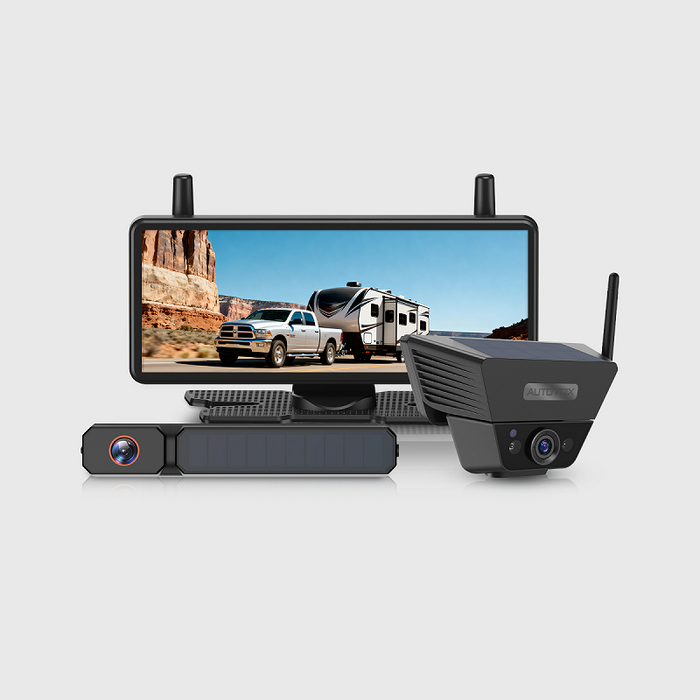
AUTO-VOX Solar5 Series
One Fixed, One Flexible
From Daily Commute to Weekend Haul—Snap, Sync, and Go on Any Vehicle.

New AUTO-VOX WF Series
Three Cameras.
One Safer RV Journey.
Modular, Expandable, Made for RVs.

ABOUT
AUTO-VOX
Trusted by 500,000+ Drivers Worldwide.
The smarter way to see what’s behind.

Worldwide Shipping
Available in more than 20 countries.
SUPPORT 24/7
24/7 Support, anytime you need it.
100% PAYMENT SECURE
Shopify official payment, 100% secure payment guaranteed.
30-Day Return Policy
Support 30-day no-reason return and exchange.
Quick Finder

With DVR
For Cars & SUVs
For RV
For Trailers
Multi-camera
Rearview Mirror
Top Picks for Every Driver
Shop by Category
Camping & RVing
Explore freely. Park anywhere.

Towing & Trailers
Hook up. Back up right.

Daily Commute
Park easy. Stay safe.

Power & Connection
Solar Series
Dual power supply — solar + USB, no wiring needed. Install in 1 minute, enjoy stable 500+ ft signal across all vehicle types. Smart, effortless, and eco-friendly.


Wireless Series
Strong signal, zero hassle. Powered by AutoLink™ 2.4GHz transmission for stable, long-distance performance. Just connect the camera to the reversing light, plug in the monitor — and drive with confidence.

Wired Series
Classic connection, ultimate reliability. Hardwired setup ensures real-time, interference-free video at all times. Built for family vehicles that value consistency and durability.

Drive with Confidence & Ease
Founded in 2007, AUTO-VOX specializes in auto safety electronics.
We offer a complete range of products —wired, wireless, and solar-powered-focused on making driving safer and easier.
What Our Customer Say
Steven Tucker
⭐️⭐️⭐️⭐️⭐️

“We got few wireless back up camaras from Auto-Vox. It's easy to install and have good signal. I've used it for travel trailer so it's about 30' from the camara to monitor and still works really good. Very happy with the products. Reliable company.”
Solar4 A 1080P Wireless Backup Camera
Jerry
⭐️⭐️⭐️⭐️⭐️

I don't usually write reviews, but I must in this case! ! had some trouble at first. These folks walked me through and even sent replacement equipment. Awesome!! Very good quality...clear, easy to instaall..
Solar3A Plus 1080P Wireless Backup Camera
Adan
⭐️⭐️⭐️⭐️⭐️

Unfortunately we had some trouble with our reversing camera. We contacted Auto-Vox and corresponded with Kaya. Excellent customer service which is seldom nowadays. Always quick to respond and very professional.
Solar3A Plus 1080P Wireless Backup Camera
sgallery
⭐️⭐️⭐️⭐️⭐️

I purchased a back up camera from my Rv last year September 2023 and was so impressed I opted to purchase another one to use as a trail camera on the front of my jeep while offroading for this year while we are in Arizona, important to see what you are about to go over before you actually climb onto it.
V5 Pro 1080P Rear View Mirror Dash Cam
John
⭐️⭐️⭐️⭐️⭐️

Mounted to the bottom of the license plate. Trunk handle is on top. Very clear image and strong connection. Installation instruction were clear and concise. I would recommend.
Solar4 A 1080P Wireless Backup Camera
Sandra
⭐️⭐️⭐️⭐️⭐️

I ordered a solar 1 back up camera very easy to fit and use hardest thing was to get the number plate off the car very good product at a good price delivery was 4
day
V5 Pro 1080P Rear View Mirror Dash Cam
BlogS

By AaliyahGloria
Guides
Apr 03, 2026
There is no crucible quite like a crowded boat ramp on a busy Saturday morning. You have a line of impatient trucks waiting behind you, a group of seasoned boaters watching your every move from the dock, and a narrow slab of slippery concrete leading into the water.
If you make a mistake, you risk jackknifing your trailer, dropping your truck's rear axle off the end of the ramp, or becoming the next viral star on a "Boat Ramp Fails" YouTube compilation.
The biggest challenge of launching a boat isn't the steering; it is the blind spots. When an empty boat trailer is hitched to your truck, it often disappears entirely behind your tailgate. Even with the boat loaded, the hull blocks your center rearview mirror, leaving you to guess your trajectory using only your side mirrors.
Historically, launching a boat meant relying on a screaming spotter or frustrating trial and error. Today, modern technology has provided the ultimate cheat code: the trailer backup camera.
In this comprehensive guide, we will break down the physics of backing down a ramp, share the proven 5-step method for reversing a trailer, and explain why outfitting your rig with a dedicated marine-grade camera is the smartest investment you can make for your boating season.
Part 1: Why the Boat Ramp Defeats Standard Mirrors
Backing up a standard utility trailer is one thing, but a boat trailer introduces unique geometrical challenges that render factory truck cameras and mirrors almost useless.
1. The "Disappearing" Empty Trailer
When you retrieve your boat at the end of the day, you have to back an empty trailer down the ramp. Because boat trailers have a low profile and a long tongue, they completely vanish below the tailgate line of most modern pickup trucks and SUVs. You cannot see the trailer until it has already started to jackknife.
2. The Ramp Incline Angle
Boat ramps are steep. When your truck's rear tires hit the incline, the angle of your vehicle changes dramatically relative to the trailer. If you are relying on a standard factory backup camera for truck models, you will suddenly find yourself staring straight up at the sky or the bow of your boat, rather than the path to the water.
3. The V-Hull Blind Spot
When the boat is on the trailer, the flared shape of a V-hull or pontoon completely obliterates your central vision. You cannot see if there is a submerged log, a steep drop-off, or a dock pylon directly behind your outboard motor.

Part 2: 5 Proven Steps to Back Up a Trailer Like a Pro
Even with the best technology, you still need to know how to steer. Before looking at camera upgrades, master these fundamental reversing rules:
-
Step 1: The "Hand on the Bottom" Trick. This is the golden rule of trailering. Place one hand at the 6 o'clock position (the very bottom) of your steering wheel. Now, whichever way you move your hand is the direction the rear of the trailer will go. Move your hand left, the trailer goes left.
-
Step 2: Start Straight. Never start backing down the ramp at an angle. Pull forward as far as you can to get the truck and trailer perfectly aligned in a straight line before shifting into reverse.
-
Step 3: Make Micro-Adjustments. Do not oversteer. A one-inch turn of the steering wheel multiplies into a massive swing at the back of a 20-foot boat trailer. Make tiny corrections and wait for the trailer to react.
-
Step 4: Roll Your Windows Down. Turn off the radio. You need to hear what is happening outside. You might hear the trailer tires scrubbing, water splashing, or someone yelling to stop.
-
Step 5: Trust Your Camera (But Verify). Use your camera for center alignment and depth perception, but always sweep your side mirrors every few seconds to ensure your truck isn't veering out of its lane.
Part 3: Where to Mount a Camera on a Boat Trailer
If you want to add a camera to your towing setup, you have a few options, but you must factor in the "dunk zone."
The License Plate/Bumper Mount (The Safe Bet)
Mounting an aftermarket wireless backup camera to the bumper or license plate of your tow vehicle is excellent for the actual hitching process. However, once hitched, it just stares at the bow of your boat. It won't help you navigate the ramp.
The Rear Trailer Crossmember (The Ultimate View)
For absolute precision at the ramp, mount a camera to the rear crossmember of the boat trailer itself. This gives you a clear view of the water, the dock, and exactly when your trailer bunks are deep enough to float the boat.
The Challenge: This area of the trailer is completely submerged during every launch. If you launch in saltwater, the corrosion risk is immense. Any camera mounted here must be industrial-grade waterproof.
The High-Mount Boat Solution
For larger vessels, some owners mount a temporary, battery-powered camera to the rear of the boat itself (often on a wake tower or railing) facing backward, removing it once the boat is in the water.
Part 4: Why AUTO-VOX is the Ultimate Marine Upgrade
If you are tired of the boat ramp anxiety, stringing 40 feet of video cable from your dashboard, through your truck, and down a wet boat trailer is a recipe for electrical disaster. You need a solution that is wireless, incredibly durable, and easy to install.
This is exactly why the boating community relies on AUTO-VOX aftermarket camera systems. Here is how AUTO-VOX solves the boat ramp dilemma:
1. True IP69K Waterproofing (Survives the Dunk)
A standard IP67 "weatherproof" camera will die instantly when submerged in a murky lake or a saltwater bay. AUTO-VOX rear cameras are engineered with a strict IP69K waterproof rating. They are injected with heavy-duty industrial resins, ensuring they can be fully submerged at the boat ramp without ever shorting out or fogging up the lens.

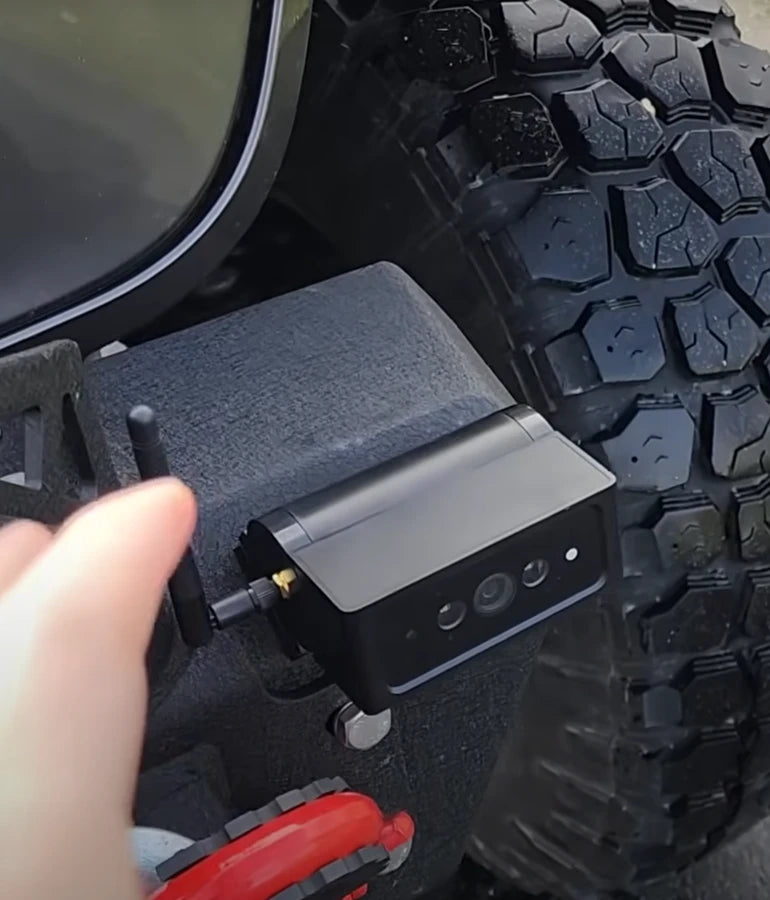
2. The Solar Wireless Miracle
Drilling holes into a galvanized or aluminum boat trailer invites rust. The AUTO-VOX Solar Wireless systems completely eliminate the need for wiring. You mount the camera bracket to the back of your trailer, and the integrated solar panel keeps the internal battery charged. It transmits a flawless, lag-free digital HD signal to the monitor in your truck cab. Zero wire splicing, zero corrosion points.
3. HD Night Vision for Early Launches
The best fishing happens at dawn. Backing down an unlit, slick boat ramp at 4:30 AM is incredibly dangerous. AUTO-VOX cameras utilize advanced Super Night Vision and WDR (Wide Dynamic Range) sensors. They pull in ambient moonlight and enhance your reverse lights, turning a pitch-black boat ramp into a bright, daylight-quality image on your dashboard monitor.
4. Large, Dedicated Monitors
Don't squint at your tiny smartphone or a 4-inch factory radio screen while trying to back up a 6,000-pound boat. AUTO-VOX provides massive 5-inch and 7-inch HD dashboard monitors or full rearview mirror camera systems, giving you a crystal-clear, panoramic view of the hazard zone behind your prop.
Conclusion
The boat ramp does not have to be a source of weekend anxiety. By understanding how your trailer moves, mastering the steering wheel fundamentals, and relying on modern technology, you can launch and retrieve your vessel with the efficiency of a seasoned charter captain.
Stop relying on blind luck and stressed-out spotters. By outfitting your tow rig or trailer with an AUTO-VOX wireless backup camera, you gain the extreme waterproofing, HD night vision, and flawless wireless transmission required for marine environments. Upgrade your visibility, back down the ramp with total confidence, and get on the water faster.
Frequently Asked Questions (FAQs)
Can you submerge a backup camera in water?
It depends entirely on the camera's IP (Ingress Protection) rating. A standard IP67 camera can withstand rain but will likely fail if submerged on a boat trailer. You must use a camera with an IP68 or IP69K rating (like those from AUTO-VOX), which are specifically designed to withstand prolonged immersion and high-pressure water jets.
Will a wireless backup camera reach from my truck to the back of my boat trailer?
Yes. High-quality digital wireless systems use an encrypted 2.4Ghz signal that can easily transmit a stable video feed 30 to 50 feet without static or interference. They are perfectly capable of transmitting from the rear of a long boat trailer to the dashboard monitor in your cab.
How do I clean saltwater off my trailer backup camera?
Saltwater is highly corrosive to electronics and metal brackets. After every saltwater launch and retrieval, you must thoroughly rinse the camera housing and mounting bracket with fresh water. Use a soft microfiber cloth to wipe the lens dry to prevent hard water spots from blurring your video feed.
Do I need a camera if I have a spotter?
While a good spotter is invaluable, a camera provides a literal second set of eyes. A camera eliminates the communication lag between you and the spotter, allowing you to see exactly when the trailer bunks hit the water line and ensuring the path directly behind your outboard motor is completely clear of submerged obstacles.

By AaliyahGloria
Guides
Apr 03, 2026
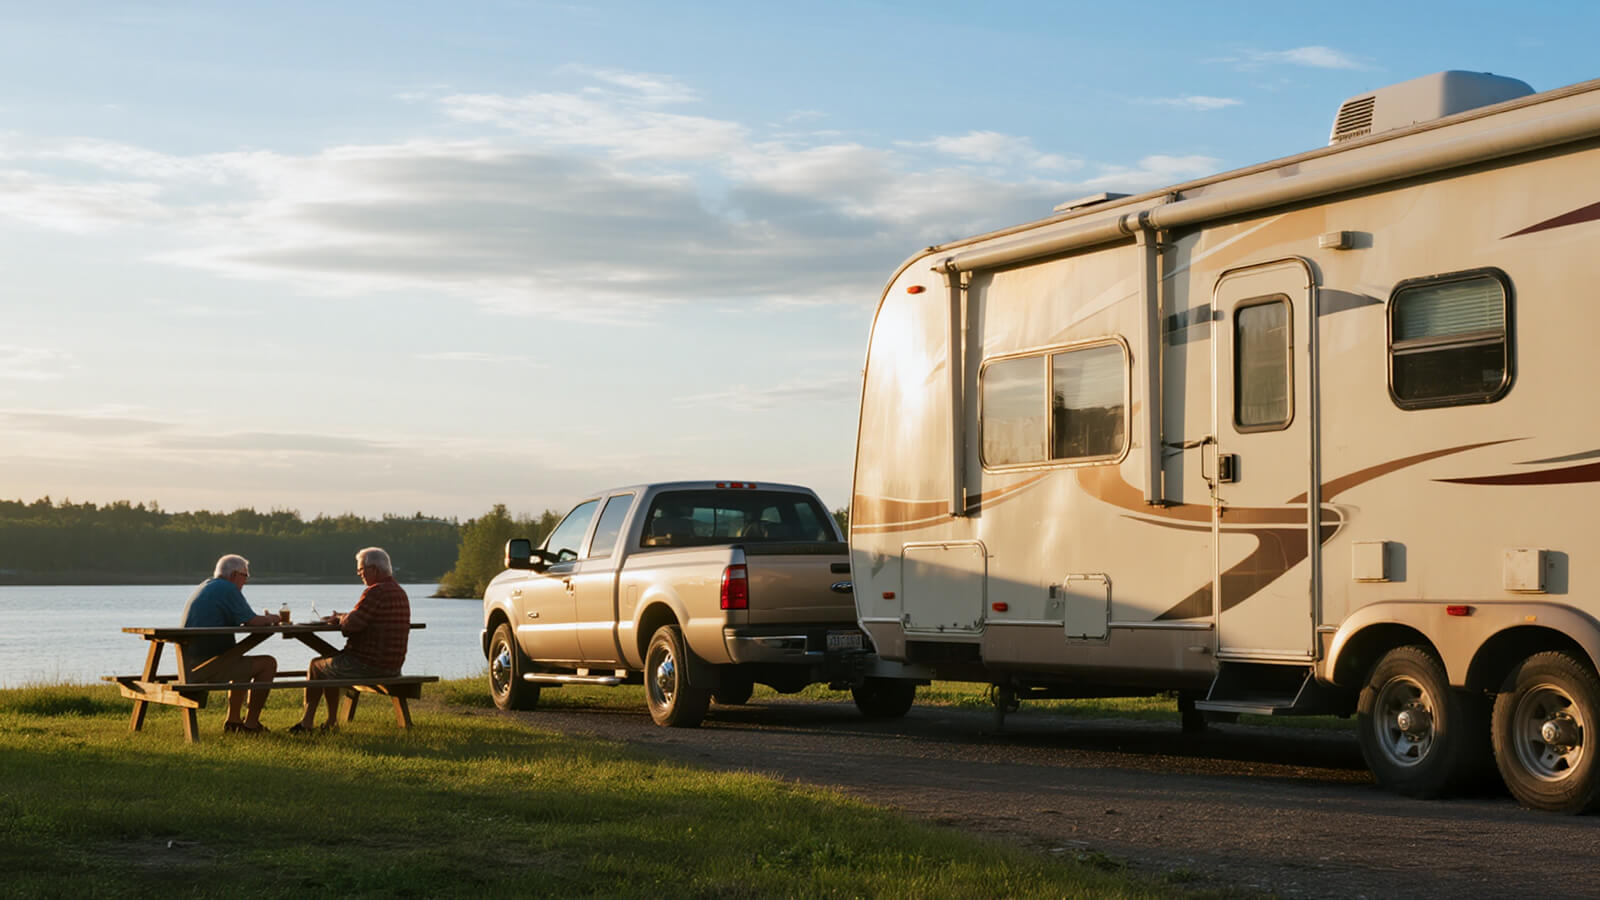
We have all been there. It is 6:00 AM at the campground, or you are trying to hook up your boat trailer after a long day on the water. You are alone. You back up your truck, put it in park, get out, and realize you are still three feet away. You get back in, reverse a little more, get out again, and realize you are now two inches off to the left.
After ten minutes of climbing in and out of the cab—and dangerously close calls with your truck’s rear bumper—you finally get the hitch ball under the trailer coupler.
Historically, solo hitching required frustrating trial and error, relying on a spotter, or using gimmicks like the "tennis ball on a stick" method. Today, trying to hitch a 7,000-pound travel trailer or a heavy equipment hauler without visual assistance is a massive waste of time and a fast track to a dented tailgate.
The ultimate solution? A dedicated trailer backup camera. In this comprehensive guide, we will break down the mechanics of reversing a trailer, how to choose the perfect camera angle, and give you a step-by-step masterclass on hitching up solo on the very first try.
Quick Summary: The Secret to Solo Hitching
-
The Problem: Tailgates block your line of sight, making depth perception impossible when reversing toward a trailer.
-
The Best Angle: A license plate camera is ideal for standard ball hitches, while a high-mount camera is best for fifth wheels.
-
The Fix: Use side mirrors for gross alignment (getting within 3 feet), then switch exclusively to your backup camera monitor for the final micro-alignment.
Part 1: Why Solo Hitching is a Geometrical Nightmare
Hitching a trailer is fundamentally an exercise in depth perception. When you look through your rearview mirror or over your shoulder, the tailgate completely blocks your view of the hitch ball and the trailer coupler.
Without a camera, you are forced to use physical landmarks (like the edge of your truck bed relative to the trailer jack) to guess your trajectory. Furthermore, standard factory backup camera for truck models are often mounted at strange angles or feature fish-eye lenses that distort distance, making the final two inches of alignment incredibly deceptive.

Part 2: Choosing the Right Camera Angle for Towing
If you want to nail the hookup on the first try, the location of your backup camera is critical. Not all mounting positions are created equal when it comes to towing.
1. The License Plate Mount (The Standard)
A camera mounted to your license plate frame gives a great low-angle view. Because the camera sits only a few inches above the hitch receiver, you get a straight-on look at the hitch ball approaching the trailer coupler.
-
Best for: Standard ball hitches and weight-distribution hitches.
-
The Drawback: It can be harder to judge side-to-side alignment from a perfectly horizontal angle.
2. The Third Brake Light Mount (The Bird’s-Eye View)
If you drive a heavy-duty truck or a cargo van, mounting the camera high up on the third brake light housing is the holy grail for towing. This top-down, "bird's-eye" perspective allows you to look directly down at your rear bumper.
-
Best for: Fifth-wheel hitches, goosenecks, and absolute precision on standard ball hitches.
-
The Advantage: You can see the exact millimeter the coupler crosses over the hitch ball, entirely eliminating depth perception errors.
Part 3: Step-by-Step Guide: Hitching Solo with a Camera
Throw away the tennis balls and magnetic alignment rods. Here is how to use your camera to execute a flawless, one-person hookup.
-
Step 1: Prep the Trailer Before you even put the truck in reverse, ensure the trailer wheels are securely chocked. Use your trailer tongue jack to raise the coupler slightly higher than your truck’s hitch ball. (Note: If the coupler is too low, you will ram your hitch directly into it, causing severe damage).
-
Step 2: The Gross Alignment (Use Your Mirrors) Do not stare at your camera screen immediately. Use your side mirrors to back the truck up until you are roughly centered with the front of the trailer and about 3 to 4 feet away. Your side mirrors are still your best tool for keeping the truck’s body straight.
-
Step 3: The Micro-Alignment (Use the Camera) Once you are within 3 feet, shift your focus entirely to your backup camera monitor.
-
Use the Gridlines: Most aftermarket cameras feature parking gridlines. Align the center line (usually red or yellow) directly with the vertical post of your trailer jack.
-
Creep Slowly: Take your foot off the gas and let the truck idle backward. Make micro-adjustments to the steering wheel. Remember, a one-inch movement of the steering wheel translates to a massive swing at the rear bumper.
-
-
Step 4: The Stop and Drop Watch the camera monitor as the hitch ball slides directly underneath the trailer coupler. Stop the truck, apply the parking brake, and put it in Park. Get out, lower the trailer jack, lock the coupler over the ball, cross your safety chains, plug in your 7-way wiring harness, and you are ready to tow.
Part 4: Specialized Hitches Demand Better Cameras
If you tow a massive travel trailer, you might use a premium sway-elimination system like a ProPride 3P or a Hensley Arrow.
Unlike a standard ball hitch, these systems use a heavy steel "stinger" (draw bar) that must be backed perfectly into a narrow receiver box attached to the trailer. You cannot simply get "close enough" and drop the trailer onto the ball; the alignment must be mathematically perfect in height, angle, and depth.
Attempting to connect a ProPride hitch solo without a high-definition backup camera is incredibly difficult. A dedicated camera allows you to see the exact entry angle of the stinger, saving you from severely jarring your truck transmission by ramming the hitch box off-center.
Part 5: Why AUTO-VOX is the Ultimate Towing Companion
If your truck lacks a factory camera, or if your factory 4-inch screen is too small to see the hitch ball clearly, stepping into the aftermarket is a game-changer.
For towing enthusiasts, AUTO-VOX offers the most robust, easy-to-install solutions on the market. Here is why an AUTO-VOX system is the ultimate solo hitching tool:

1. Unbreakable Wireless Technology
Running a video cable the entire length of a crew-cab pickup truck is a massive hassle. AUTO-VOX specializes in digitally encrypted wireless backup camera systems (like the Solar 4). You mount the camera to your license plate, plug the massive 5-inch or 7-inch monitor into your dashboard's 12V outlet, and it pairs instantly. No drilling, no wire splicing.
2. Massive HD Monitors
Trying to align a hitch using a tiny screen embedded in a rearview mirror causes eye strain. AUTO-VOX provides large, dedicated dashboard monitors with true 1080p high-definition resolution. You can see the exact texture of your hitch ball and every detail of the trailer coupler.
3. Superior Low-Light Performance
Fishermen and hunters know that the best times to hitch up are often well before dawn or after dusk. Standard cameras get incredibly grainy in the dark. AUTO-VOX cameras utilize advanced Wide Dynamic Range (WDR) and Super Night Vision sensors. They capture ambient moonlight and the glow of your reverse lights, delivering a bright, clear image of your hitch even in pitch blackness.
4. Multi-Camera Capabilities
The best towing setups don't stop at the tailgate. Many AUTO-VOX monitors support dual-channel inputs. You can mount one camera on your truck's license plate for hitching, and easily mount a second wireless AUTO-VOX camera to the back of your 30-foot travel trailer. This allows you to monitor highway traffic behind your rig and safely back your camper into tight spots at the RV park—all from the same screen.
Conclusion
Hitching a trailer solo shouldn't be a test of your patience or a threat to your vehicle's paint job. By understanding the geometry of your setup, choosing the correct camera angle, and following a strict step-by-step approach, you can eliminate the frustrating cycle of getting in and out of your cab.
Equipping your truck with a dedicated AUTO-VOX wireless system or a high-definition rearview mirror camera is the smartest investment a solo tower can make. Stop guessing your distances, save your bumper, and get on the road faster with flawless, first-try hookups every single time.
Frequently Asked Questions (FAQs)
Can I leave my wireless backup camera on while driving with a trailer? Yes, if it is wired to a continuous power source. If you tap the camera into your truck's running lights instead of the reverse lights (or use a solar/battery-powered AUTO-VOX model), you can activate the monitor at any time. This is excellent for keeping an eye on your hitch connection or cargo while driving down the highway.
How do I clean my backup camera lens for a clear view of the hitch? Exhaust soot and road grime quickly blur camera lenses. Keep a small microfiber cloth and a bottle of mild glass cleaner in your truck's door pocket. Give the lens a quick, gentle wipe before you begin the hitching process. Avoid using your thumb to wipe dry dirt, as this can cause micro-scratches on the plastic lens cover.
Is a license plate camera or a tailgate handle camera better for hitching? Both work well, but they offer different perspectives. A tailgate handle camera looks slightly downward, giving you a better view of the distance between the bumper and the trailer tongue. A license plate camera gives a straight-on, low-angle view that makes side-to-side alignment of the hitch ball very easy to judge.
Will a wireless backup camera signal reach the back of a 30-foot travel trailer? Yes. High-quality digital wireless systems, such as those from AUTO-VOX, are designed to transmit flawlessly up to 33 feet (and often much further in open air) without static or interference, making them perfect for mounting on the rear of long travel trailers or fifth wheels.

By AaliyahGloria
Guides
Apr 03, 2026
Modern SUVs are the ultimate utility vehicles. From compact crossovers like the Honda CR-V to massive family haulers like the Chevy Tahoe, they offer incredible cargo space, high seating positions, and all-weather capability. However, that massive enclosed cargo area comes with a significant safety trade-off: massive rear blind spots.
While backup cameras have been mandatory on all new vehicles in the US since May 2018, millions of older SUVs on the road still lack this critical safety feature. Even if your SUV has a factory camera, it is likely mounted on the exterior liftgate, where it is constantly bombarded by rain, mud, road salt, and snow, rendering it useless right when you need it most.
If you want to upgrade your visibility, the thought of taking a power drill to your expensive SUV's liftgate is terrifying. Drilling holes invites rust, voids paint warranties, and requires snaking wires through complicated weather stripping.
Fortunately, there is a vastly superior, stress-free alternative: The Interior Window Mount Backup Camera.
In this comprehensive guide, we will explore why traditional exterior camera installations are a nightmare for SUV owners, break down the brilliant advantages of interior window mounting, and reveal why upgrading to an aftermarket AUTO-VOX system is the smartest, fastest DIY project you can tackle.
Quick Summary: The Interior Mount Advantage
-
Zero Drilling: Protects your SUV’s paint and resale value by using strong interior adhesive.
-
Self-Cleaning: Uses your SUV’s factory rear wiper to keep the camera’s view clear of rain and snow.
-
Theft-Proof: Locks the camera safely inside the cabin, immune to vandalism and the elements.
Part 1: Why Traditional SUV Camera Installs Are a Headache
If you read standard installation guides, adding a backup camera sounds like an advanced engineering project. Here is what a traditional exterior install on an SUV liftgate entails:
1. The Dreaded Drill Hole
To mount a camera above your license plate, you usually have to drill a half-inch hole straight through your metal or fiberglass liftgate to pass the video cable through. If you don't seal this hole perfectly with rubber grommets and silicone, water will leak into your hatch, causing severe rust and electrical shorts.
2. The Weather Boot Nightmare
SUVs have a flexible rubber accordion boot at the top of the liftgate hinge that houses the factory wiring. Fishing a new aftermarket video cable through this tightly packed boot is notoriously difficult and often results in pinched or broken wires.
3. The Elements (The "Dirty Lens" Problem)
Exterior cameras live a hard life. Because SUVs have a flat, aerodynamic rear profile, they create a vacuum that sucks exhaust soot, road grime, and snow directly onto the tailgate. An exterior camera requires constant manual cleaning; otherwise, your screen will just show a blurry, muddy mess.

Part 2: The Genius of the SUV Window Mount
What if you could bypass the drilling, the rust, and the dirt entirely? By mounting the backup camera inside the cabin, directly against the rear windshield, you solve almost every installation pain point instantly.
Here are the unique advantages of an interior window mount:
1. Zero Exterior Modifications
Window mounts use heavy-duty 3M VHB (Very High Bond) adhesive or industrial suction cups to attach the camera bracket directly to the inside of your rear glass. There are no holes to drill in your bumper or liftgate, maintaining your SUV's resale value and factory weather seals.
2. The "Rear Wiper Advantage"
This is the ultimate secret of the interior mount. Because the camera looks out through your rear windshield, your SUV's factory rear wiper blade cleans the camera's field of view for you! If it is snowing or raining, you simply turn on your rear wiper, and your backup camera instantly has a crystal-clear, unobstructed view of the road.
3. Theft and Damage Prevention
Exterior license plate cameras are easily stolen, vandalized, or smashed by shopping carts and minor fender-benders. An interior-mounted camera is safely locked inside your vehicle, protected from both thieves and careless drivers.
Part 3: Overcoming Window Mount Challenges (Tint & Glare)
While interior mounting is brilliant, many SUV owners have two immediate concerns: window tint and glass glare.
-
Does Window Tint Ruin the Image? Most SUVs come from the factory with "privacy glass" (usually around 20% tint) on the rear windows. A cheap, low-quality aftermarket camera will struggle to see through this dark tint, especially at night. However, premium cameras equipped with Wide Dynamic Range (WDR) sensors and superior low-light chips can easily pull ambient light through heavy factory tint, delivering a bright, clear image regardless of the glass.
-
What About Defroster Lines? When mounting the camera, simply look closely at the glass and position the camera lens exactly between two of the horizontal orange defroster grid lines. The camera lens is small enough that it will look right past them without any interference.
Part 4: Why AUTO-VOX is the Ultimate No-Drill Upgrade
If you want to capitalize on the benefits of an interior window mount, you need a system designed with premium optics to punch through tinted SUV glass. This is where AUTO-VOX completely outshines standard aftermarket kits.
Whether you drive a Toyota RAV4, a Ford Explorer, or a Jeep Grand Cherokee, outfitting your SUV with an AUTO-VOX system is the ultimate visibility hack.
1. Bypassing the Dashboard Entirely
Running a video cable all the way to a new stereo head unit is exhausting. An AUTO-VOX rearview mirror camera completely replaces your standard factory rearview mirror. It features a stunning, full-bleed HD touchscreen. You simply route the wire from the rear window along the ceiling headliner directly to the mirror. It is the cleanest possible DIY install.
2. WDR Technology for Tinted Glass
AUTO-VOX cameras are engineered with state-of-the-art WDR technology and Super Night Vision. They are specifically designed to balance exposure and enhance low-light environments. Even if your SUV has heavy 20% rear tint, the AUTO-VOX sensor adjusts automatically, turning a pitch-black driveway into a bright, daylight-quality image on your mirror.
3. Continuous HD Vision
A traditional backup camera only helps you when reversing. An AUTO-VOX digital mirror provides a continuous live video feed while you are driving forward. If your SUV's cargo area is packed to the roof with luggage, sports equipment, or large dogs, your physical mirror is useless. The interior-mounted AUTO-VOX camera sees right out the back window, completely eliminating your blind spots on the highway.
4. Simple, Reversible Installation
Because there is no drilling, an AUTO-VOX interior setup is entirely reversible. If you lease your SUV, you can easily install the system, enjoy premium mirror dash cam functionality for security, and cleanly remove the adhesive camera bracket before turning the vehicle back in without penalty.
Part 5: The 15-Minute DIY Install Guide
Ready to upgrade? Here is how simple an interior window mount installation really is:
-
Clean the Glass: Use glass cleaner and isopropyl alcohol to thoroughly clean the top-center of your interior rear windshield. It must be completely free of dust and grease.
-
Position the Camera: Peel the backing off the 3M adhesive mount. Position the lens so it is pointing slightly down (to see your bumper) and ensure the lens is sitting neatly between two defroster lines. Press firmly.
-
Tuck the Wire: Route the thin video cable straight up from the camera and tuck it beneath the edge of the plastic headliner. Run it along the roofline, above the doors, all the way to the front windshield.
-
Power Up: Plug the system into your AUTO-VOX digital mirror, connect the power adapter to your 12V cigarette lighter (or hardwire it to the fuse box), and you are done.

Conclusion
Adding a backup camera to your SUV shouldn't require voiding your paint warranty, fighting with rubber weather boots, or drilling holes into sheet metal.
By utilizing an interior window mount, you protect your camera from the elements, let your rear wiper do the cleaning, and drastically reduce your installation time. When paired with the advanced HD optics and WDR technology of an AUTO-VOX digital rearview mirror, you completely eliminate your SUV's massive blind spots. Skip the drill, upgrade your tech, and drive your family with total confidence.
Frequently Asked Questions (FAQs)
Can an interior backup camera see at night through tinted windows? Yes, provided you purchase a high-quality camera. Cheap cameras will struggle, but systems like AUTO-VOX feature advanced WDR (Wide Dynamic Range) and Super Night Vision sensors that digitally enhance the available light, providing a clear image even through standard 20% factory SUV privacy glass.
Will the rear window defroster melt the camera mount? No. Automotive rear defroster lines generally reach temperatures around 85°F to 90°F (30°C to 32°C). High-quality 3M VHB adhesive mounts used by reputable camera brands are designed to withstand interior cabin temperatures exceeding 180°F, so the defroster will not affect the bond or the camera housing.
Do I need a wireless or wired camera for an SUV? A wired system is generally better for a continuous-view digital rearview mirror, as it guarantees a flawless, lag-free 1080p stream. Because you are mounting it inside, tucking a wire along the interior roof headliner is incredibly fast and easy, negating the primary benefit of a wireless backup camera (which is avoiding the need to drill through the firewall).
Is an interior-mounted camera legal for a driving test? Yes. While you are still required to physically turn your head and use your side mirrors during a driving test, having an aftermarket backup camera (whether mounted inside or outside) is perfectly legal and heavily encouraged for overall vehicle safety.
FAQ
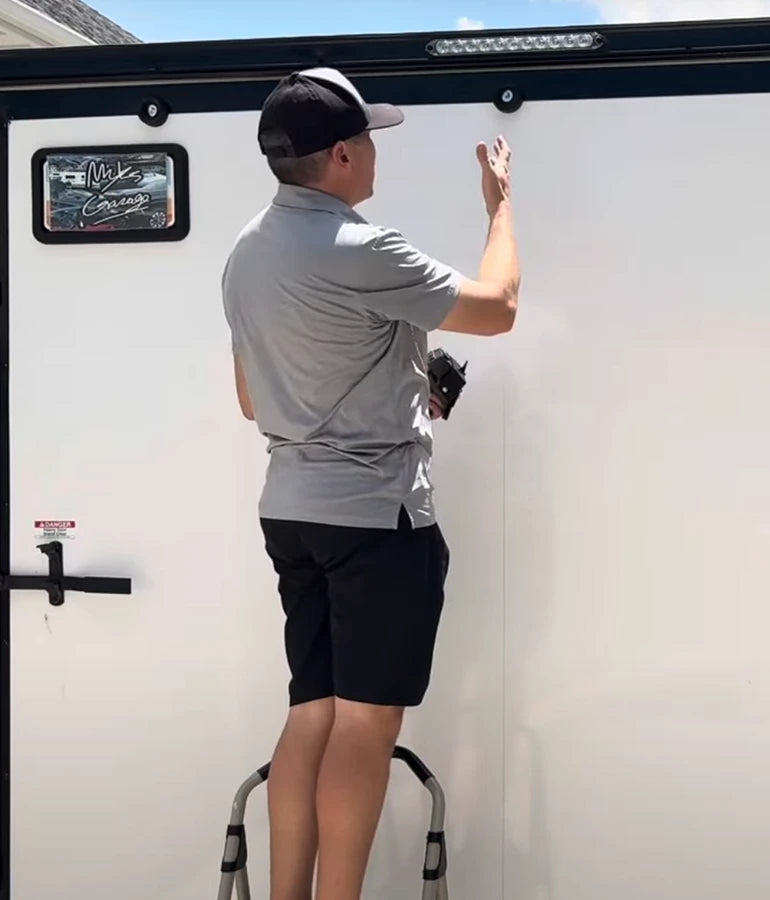
Not at all! Our products, including the Solar5, Solar4B, Solar3A Plus feature hassle-free designs like magnetic installation and wireless setups. These make it easy to install on RVs, trailers, and other large vehicles without professional assistance.
Are AUTO-VOX backup cameras compatible with all vehicle types?
Yes, Auto-Vox offers a wide range of products tailored to different vehicle types, including cars, trucks, RVs, trailers, and vans. For example, the Solar3C is specifically designed for large vehicles, while other models cater to standard cars and smaller vehicles.
How does AUTO-VOX ensure the product's durability in extreme weather?
AUTO-VOX products are built with high-quality, weather-resistant materials. They are designed to withstand extreme heat, cold, rain, and snow, ensuring reliable performance in all conditions.
What are the benefits of shopping with AUTO-VOX?
We offer free shipping across the US, 24/7 customer support, 100% secure payment, and a 30-day return policy to ensure a risk-free shopping experience.
How does AUTO-VOX support sustainable driving?
AUTO-VOX integrates sustainability into its product design. For example, the Solar3A Plus features advanced solar-assisted charging and power-saving technology, reducing battery consumption by 50% while maintaining excellent performance and reliability.
Why are EU/UK prices different from US prices?
EU and UK prices reflect local taxes, import duties, and shipping costs, which may cause differences from US pricing.
More questions? See our full FAQ